Repairing damaged plastic pegs
Friday, 4th October 2019
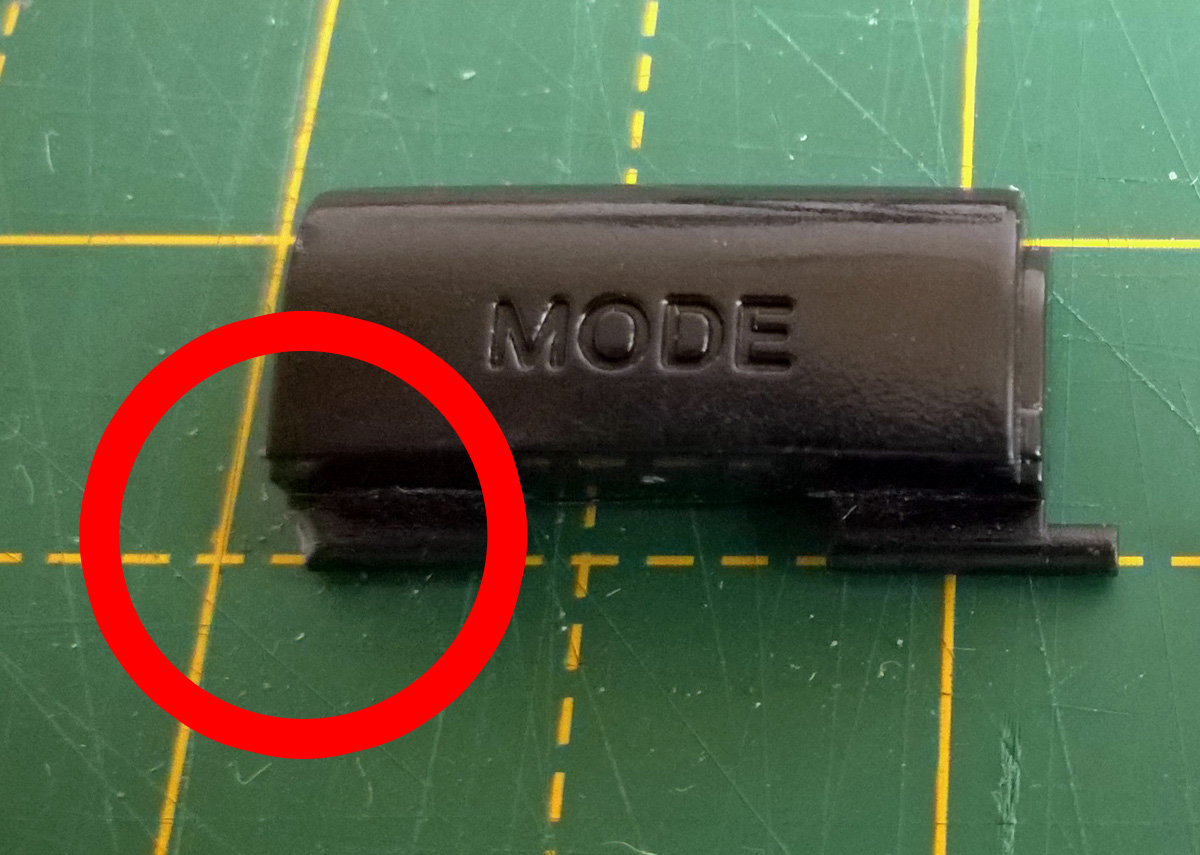
It's not uncommon for parts of old electronic devices to have damaged plastic pegs, like the one in this photo:
If you still have the snapped off plastic peg you may be able to glue it back on, but this can leave a weakened part that doesn't hold up very well. In other cases you might have lost the part entirely. This happened to me recently with the purchase of a six-button Mega Drive control pad. I ordered it from CeX's website and so couldn't see what condition it would be in until it arrived in the post. Unfortunately, it arrived in a filthy condition with a d-pad that only worked if you pressed the buttons very firmly and a non-functioning Mode button. I took it apart and was able to get the d-pad working again by cleaning the contacts. Whilst I left the rest of the plastic parts soaking in the sink to try to remove as much of the encrusted grime as possible I turned my attention to the faulty Mode button.
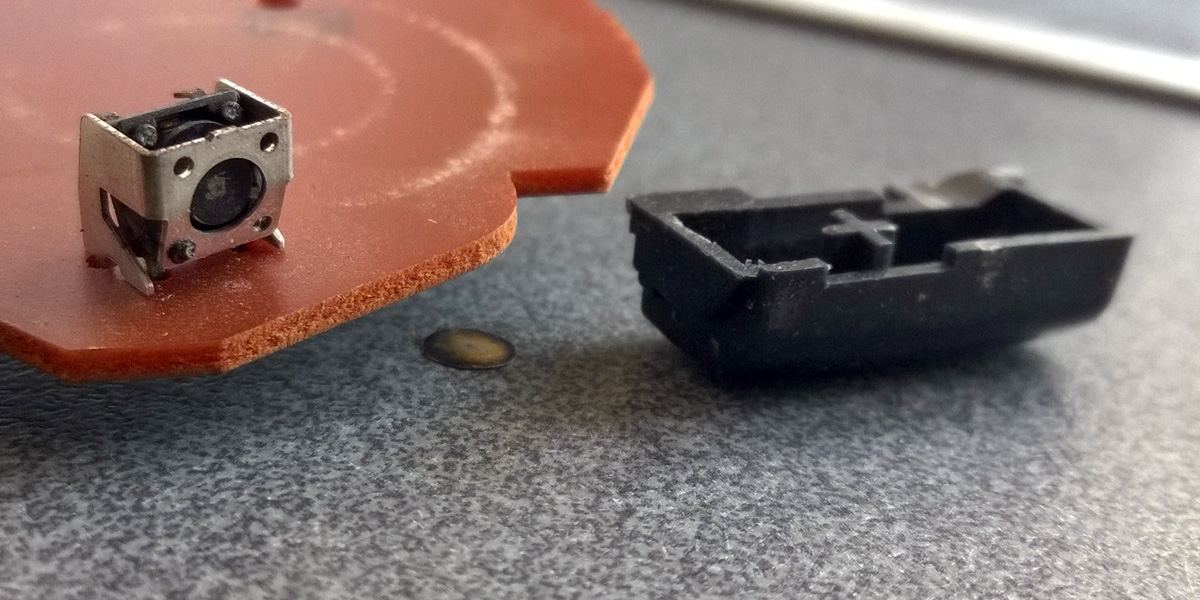
At some point the button must have been pushed in too firmly, damaging the tactile switch on the main board - the metal casing was bent and the plastic switch body had separated from it with the metal diaphragm that closes the contacts falling out. I've seen the same thing happen to some Sega Saturn control pads and fortunately had some spares in my parts bin so was able to swap that out easily. However, the pressure had snapped one of the plastic pegs of the Mode button off and it was nowhere to be found, so I needed to construct a replacement.
Fortunately, I have some scrap plastic parts from cutting out holes in plastic enclosures. In my case I needed to make a new peg that was 1.8mm in diameter, and had some 2mm sheet to use for this purpose. If I didn't have this then I could have gone online to buy a small 2mm thick sheet of ABS, but I prefer to recycle where possible!

The first thing to do was to get a piece of plastic that was roughly the right size, so I cut a length with a cross-section of 2×2mm. To cut the plastic I scored it with a knife and then snapped it by gripping the short part with a pair of pliers and bending the longer part away from the score line.
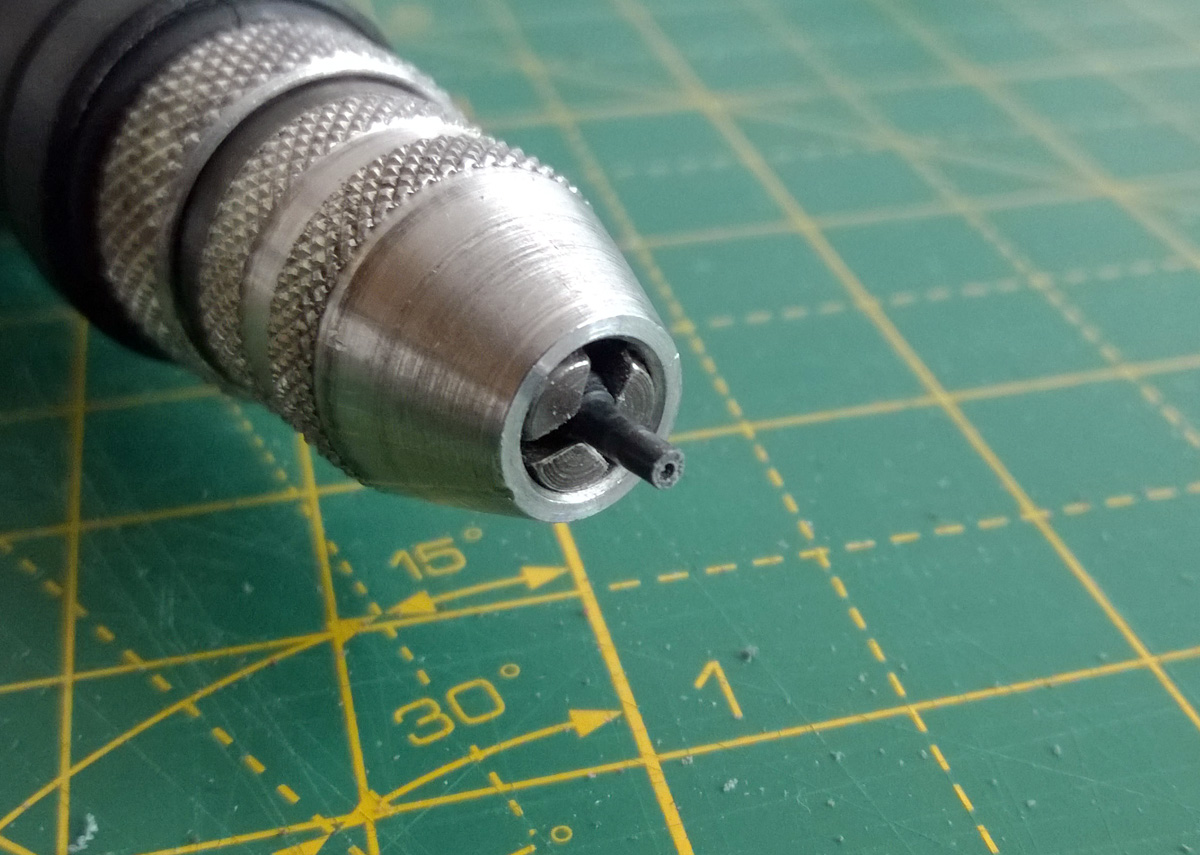
As the plastic peg needs to rotate in its slot inside the control pad it needs a round cross-section rather than a square one. To shape the peg into a rough cylinder I mounted it in the chuck of a rotary tool, as pictured above.

The rotary tool was then switched on and the plastic part held against a file. The photo above shows the start of this process with the peg beginning to take form. You need to work somewhat slowly with plastic as it gets hot when filing, cutting or drilling and if you let the heat build up it can melt and bend or gum up your tools. In my case I only used the file for a short period at a time before giving the piece time to cool back down. If I had been able to use my variable-speed rotary tool I could have set it to a lower speed to reduce the heat however the collet chuck on that tool wouldn't have been able to grip the work piece.

It doesn't take very long to get a nice round profile on the peg, though, even when working slowly (it's only a small piece, after all!) I carried on working it until I measured the 1.8mm diameter I was aiming for.
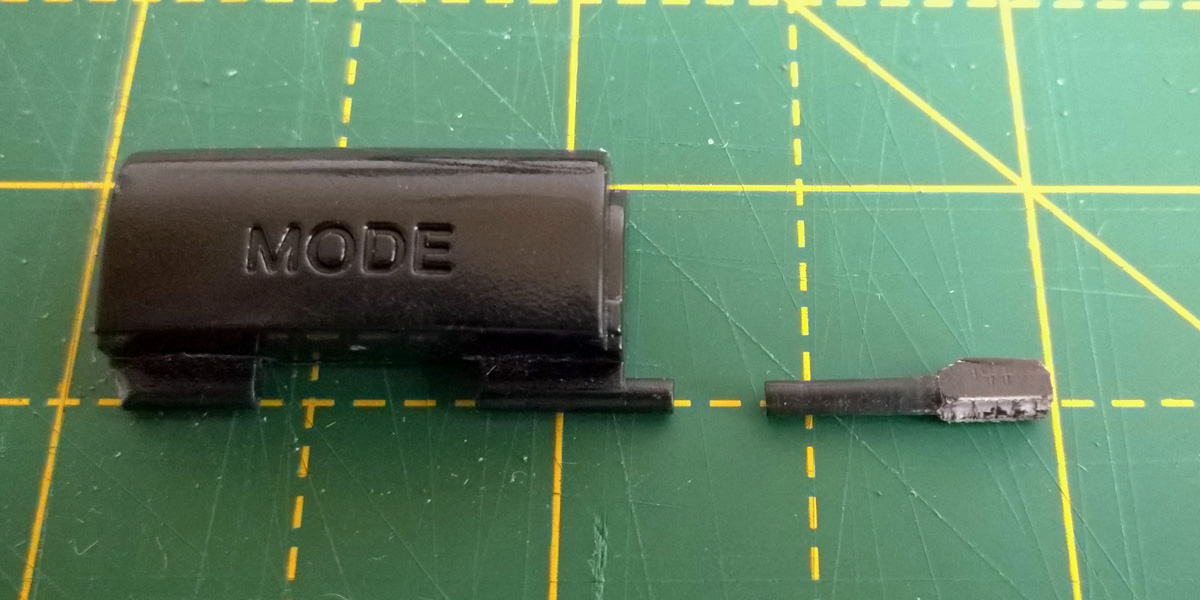
The above photo shows a size comparison between the new peg and the intact one on the Mode button. I've left the piece long (with the rough ending as a "handle") to make it easier to work with until it's time to fix it in place rather than cutting it to length straight away.
How to attach the new peg to the damaged button is the next issue to deal with. The rough surface of the snapped area of the button would make gluing difficult, though it could be filed flat to provide an easier surface to work with. My preferred technique, however, is to fix the new plastic peg with a metal pin made from a paper clip. This involves drilling narrow holes in the old button and the new peg to fit the metal pin through.

A pin vice is an invaluable tool for fine drilling work like this. I started with a very small drill bit to make the initial hole, being very careful to ensure I was drilling straight and in a well-centred location. This is something that needs to be taken slowly, especially on the original part. Once I had a pilot hole in the right place I switched to a larger drill bit that would drill a hole that the paper clip could fit into.
Starting the hole in the plastic peg might be easier by spinning the piece in your rotary tool and then bringing the stationary drill bit up to the end of it. As before be very careful about melting the plastic as once the hole is drilled the plastic is even thinner and will melt more easily – the peg is much shorter in the above photo than it was in previous photos as I accidentally melted it when I tried to drill all the way through in the rotary tool. I had to cut off the melted and distorted part to start again, only starting the hole in the rotary tool this time and then drilling the rest of the way slowly by hand. It's a good thing there was plenty of excess material!
The above photo shows the short length of paper clip that has been cut to connect the two plastic parts. Using a piece of wire like this should provide a lot of strength to the join – my experiences of gluing plastic to plastic have been very mixed, depending on the glue and plastic involved.
The parts in this case are all glued together with superglue and it seems to hold together quite well. The replacement peg was first cut to length before being glued. I coated one end of the paper clip rod in glue before pushing it into the hole on the button, then added glue to the other end and slid the new peg on. The end of the peg had a slightly protruding piece of the paper clip rod, so it was filed flush once the glue had set.
The uneven break still left a small gap in the join between the new peg and the Mode button body, so I filled it with a small amount of two-part epoxy resin. I used a toothpick to transfer a small amount of the mixed epoxy resin into the gap. This is always a bit messy so I protected the main button surface with masking tape. I also tidied up any "blobbiness" or glue that had otherwise run to undesired areas with a sharp knife before the epoxy had fully cured.
The button now sits properly in place inside the control pad and swings freely as it should. I could of course have just returned the control pad for a refund considering its condition but in spite of its problems it was still a well-priced item and I'm not sure they would have bothered to repair it. At least I know this way it'll be appreciated in its second life!