XNA DOOM3
Thursday, 3rd July 2008
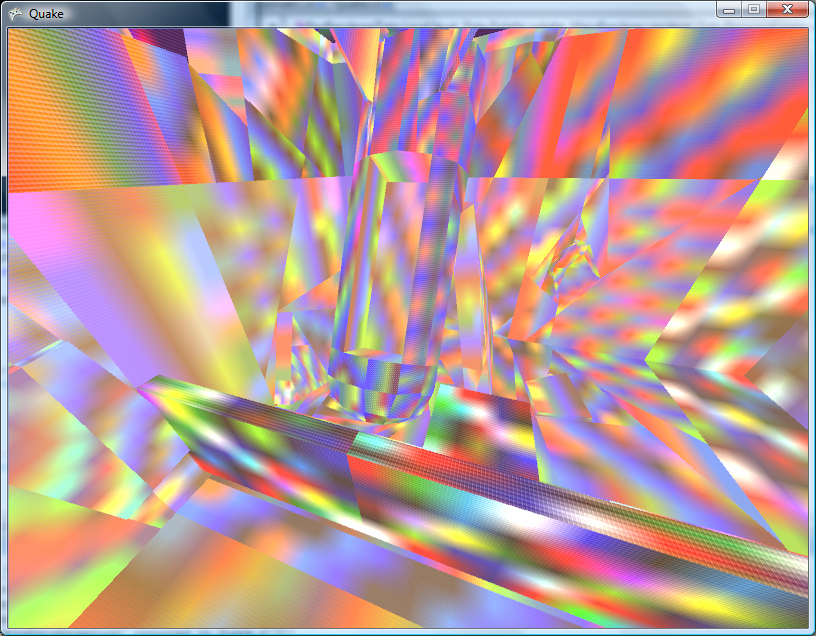
This journal is starting to look a little drab, so here's a splash of colour.
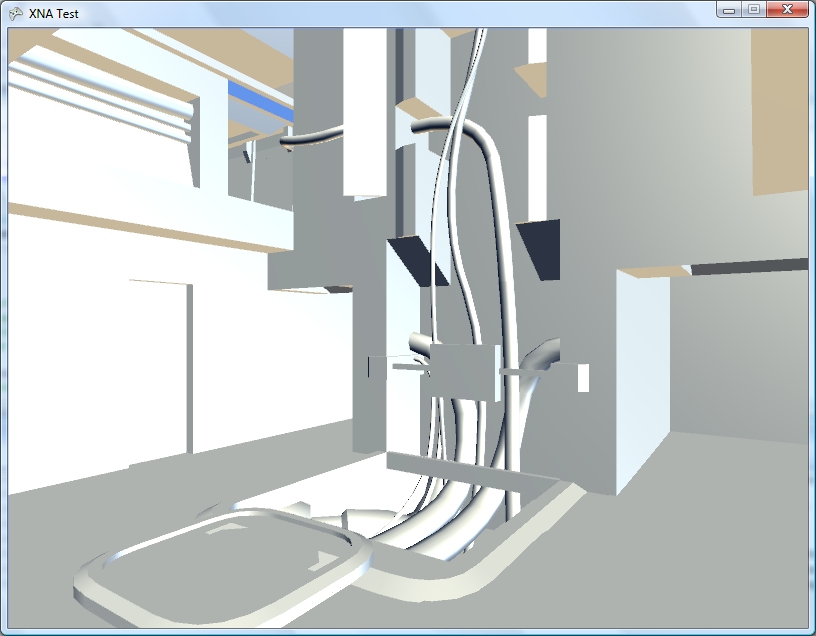
Not really all that colourful, on second thoughts.  I fancied a short break from BBC BASIC, and seeing that the current XNA CTP supports VS 2008 I thought I'd try a bit more work on hardware-accelerated 3D. I've never worked with shadows, bump mapping or visibility portals, and have a copy of DOOM 3, so thought that would provide a nice set of resources to experiment with.

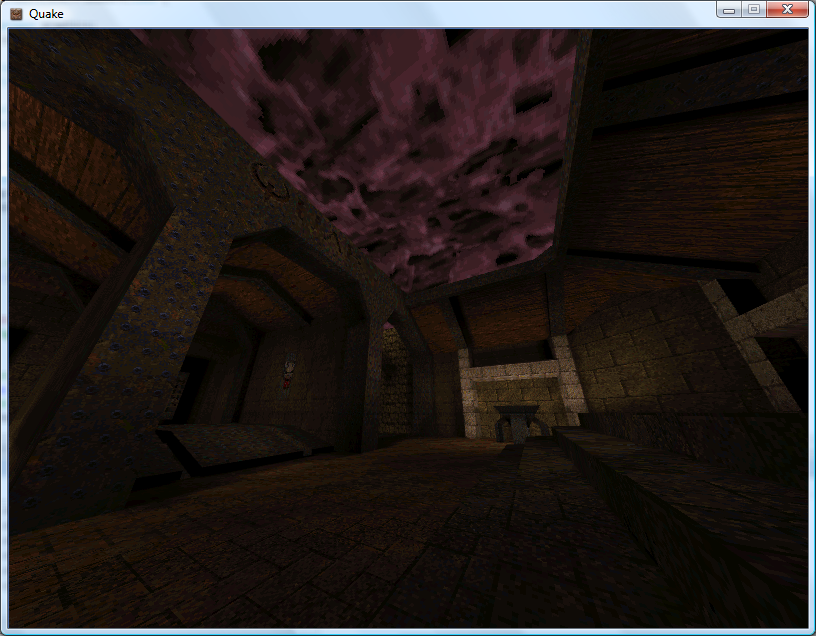
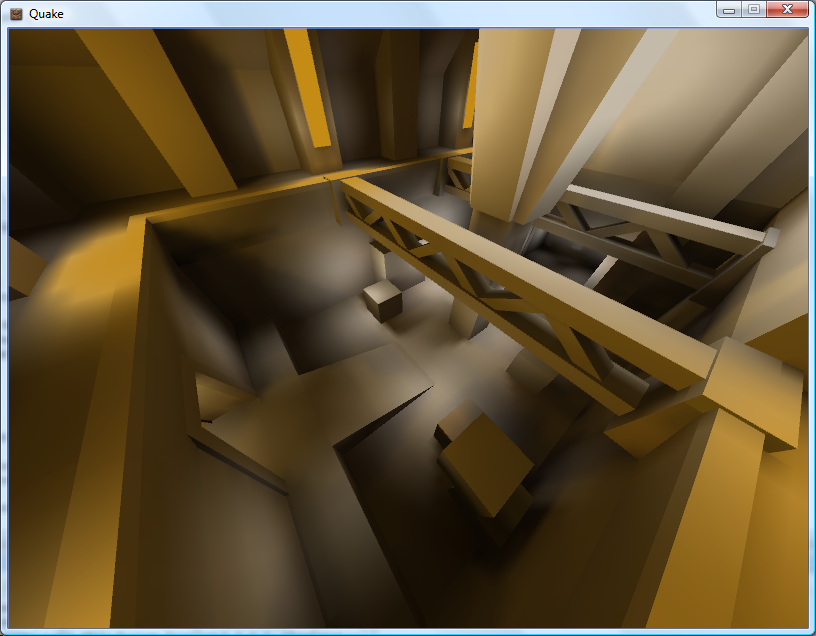
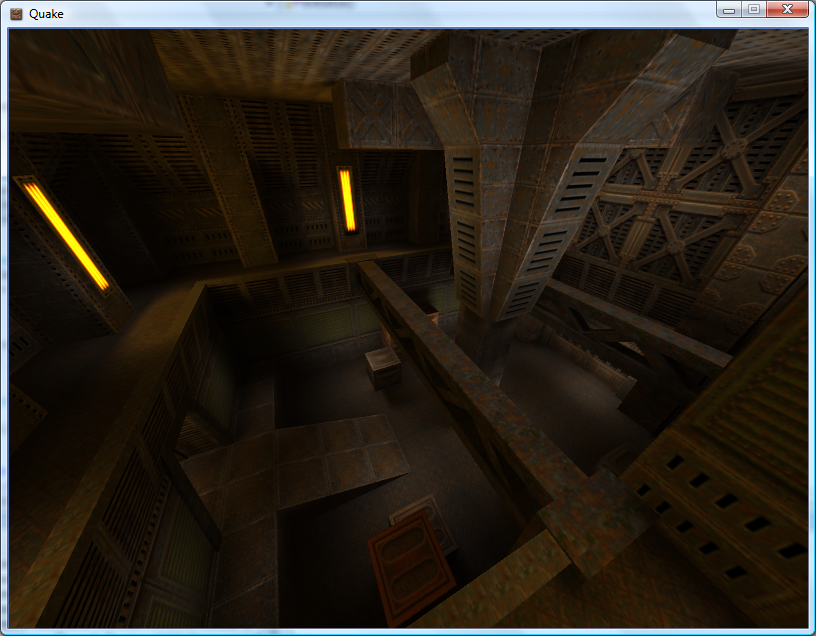
The screenshots are generated by simply brute-force rendering of all surfaces of all models in a level (.proc) file. The odd colours and lighting are courtesy of the default lighting provided by the BasicEffect class. The level files are simple to parse (they're just text files breaking each surface down into vertex and index arrays, ready to be fed to the video hardware), so though I've not found much documentation on them it's been pretty easy to guess what's what so far.
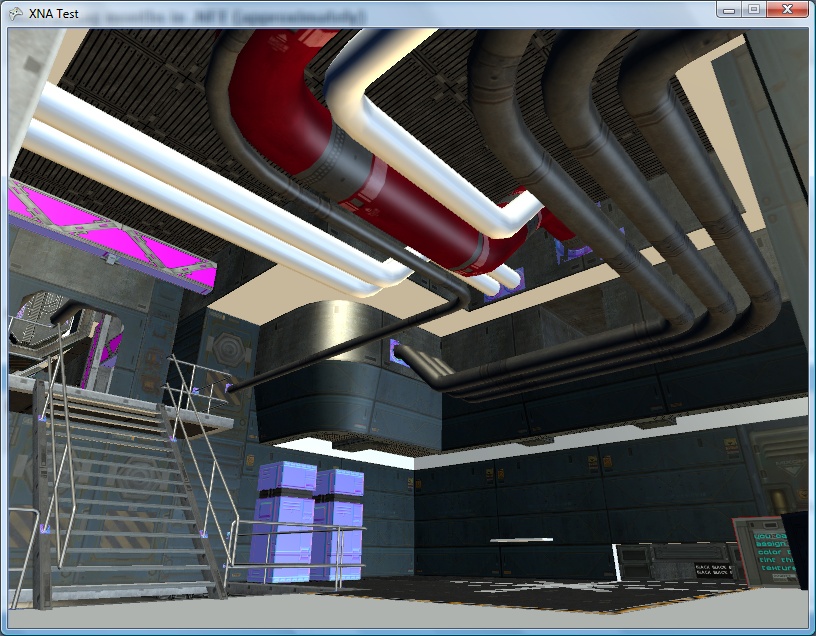
The above textures are loaded by taking the material name and appending .tga, which seems to return a random mixture of specular, diffuse or normal maps. There is a materials directory that appears to contain definitions for which image file to use for each different type of texture map, so that looks like the next thing to investigate.
Dynamic Lighting
Tuesday, 18th September 2007
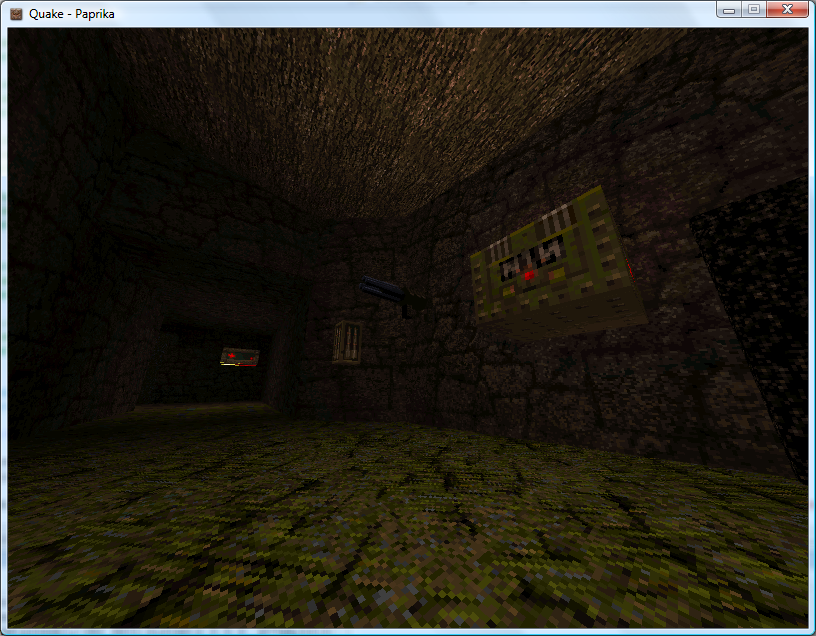
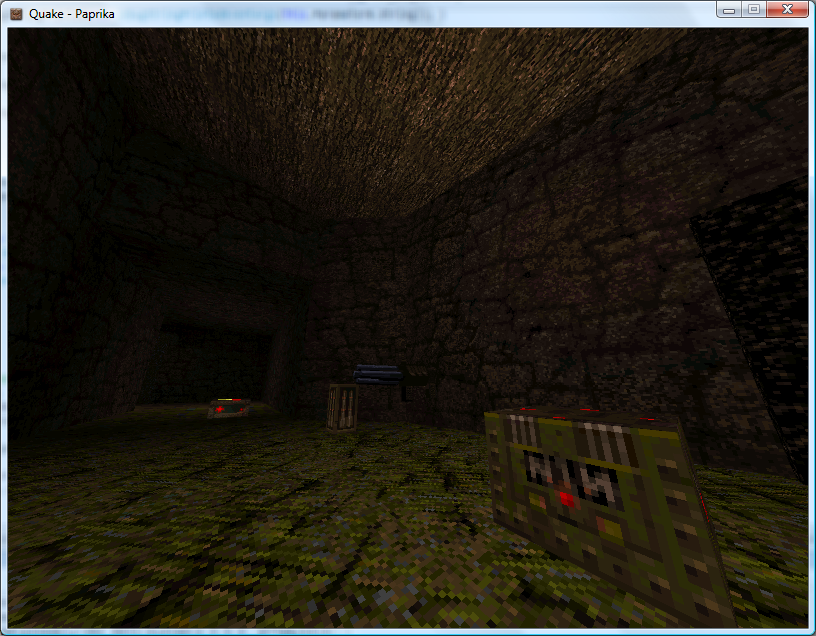
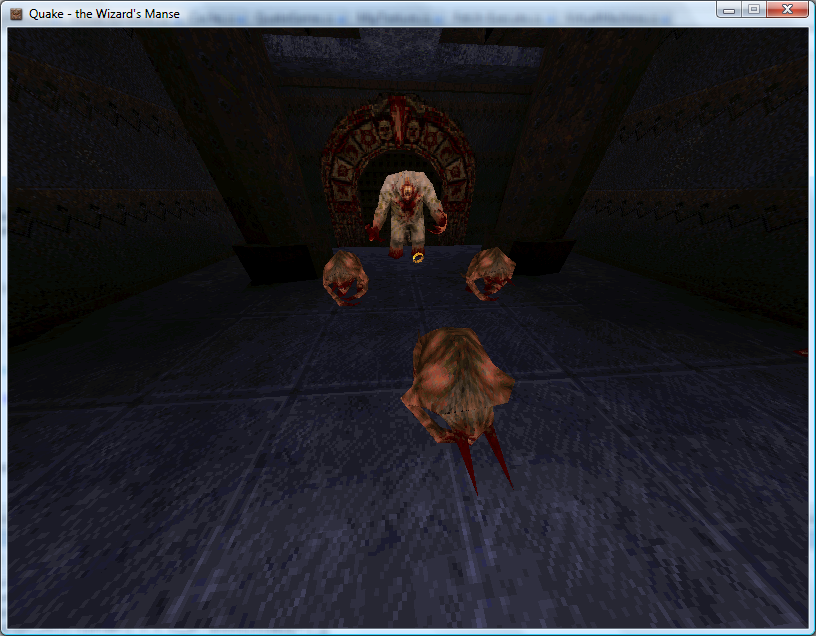
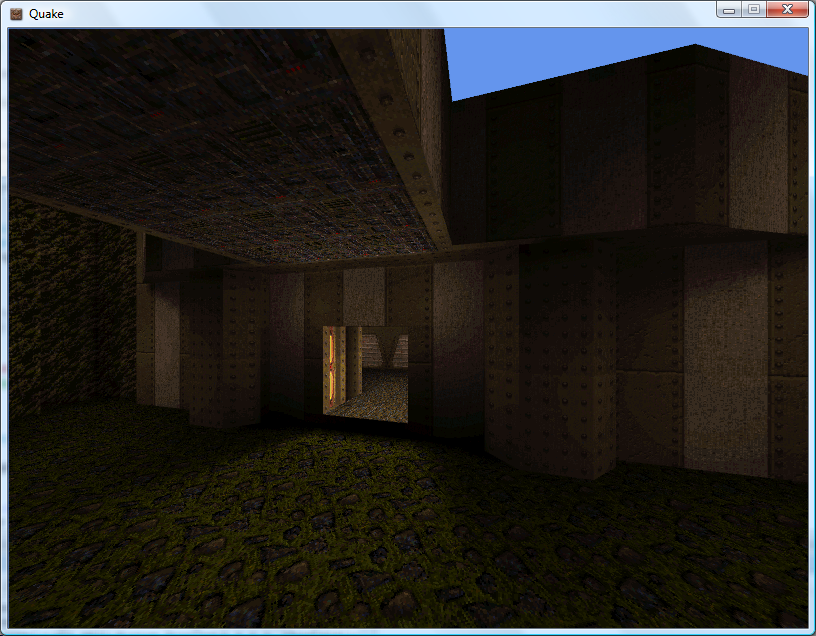
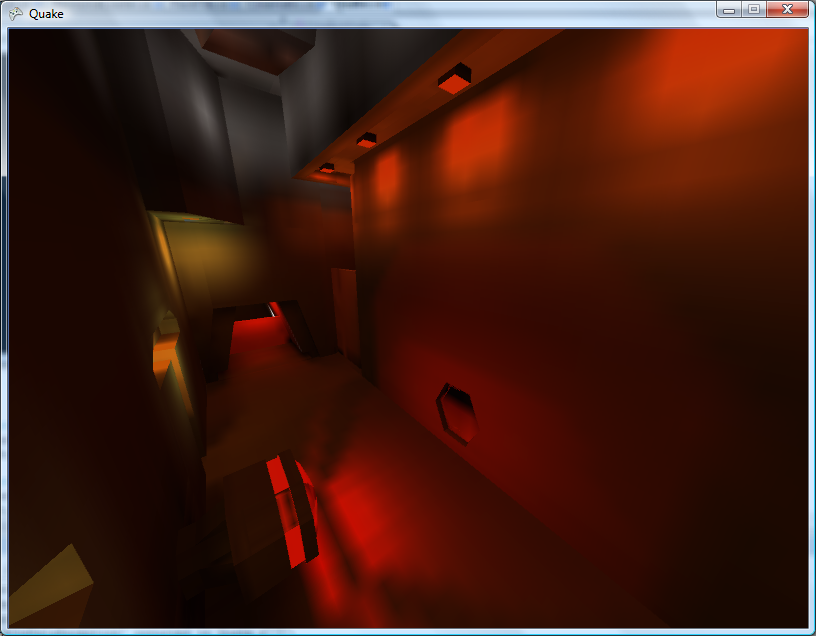
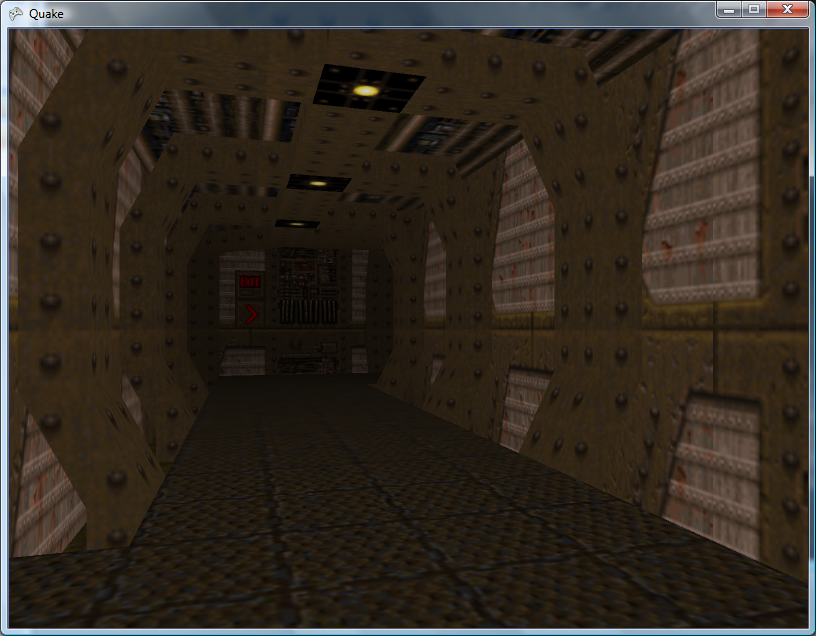
Quake has a few dynamic lights - some projectiles, explosions and the fireballs light up their surroundings.
Fortunately, the method used is very simple: take the brightness of the projectile, divide it by the distance between the point on the wall and the light and add it to the light level for that point. This is made evident by pausing the early versions of Quake; when paused the areas around dynamic lights get brighter and brighter as the surface cache gets overwritten multiple times.
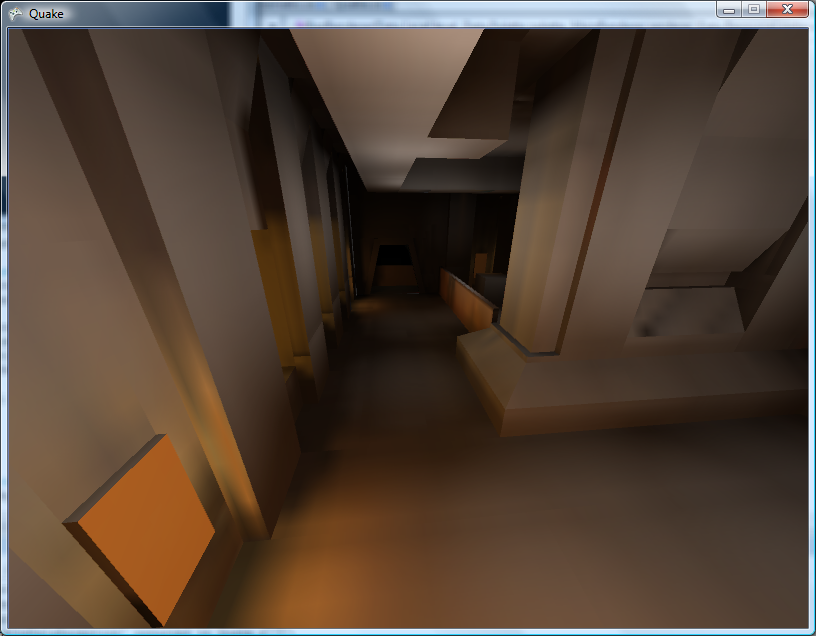
The next problem is that a light on the far side of a thin wall will light up both sides! Happily, this bug wasn't fixed in Quake, and is very evident in the start level where you can see the light spots from the fireballs in the Hard hall on the walls of the Medium hall.
I'd noticed that fireball-spawning entites would occasionally spawn a still fireball then remove it some seconds later. Looking over the Quake source code, it would appear that in each update the game iterates over all entities, checks their movetype property, then applies physics as applicable. Fireballs don't seem to have any real physics to speak of (they can pass through walls) beyond adding gravity each update to their velocity.
This required some further changes to get the VM working, including console variable support (gravity is defined in the sv_gravity console variable - this allows for the special low-gravity Ziggurat Vertigo).
For some reason the pickups seem to have their movetype set to TOSS resulting in all of the pickups flying away when the level started (not to mention abysmal performance). I added a hack to the droptofloor() QuakeC function that sets their on-floor flag (and hence disables their physics), but I'm not sure what the best course of action is going to be. I'm having to dig deeper and deeper into Quake's source, now...
Bounding Box Bouncing
Friday, 14th September 2007
I've updated the collision detection between points and the world with Scet's idea of only testing with the faces in the leaf containing the start position of the point.

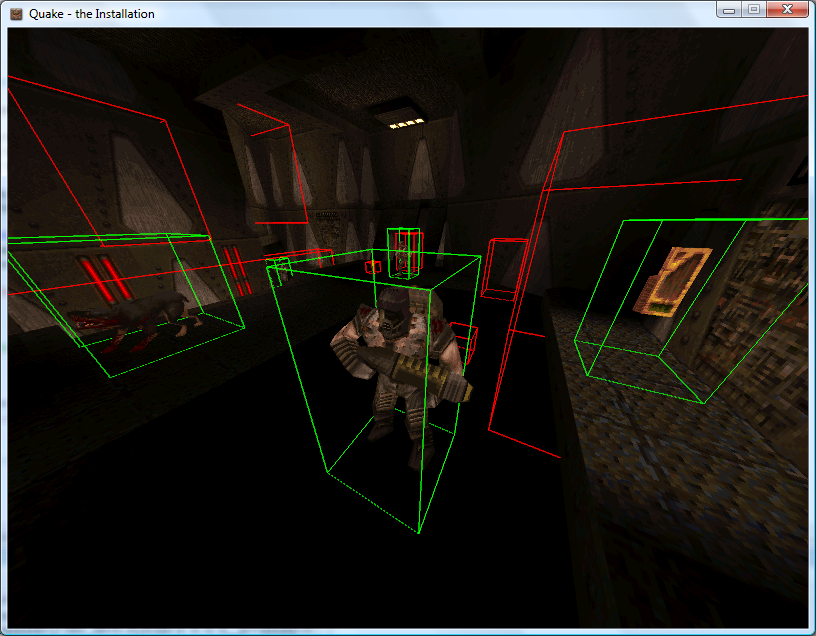
ZiggyWare's Simple Vector Rendering GameComponent is being very useful for testing the collision routines.
I have also extended the collision routines to bounding boxes. This fixes a few issues where a point could drop through a crack in the floor between two faces.
My technique is to test the collision between the eight corners of the box and then to pick the shortest collision and use that as the resultant position. This results in a bounding box that is not solid; you can impale it on a spike, for example.
In the above screenshot, the cube comes to rest with the corners all lined up on cracks, which means that it slips through as its base isn't solid.
Happily, object collisions are simple bounding-box affairs, the bounding boxes set with QuakeC code, which should simplify things somewhat.
Goodness Gracious, Great Balls of Lava
Wednesday, 12th September 2007
I've reworked the VM completely to use an array of a union of a float and an int, rather than the MemoryStream kludge I was using before. This also removes a lot of the multiply-or-divide-by-four mess I had with converting indices to positions within the memory stream.
There are (as far as I know) three ways to invoke QuakeC methods. The first is when an entity is spawned, and this is only valid when the level is being loaded (the function that matches the entity's classname is called). The second is when an entity is touched (its touch function is called) and the third is when its internal timer, nextthink, fires (its think function is called).
The third is the easiest one to start with. On a monster-free level, there are still "thinking" items - every powerup item has droptofloor() scheduled to run.
A strange feature of custom levels has been that all of the power-up items have been floating in mid-air.
By hacking together some crude collision detection (face bouncing boxes and axial planes only) I could make those objects sit in the right place:
With many thanks to Zipster pointing me in the right direction I have extended this to perform collision detection of a moving vertex against all world faces.
Here I fire a vertex (with a lava ball drawn around it to show where it is) through the world. When I hit a face I reflect the velocity by the face normal.
It looks much more realistic if I decrease the velocity z component over time (to simulate gravity) and reduce the magnitude of the velocity each time it hits a surface, so I can now bounce objects around the world:
Performing the collision detection against every single face in the world is not very efficient (though on modern hardware I'm still in the high nineties). There are other problems to look into - such as collisions with invisible brushes used for triggers and collision rules when it comes to water and the sky, not to mention that I should really be performing bounding-box collision detection, not just single moving points. Points also need to slide off surfices, not just stop dead in their tracks.
Once a vertex hits a plane and has been reflected I push it out of the surface very slightly to stop it from getting trapped inside the plane. This has the side effect of lifting the vertex a little above the floor, which it then drops back against, making it slide down sloping floors.
Entities Spawned by QuakeC Code
Thursday, 6th September 2007
After all that time spent trying to work out how the QuakeC VM works I finally have some real-world results.
Apart from the obvious boring stuff going on in the background parsing and loading entities go, two functions in particular are of note. The first is a native function, precache_model(string) which loads and caches a model of some description (sprites, Alias models or BSP models). The QuakeC VM I've written raises an event (passing an event containing the name of the model to load), which the XNA project can interpret and use to load a model into a format it's happy with.
Inspiration for the Strogg in Quake 2?
With a suitable event handler and quick-and-dirty model renderer in place, the above models are precached (though they probably shouldn't be drawn at {0, 0, 0}).
The second function of interest is another native one, makestatic(entity). Quake supports three basic types of entity - dynamic entities (referenced by an index, move around and can be interacted with - ammo boxes, monsters and so on), temporary entities (removes itself from the game world automatically - point sprites) and static entities. Static entities are the easiest to handle - once spawned they stay fixed in one position, and can't be accessed (and hence can't be removed). Level decorations such as flaming torches are static. Here's the QuakeC code used to spawn a static small yellow flame:
void() light_flame_small_yellow =
{
	precache_model ("progs/flame2.mdl");
	setmodel (self, "progs/flame2.mdl");
	FireAmbient ();
	makestatic (self);
};
// Handle precache models:
void Progs_PrecacheModelRequested(object sender, Quake.Files.QuakeC.PrecacheFileRequestedEventArgs e) {
	switch (Path.GetExtension(e.Filename)) {
		case ".mdl":
			if (CachedModels.ContainsKey(e.Filename)) return; // Already cached.
			CachedModels.Add(e.Filename, new Renderer.ModelRenderer(this.Resources.LoadObject<Quake.Files.Model>(e.Filename)));
			break;
		case ".bsp":
			if (CachedLevels.ContainsKey(e.Filename)) return; // Already cached.
			CachedLevels.Add(e.Filename, new Renderer.BspRenderer(this.Resources.LoadObject<Quake.Files.Level>(e.Filename)));
			break;
	}
}

// Spawn static entities:
void Progs_SpawnStaticEntity(object sender, Quake.Files.QuakeC.SpawnStaticEntityEventArgs e) {
	// Grab the model name from the entity.
	string Model = e.Entity.Properties["model"].String;

	// Get the requisite renderer:
	Renderer.ModelRenderer Renderer;
	if (!CachedModels.TryGetValue(Model, out Renderer)) throw new InvalidOperationException("Model " + Model + " not cached.");

	// Add the entity's position to the renderer:
	Renderer.EntityPositions.Add(new Renderer.EntityPosition(e.Entity.Properties["origin"].Vector, e.Entity.Properties["angles"].Vector));
}
The result is a light sprinkling of static entities throughout the level.

As a temporary hack I just iterate over the entities, checking if each one is still active, and if so lumping them with the static entities.
If you look back a few weeks you'd notice that I already had a lot of this done. In the past, however, I was simply using a hard-coded entity name to model table and dumping entities any old how through the level. By parsing and executing progs.dat I don't have to hard-code anything, can animate models correctly, and even have the possibility of running the original game logic.
An example of how useful this is relates to level keys. In some levels you need one or two keys to get to the exit. Rather than use the same keys for each level, or use many different entity classes for keys, the worldspawn entity is assigned a type (Mediaeval, Metal or Base) and the matching key model is set automatically by the key spawning QuakeC function:
/*QUAKED item_key2 (0 .5 .8) (-16 -16 -24) (16 16 32)
GOLD key
In order for keys to work
you MUST set your maps
worldtype to one of the
following:
0: medieval
1: metal
2: base
*/

void() item_key2 =
{
	if (world.worldtype == 0)
	{
		precache_model ("progs/w_g_key.mdl");
		setmodel (self, "progs/w_g_key.mdl");
		self.netname = "gold key";
	}
	if (world.worldtype == 1)
	{
		precache_model ("progs/m_g_key.mdl");
		setmodel (self, "progs/m_g_key.mdl");
		self.netname = "gold runekey";
	}
	if (world.worldtype == 2)
	{
		precache_model2 ("progs/b_g_key.mdl");
		setmodel (self, "progs/b_g_key.mdl");
		self.netname = "gold keycard";
	}
	key_setsounds();
	self.touch = key_touch;
	self.items = IT_KEY2;
	setsize (self, '-16 -16 -24', '16 16 32');
	StartItem ();
};
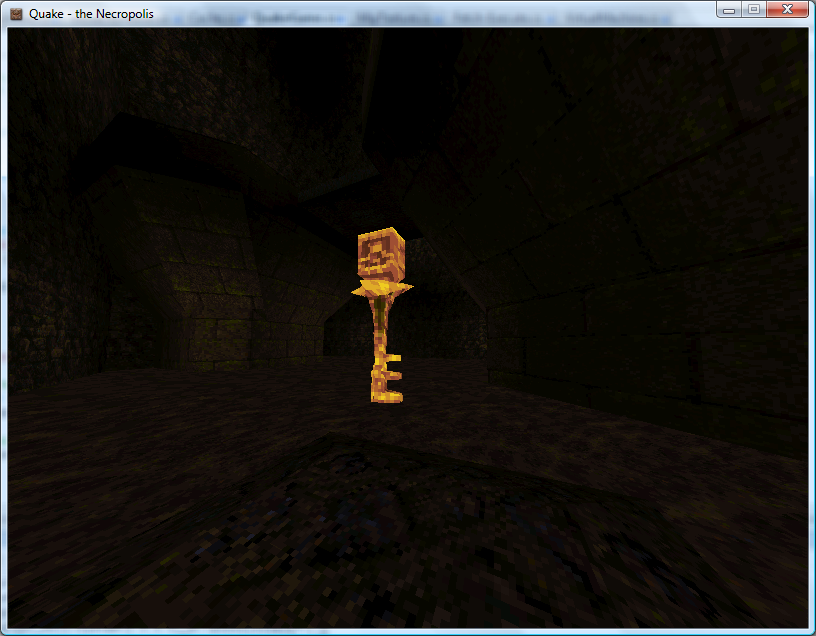
Mediaeval Key
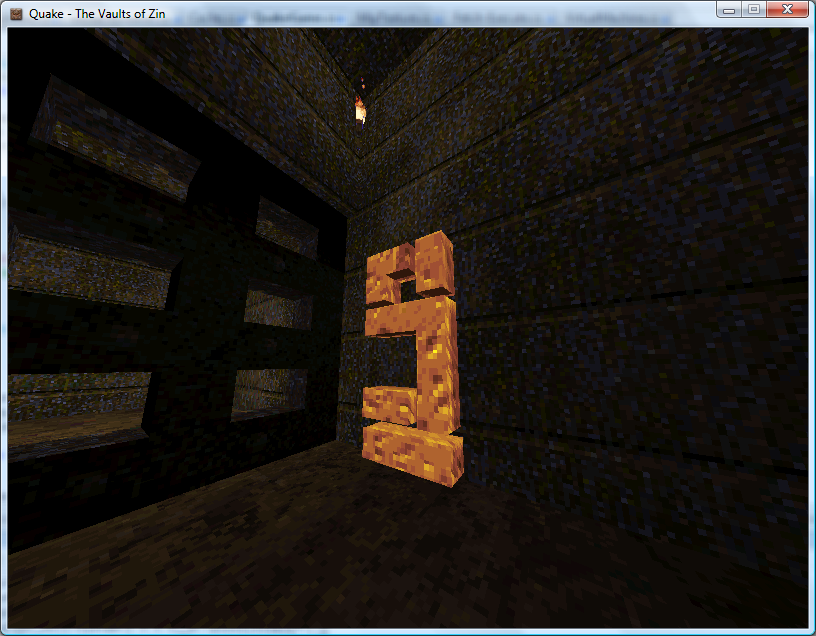
Metal Runekey
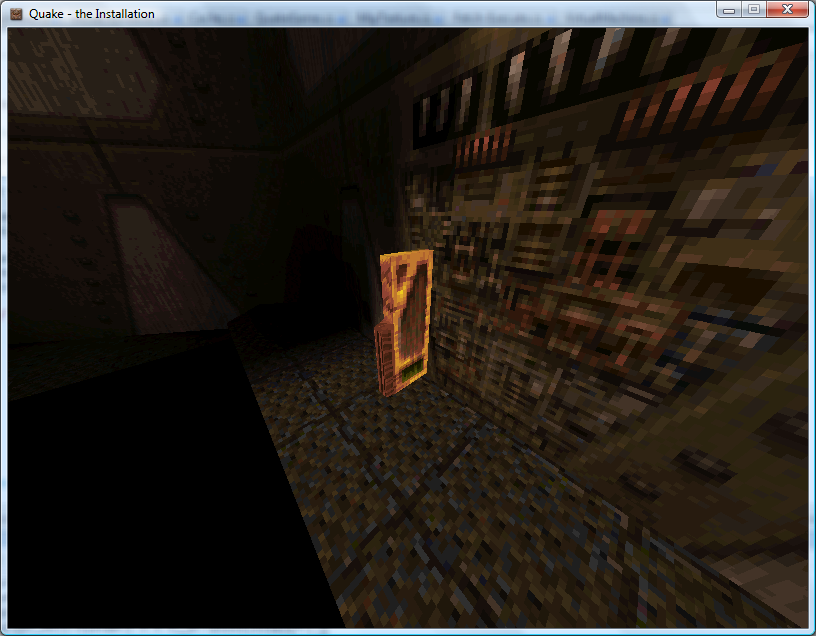
Base Keycard
One problem is entities that appear at different skill levels. Generally higher skill levels have more monsters, but there are other level design concerns such as swapping a strong enemy for a weaker one in the easy skill mode. In deathmatch mode entities are also changed - keys are swapped for weapons, for example. At least monsters are kind - their spawn function checks the deathmatch global and they remove themselves automatically, so adding the (C#) line Progs.Globals["deathmatch"].Value.Boolean = true; flushes them out nicely.
Each entity, however, has a simple field attached - spawnflags - that can have bits set to inhibit the entity from spawning at the three different skill levels.
Easy
Medium

Hard
Regrettably, whilst the Quake 1 QuakeC interpreter source code is peppered with references to Quake 2 it would appear that Quake 2 used native code rather than QuakeC to provide gameplay logic, so I've dropped development on the Quake 2 side at the moment.
QuakeC
Monday, 3rd September 2007
This journal hasn't been updated for a while, I know. That doesn't mean that work on the Quake project has dried up - on the contrary, a fair amount of head-way has been made!
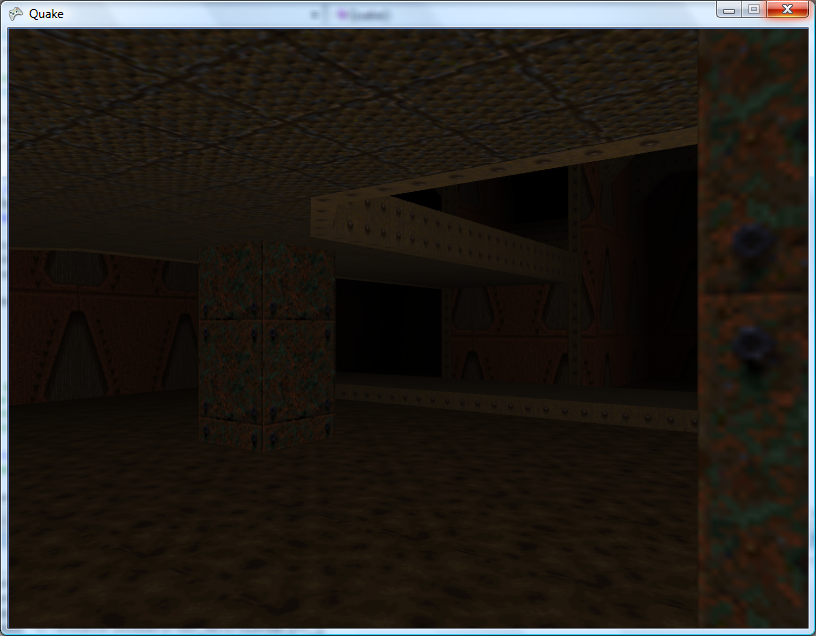
The problem is that screenshots like the above are really not very interesting at all. 
As far as I can tell, Quake's entity data (at runtime) is stored in a different chunk of memory to the memory used for global variables. I've had numerous problems getting the code to work - most of which caused by pointer confusion. Four bytes are generally used for a field (vectors use three singles, so you have 12 bytes), so I've tried multiplying and dividing offsets by four to try and get it all to work.
The basic entity data is stored in the .bsp file. It takes the following form:
{
"worldtype" "2"
"sounds" "6"
"classname" "worldspawn"
"wad" "gfx/base.wad"
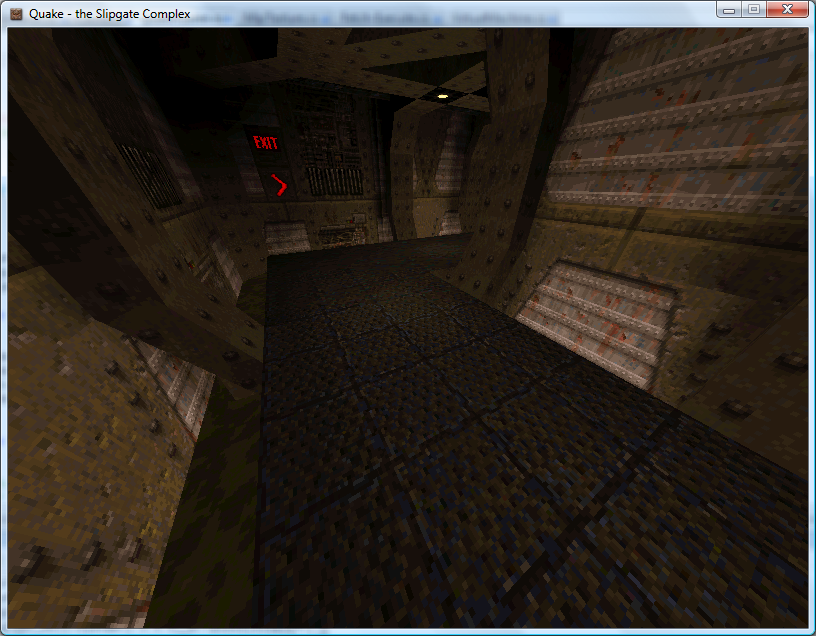
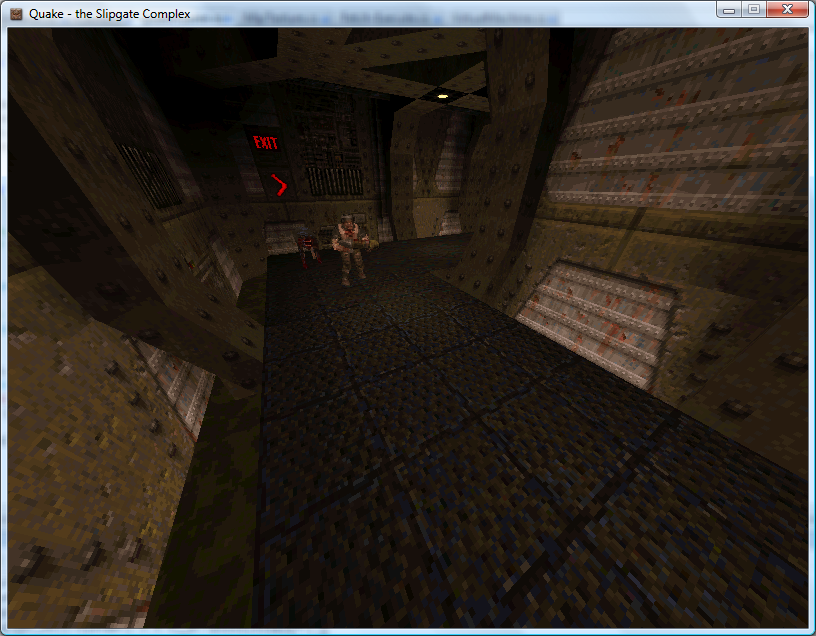
"message" "the Slipgate Complex"
}
{
"classname" "info_player_start"
"origin" "480 -352 88"
"angle" "90"
}
{
"classname" "light"
"origin" "480 96 168"
"light" "250"
}
classname describes the type of the entity, and the other key-value pairs are used to adjust the entity's properties. All entities share the same set of fields, which are declared in a special section of the progs.dat file.
For each classname there is a matching QuakeC function. As far as I can tell the trick is to decode an entity then invoke its QuakeC method.
void() light =
{
	if (!self.targetname)
	{	// inert light
		remove(self);
		return;
	}

	if (self.style >= 32)
	{
		self.use = light_use;
		if (self.spawnflags & START_OFF)
			lightstyle(self.style, "a");
		else
			lightstyle(self.style, "m");
	}
};
As you can probably guess, if a light entity is not attached to a particular target it is automatically removed from the world as it serves no useful function (the lightmaps are prerendered, after all). A similar example comes from the monsters which remove themselves if deathmatch is set. The QuakeC code also contains instructions on setting which model file to use for each entity and declares the animation frame sequences, so is pretty important to get working.
I have a variety of directories stuffed with images on my website, and (thankfully) I have used a faintly sane naming convention for some of these. I knocked together a PHP script which reads the files from these directories and creates a nifty sort of gallery. It automatically generates thumbnails and is quite fast. As I don't have an internet connection at home it's more practical to be able to just drop files into a directory and have the thing automatically update rather than spend time updating a database.
PHP source code (requires GD).
It's INI file driven. The two files are config.ini:
[Site]
base_dir=../../ ; Base directory of the site
; I put this in bin/gallery, so need to go up two levels :)

[Files]
valid_extensions=jpg,gif,png ; Only three that are supported

[Thumbnails]
max_width=320
max_height=256
quality=90 ; Thumbnail JPEG quality
...and galleries.ini:
[VB6 Terrain]
key=te                 ; Used in gallery=xyz parameter
path=projects/te       ; Image location, relative to base_dir
date_format=ddmmyyyyi  ; Filename format, where i = index.

[MDX DOOM]
key=doom
path=images/doom
ignore_extensions=jpg     ; Can be used to ignore extensions.
date_format=yyyy.mm.dd.ii
The index in the date format is for files that fall on the same date. Historically I used a single letter (01012003a, 01012003b), currently I use a two-digit integer (2003.01.01.01).
If a text file with the name of the image + ".txt" is found, that is used as a caption. (eg, /images/quake/2003.01.01.01.png and /images/quake/2003.01.01.01.png.txt).
It's not designed to be bullet-proof (and was written very very quickly) but someone might find it a useful base to work on.
8-bit Raycasting Quake Skies and Animated Textures
Monday, 20th August 2007
All of this Quake and XNA 3D stuff has given me a few ideas for calculator (TI-83) 3D.
One of my problems with calculator 3D apps is that I have never managed to even get a raycaster working. Raycasters aren't exactly very tricky things to write.
So, to help me, I wrote a raycaster in C#, limiting myself to the constraints of the calculator engine - 96×64 display, 256 whole angles in a full revolution, 16×16 map, that sort of thing. This was easy as I had floating-point maths to fall back on.
With that done, I went and ripped out all of the floating-point code and replaced it with fixed-point integer arithmetic; I'm using 16-bit values, 8 bits for the whole part and 8 bits for the fractional part.
From here, I just rewrote all of my C# code in Z80 assembly, chucking in debugging code all the way through so that I could watch the state of values and compare them with the results from my C# code.

The result is rather slow, but on the plus side the code is clean and simple. The screen is cropped for three reasons: it's faster to only render 64 columns (naturally), you get some space to put a HUD and - most importantly - it limits the FOV to 90°, as the classic fisheye distortion becomes a more obvious problem above this.

I sneaked a look at the source code of Gemini, an advanced raycaster featuring textured walls, objects and doors. It is much, much faster than my engine, even though it does a lot more!
It appears that the basic raycasting algorithm is pretty much identical to the one I use, but gets away with 8-bit fixed point values. 8-bit operations can be done significantly faster than 16-bit ones on the Z80, especially multiplications and divisions (which need to be implemented in software). You can also keep track of more variables in registers, and restricting the number of memory reads and writes can shave off some precious cycles.
Some ideas that I've had for the raycaster, that I'd like to try and implement:
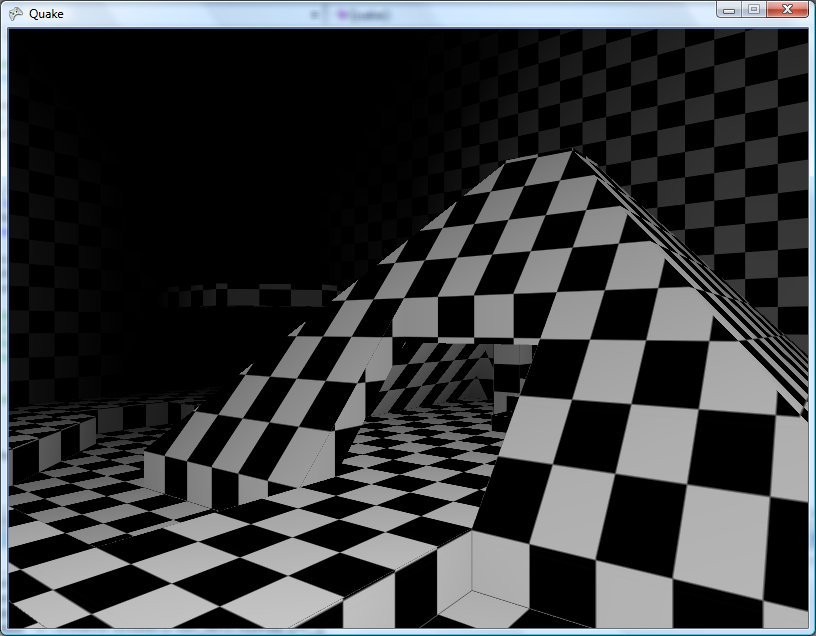
- Variable height floors and ceilings. Each block in the world is given a floor and ceiling height. When the ray intersects the boundary, the camera height is subtracted from these values, they are divided by the length of the ray (for projection) and the visible section of the wall is drawn. Two counters would keep track of the upper and lower values currently drawn to to keep track of the last block's extent (for occlusion) and floor/ceiling colours could be filled between blocks.
- No texturing: wall faces and floors/ceilings would be assigned dithered shades of grey. I think this, combined with lighting effects (flickering, shading), would look better than monochrome texture mapping - and would be faster!
- Ray-transforming blocks. For example, you could have two 16×16 maps with a tunnel: the tunnel would contain a special block that would, when hit, tell the raycaster to start scanning through a different level. This could be used to stitch together large worlds from small maps (16×16 is a good value as it lets you reduce level pointers to 8-bit values).
- Adjusting floors and ceilings for lifts or crushing ceilings.
As far as the Quake project, I've made a little progress. I've added skybox support for Quake 2:
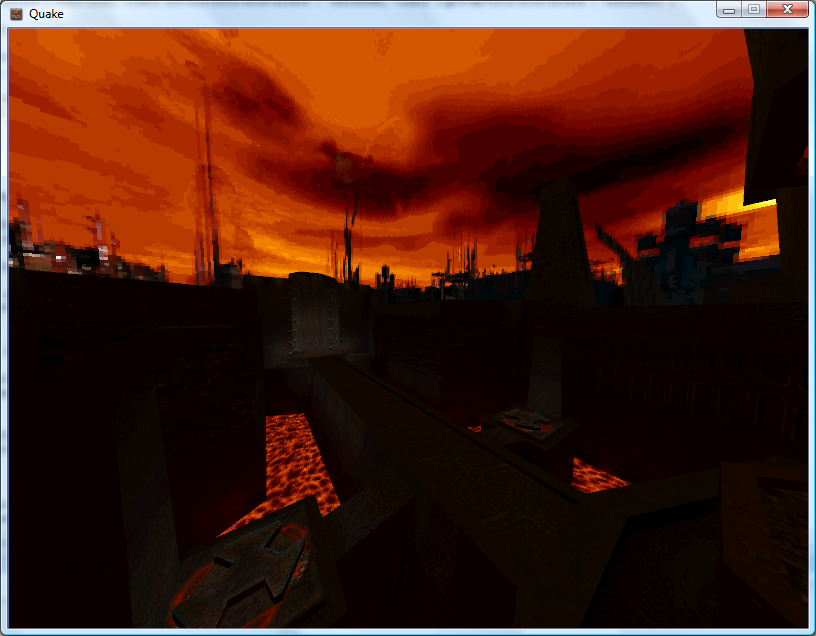
Quake 2's skyboxes are simply made up of six textures (top, bottom, front, back, left, right). Quake doesn't use a skybox. Firstly, you have two parts of the texture - one half is the sky background, and the other half is a cloud overlay (both layers scroll at different speeds). Secondly, it is warped in a rather interesting fashion - rather like a squashed sphere, reflected in the horizon:
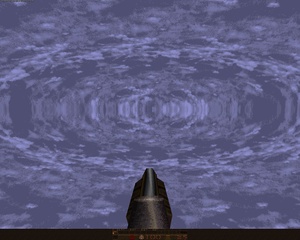
For the moment, I'm just using the Quake 2 box plus a simple pixel shader to mix the two halves of the sky texture.
I daresay something could be worked out to simulate the warping.
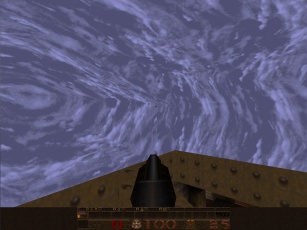
The above is from GLQuake, which doesn't really look very convincing at all.
I've reimplemented the texture animation system in the new BSP renderer, including support for Quake 2's animation system (which is much simpler than Quake 1's - rather than have magic texture names, all textures contain the name of the next frame in their animation cycle).
QuakeC VM
Wednesday, 15th August 2007
I've started serious work on the QuakeC virtual machine.
The bytecode is stored in a single file, progs.dat. It is made up of a number of different sections:
- Definitions data - an unformatted block of data containing a mixture of floating point values, integers and vectors.
- Statements - individual instructions, each made up of four short integers. Each statement has an operation code and up to three arguments. These arguments are typically pointers into the definitions data block.
- Functions - these provide a function name, a source file name, storage requirements for local variables and the address of the first statement.
On top of that are two tables that break down the definitions table into global and field variables (as far as I'm aware this is only used to print "nice" names for variables when debugging, as it just attaches a type and name to each definition) and a string table.
The first few values in the definition data table are used for predefined values, such as function parameters and return value storage.
Now, a slight problem is how to handle these variables. My initial solution was to read and write types strictly as particular types using the definitions table, but this idea got scrapped when I realised that the QuakeC bytecode uses the vector store opcode to copy string pointers, and a vector isn't much use when you need to print a string.
I now use a special VariablePointer class that internally stores the pointer inside the definition data block, and provides properties for reading and writing using the different formats.
/// <summary>Defines a variable.</summary>
public class VariablePointer {

	private readonly uint Offset;

	private readonly QuakeC Source;

	private void SetStreamPos() { this.Source.DefinitionsDataReader.BaseStream.Seek(this.Offset, SeekOrigin.Begin); }

	public VariablePointer(QuakeC source, uint offset) {
		this.Source = source;
		this.Offset = offset;
	}

	#region Read/Write Properties

	/// <summary>Gets or sets a floating-point value.</summary>
	public float Float {
		get { this.SetStreamPos(); return this.Source.DefinitionsDataReader.ReadSingle(); }
		set { this.SetStreamPos(); this.Source.DefinitionsDataWriter.Write(value); }
	}

	/// <summary>Gets or sets an integer value.</summary>
	public int Integer {
		get { this.SetStreamPos(); return this.Source.DefinitionsDataReader.ReadInt32(); }
		set { this.SetStreamPos(); this.Source.DefinitionsDataWriter.Write(value); }
	}

	/// <summary>Gets or sets a vector value.</summary>
	public Vector3 Vector {
		get { this.SetStreamPos(); return new Vector3(this.Source.DefinitionsDataReader.BaseStream); }
		set {
			this.SetStreamPos();
			this.Source.DefinitionsDataWriter.Write(value.X);
			this.Source.DefinitionsDataWriter.Write(value.Y);
			this.Source.DefinitionsDataWriter.Write(value.Z);
		}
	}

	#endregion

	#region Extended Properties

	public bool Boolean {
		get { return this.Float != 0f; }
		set { this.Float = value ? 1f : 0f; }
	}

	#endregion

	#region Read-Only Properties

	/// <summary>Gets a string value.</summary>
	public string String {
		get { return this.Source.GetString((uint)this.Integer);  }
	}

	public Function Function {
		get { return this.Source.Functions[this.Integer]; }
	}

	#endregion
}
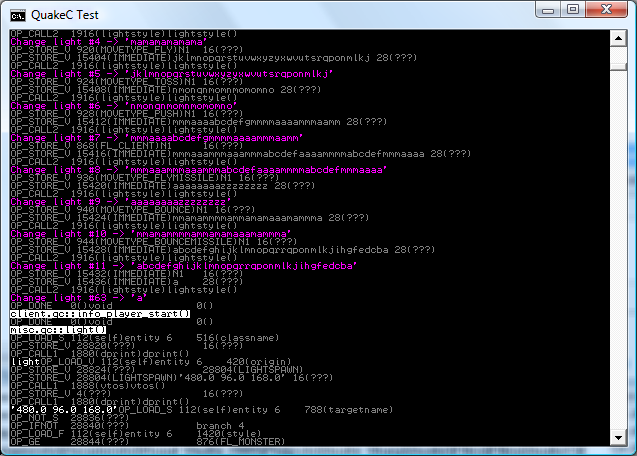
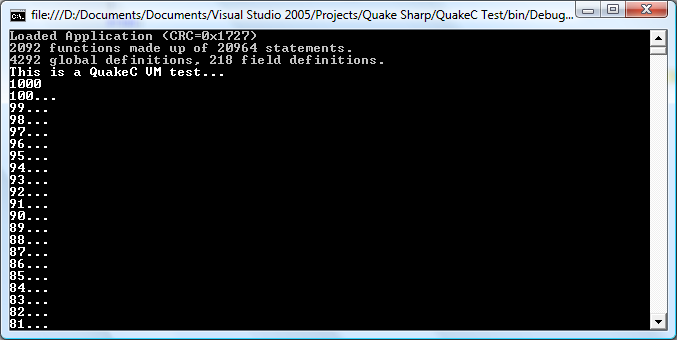
If the offset for a statement is negative in a function, that means that the function being called is an internally-implemented one. The source code for the test application in the screenshot at the top of this entry is as follows:
float testVal;

void() test = {
	dprint("This is a QuakeC VM test...\n");

	testVal = 100;
	dprint(ftos(testVal * 10));
	dprint("\n");

	while (testVal > 0) {
		dprint(ftos(testVal));
		testVal = testVal - 1;
		dprint("...\n");
	}
	dprint("Lift off!");

};
There's a huge amount of work to be done here, especially when it comes to entities (not something I've looked at at all). All I can say is that I'm very thankful that the .qc source code is available and the DOS compiler runs happily under Windows - they're going to be handy for testing.
Quake 2 PVS, Realigned Lightmaps and Colour Lightmaps
Friday, 10th August 2007
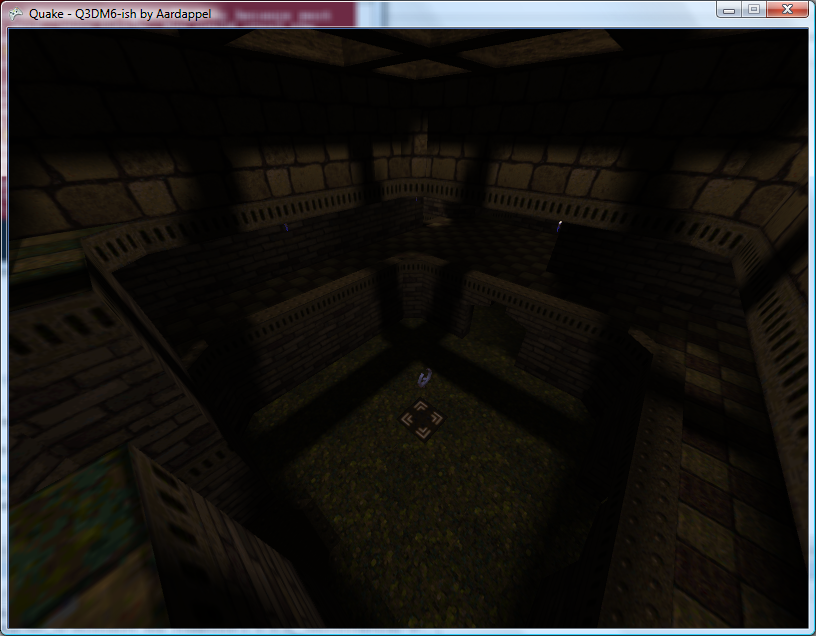
Quake 2 stores its visibility lists differently to Quake 1 - as close leaves on the BSP tree will usually share the same visibility information, the lists are grouped into clusters (Quake 1 stored a visibility list for every leaf). Rather than go from the camera's leaf to find all of the other visible leaves directly, you need to use the leaf's cluster index to look up which other clusters are visible, then search through the other leaves to find out which reference that cluster too.
In a nutshell, I now use the visibility cluster information in the BSP to cull large quantities of hidden geometry, which has raised the framerate from 18FPS (base1.bsp) to about 90FPS.
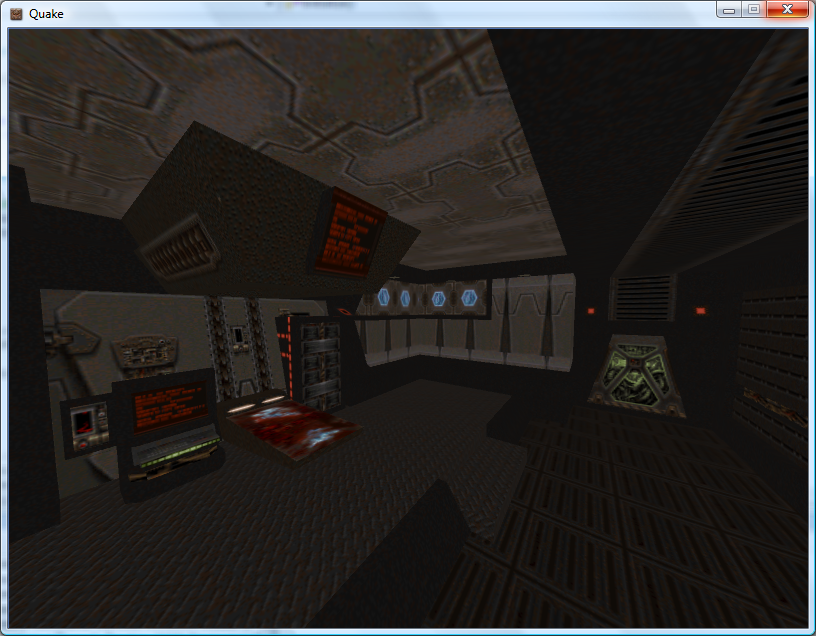
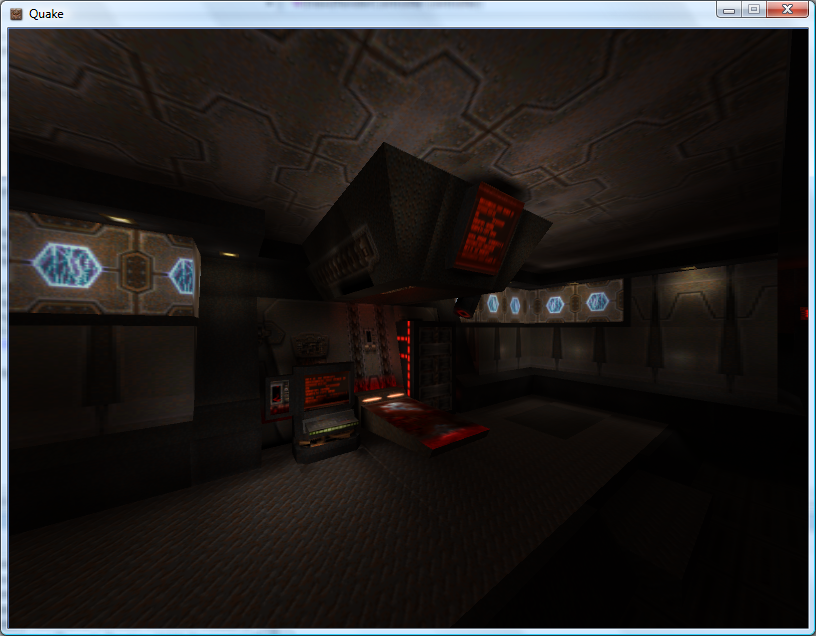
I had a look at the lightmap code again. Some of the lightmaps appeared to be off-centre (most clearly visible when there's a small light bracket on a wall casting a sharp inverted V shadow on the wall underneath it, as the tip of the V drifted to one side). On a whim, I decided that if the size of the lightmap was rounded to the nearest 16 diffuse texture pixels, one could assume that the top-left corner was not at (0,0) but offset by 8 pixels to centre the texture. This is probably utter nonsense, but plugging in the offset results in almost completely smooth lightmaps, like the screenshot above.
Before and after - coloured lightmaps.
I quite like Quake 2's colour lightmaps, and I also quite like the chunky look of the software renderer. I've modified the pixel shader for the best of both worlds. I calculate the three components of the final colour individually, taking the brightness value for the colourmap from one of the three channels in the lightmap.
float4 Result = 1;

ColourMapIndex.y = 1 - tex2D(LightMapTextureSampler, vsout.LightMapTextureCoordinate).r;
Result.r = tex2D(ColourMapSampler, ColourMapIndex).r;

ColourMapIndex.y = 1 - tex2D(LightMapTextureSampler, vsout.LightMapTextureCoordinate).g;
Result.g = tex2D(ColourMapSampler, ColourMapIndex).g;

ColourMapIndex.y = 1 - tex2D(LightMapTextureSampler, vsout.LightMapTextureCoordinate).b;
Result.b = tex2D(ColourMapSampler, ColourMapIndex).b;

return Result;
Journals need more animated GIFs
Thursday, 9th August 2007

Pixel shaders are fun.
I've implemented support for decoding mip-maps from mip textures (embedded in the BSP) and from WAL files (external).
Now, I know that non-power-of-two textures are naughty. Quake uses a number of them, and when loading textures previously I've just let Direct3D do its thing which has appeared to work well.
However, now that I'm directly populating the entire texture, mip-maps and all, I found that Texture2D.SetData was throwing exceptions when I was attempting to shoe-horn in a non-power-of-two texture. Strange. I hacked together a pair of extensions to the Picture class - GetResized(width, height) which returns a resized picture (nearest-neighbour, naturally) - and GetPowerOfTwo(), which returns a picture scaled up to the next power-of-two size if required.
All textures now load correctly, and I can't help but notice that the strangely distorted textures - which I'd put down to crazy texture coordinates - now render correctly! It turns out that all of the distorted textures were non-power-of-two.
The screenshots above demonstrate that Quake 2 is also handled by the software-rendering simulation. The current effect file for the world is as follows:
uniform extern float4x4 WorldViewProj : WORLDVIEWPROJECTION;

uniform extern float Time;
uniform extern bool Rippling;

uniform extern texture DiffuseTexture;
uniform extern texture LightMapTexture;

uniform extern texture ColourMap;

struct VS_OUTPUT {
	float4 Position : POSITION;
	float2 DiffuseTextureCoordinate : TEXCOORD0;
	float2 LightMapTextureCoordinate : TEXCOORD1;
	float3 SourcePosition: TEXCOORD2;
};

sampler DiffuseTextureSampler = sampler_state {
	texture = <DiffuseTexture>;
	mipfilter = POINT;
};

sampler LightMapTextureSampler = sampler_state {
	texture = <LightMapTexture>;
	mipfilter = LINEAR;
	minfilter = LINEAR;
	magfilter = LINEAR;
};

sampler ColourMapSampler = sampler_state {
	texture = <ColourMap>;
	addressu = CLAMP;
	addressv = CLAMP;
};

VS_OUTPUT Transform(float4 Position : POSITION0, float2 DiffuseTextureCoordinate : TEXCOORD0, float2 LightMapTextureCoordinate : TEXCOORD1) {

	VS_OUTPUT Out = (VS_OUTPUT)0;

	// Transform the input vertex position:
	Out.Position = mul(Position, WorldViewProj);

	// Copy the other values straight into the output for use in the pixel shader.
	Out.DiffuseTextureCoordinate = DiffuseTextureCoordinate;
	Out.LightMapTextureCoordinate = LightMapTextureCoordinate;
	Out.SourcePosition = Position;

	return Out;
}

float4 ApplyTexture(VS_OUTPUT vsout) : COLOR {

	// Start with the original diffuse texture coordinate:
	float2 DiffuseCoord = vsout.DiffuseTextureCoordinate;

	// If the surface is "rippling", wobble the texture coordinate.
	if (Rippling) {
		float2 RippleOffset = { sin(Time + vsout.SourcePosition.x / 32) / 8, cos(Time + vsout.SourcePosition.z / 32) / 8 };
		DiffuseCoord += RippleOffset;
	}

	// Calculate the colour map look-up coordinate from the diffuse and lightmap textures:
	float2 ColourMapIndex = {
		tex2D(DiffuseTextureSampler, DiffuseCoord).a,
		1 - (float)tex2D(LightMapTextureSampler, vsout.LightMapTextureCoordinate).rgba
	};

	// Look up and return the value from the colour map.
	return tex2D(ColourMapSampler, ColourMapIndex).rgba;
}

technique TransformAndTexture {
	pass P0 {
		vertexShader = compile vs_2_0 Transform();
		pixelShader  = compile ps_2_0 ApplyTexture();
	}
}
It would no doubt be faster to have two techniques; one for rippling surfaces and one for still surfaces. It is, however, easier to use the above and switch the rippling on and off when required (rather than group surfaces and switch techniques). Given that the framerate rises from ~135FPS to ~137FPS on my video card if I remove the ripple effect altogether, it doesn't seem worth it.
Sorting out the order in which polygons are drawn looks like it's going to get important, as I need to support alpha-blended surfaces for Quake 2, and there are some nasty areas of Z-fighting cropping up.
Alpha-blending in 8-bit? Software Quake didn't support any sort of alpha blending (hence the need to re-vis levels for use with Quake GL as underneath the opaque waters were marked as invisible), and Quake 2 has a data file that maps 16-bit colour values to 8-bit palette indices. Quake 2 also had a "stipple alpha" mode used a dither pattern to handle the two translucent surface opacities (1/3 and 2/3 ratios).
Shaders
Tuesday, 7th August 2007
Following sirob's prompting, I dropped the BasicEffect for rendering and rolled my own effect. After seeing the things that could be done with them (pixel and vertex shaders) I'd assumed they'd be hard to put together, and that I'd need to change my code significantly.
In reality all I've had to do is copy and paste the sample from the SDK documentation, load it into the engine (via the content pipeline), create a custom vertex declaration to handle two sets of texture coordinates (diffuse and lightmap) and strip out all of the duplicate code I had for creating and rendering from two vertex arrays.
[StructLayout(LayoutKind.Sequential)]
public struct VertexPositionTextureDiffuseLightMap {

	public Xna.Vector3 Position;
	public Xna.Vector2 DiffuseTextureCoordinate;
	public Xna.Vector2 LightMapTextureCoordinate;

	public VertexPositionTextureDiffuseLightMap(Xna.Vector3 position, Xna.Vector2 diffuse, Xna.Vector2 lightMap) {
		this.Position = position;
		this.DiffuseTextureCoordinate = diffuse;
		this.LightMapTextureCoordinate = lightMap;
	}

	public readonly static VertexElement[] VertexElements = new VertexElement[]{
		new VertexElement(0, 0, VertexElementFormat.Vector3, VertexElementMethod.Default, VertexElementUsage.Position, 0),
		new VertexElement(0, 12, VertexElementFormat.Vector2, VertexElementMethod.Default, VertexElementUsage.TextureCoordinate, 0),
		new VertexElement(0, 20, VertexElementFormat.Vector2, VertexElementMethod.Default, VertexElementUsage.TextureCoordinate, 1)
	};

}
uniform extern float4x4 WorldViewProj : WORLDVIEWPROJECTION;

uniform extern texture DiffuseTexture;
uniform extern texture LightMapTexture;

uniform extern float Time;

struct VS_OUTPUT {
    float4 Position : POSITION;
    float2 DiffuseTextureCoordinate : TEXCOORD0;
    float2 LightMapTextureCoordinate : TEXCOORD1;
};

sampler DiffuseTextureSampler = sampler_state {
    Texture = <DiffuseTexture>;
    mipfilter = LINEAR;
};

sampler LightMapTextureSampler = sampler_state {
	Texture = <LightMapTexture>;
	mipfilter = LINEAR;
};

VS_OUTPUT Transform(float4 Position : POSITION, float2 DiffuseTextureCoordinate : TEXCOORD0, float2 LightMapTextureCoordinate : TEXCOORD1) {

    VS_OUTPUT Out = (VS_OUTPUT)0;

    Out.Position = mul(Position, WorldViewProj);
    Out.DiffuseTextureCoordinate = DiffuseTextureCoordinate;
    Out.LightMapTextureCoordinate = LightMapTextureCoordinate;

    return Out;
}

float4 ApplyTexture(VS_OUTPUT vsout) : COLOR {
	float4 DiffuseColour = tex2D(DiffuseTextureSampler, vsout.DiffuseTextureCoordinate).rgba;
	float4 LightMapColour = tex2D(LightMapTextureSampler, vsout.LightMapTextureCoordinate).rgba;
    return DiffuseColour * LightMapColour;
}

technique TransformAndTexture {
    pass P0 {
        vertexShader = compile vs_2_0 Transform();
        pixelShader  = compile ps_2_0 ApplyTexture();
    }
}
Of course, now I have that up and running I might as well have a play with it...
By adding up and dividing the individual RGB components of the lightmap texture by three you can simulate the monochromatic lightmaps used by Quake 2's software renderer. Sadly I know not of a technique to go the other way and provide colourful lightmaps for Quake 1. Not very interesting, though.
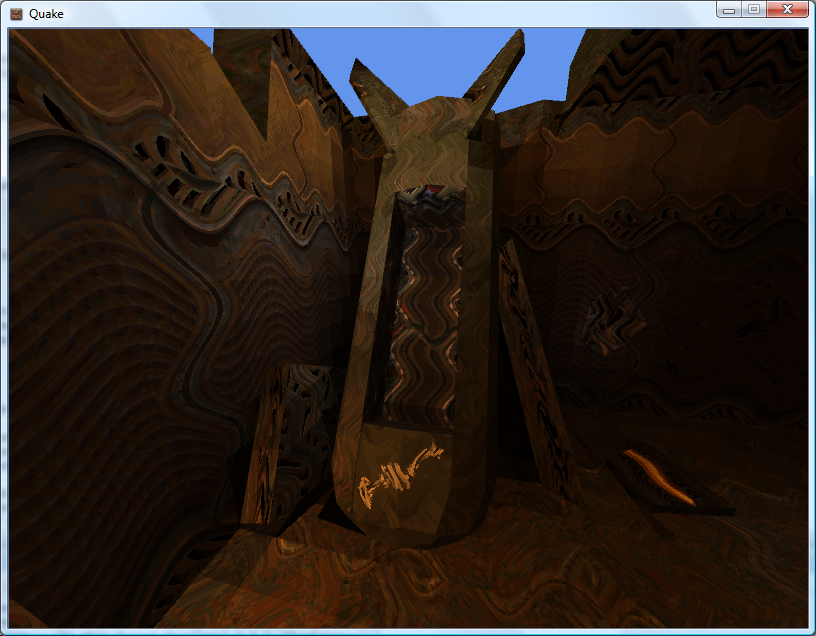
I've always wanted to do something with pixel shaders as you get to play with tricks that are a given in software rendering with the speed of dedicated hardware acceleration. I get the feeling that the effect (or a variation of it, at least) will be handy for watery textures.
float4 ApplyTexture(VS_OUTPUT vsout) : COLOR {

	float2 RippledTexture = vsout.DiffuseTextureCoordinate;

	RippledTexture.x += sin(vsout.DiffuseTextureCoordinate.y * 16 + Time) / 16;
	RippledTexture.y += sin(vsout.DiffuseTextureCoordinate.x * 16 + Time) / 16;

	float4 DiffuseColour = tex2D(DiffuseTextureSampler, RippledTexture).rgba;
	float4 LightMapColour = tex2D(LightMapTextureSampler, vsout.LightMapTextureCoordinate).rgba;

	return DiffuseColour * LightMapColour;

}
My code is no doubt suboptimal (and downright stupid).
Naturally, I needed to try and duplicate Scet's software rendering simulation trick.
The colour map (gfx/colormap.lmp) is a 256×64 array of bytes. Each byte is an index to a colour palette entry, on the X axis is the colour and on the Y axis is the brightness: ie, RGBColour = Palette[ColourMap[DiffuseColour, Brightness]]. I cram the original diffuse colour palette index into the (unused) alpha channel of the ARGB texture, and leave the lightmaps untouched.
float2 LookUp = 0;
LookUp.x = tex2D(DiffuseTextureSampler, vsout.DiffuseTextureCoordinate).a;
LookUp.y = (1 - tex2D(LightMapTextureSampler, vsout.LightMapTextureCoordinate).r) / 4;
return tex2D(ColourMapTextureSampler, LookUp);

As I'm not loading the mip-maps (and am letting Direct3D handle generation of mip-maps for me) I have to disable mip-mapping for the above to work, as otherwise you'd end up with non-integral palette indices. The results are therefore a bit noisier in the distance than in vanilla Quake, but I like the 8-bit palette look. At least the fullbright colours work.
Less Colourful Quake 2
Monday, 6th August 2007

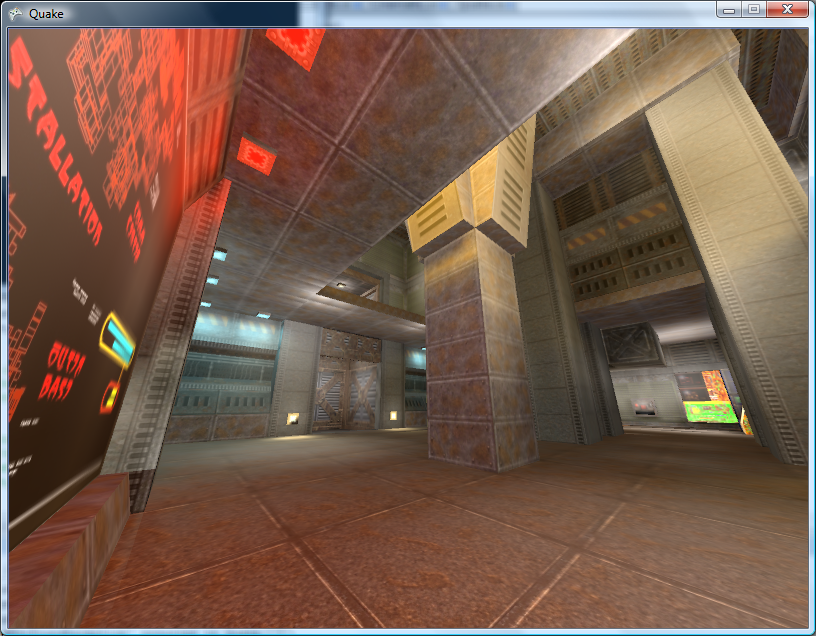
I've transferred the BSP rendering code to use the new level loading code, so I can now display correctly-coloured Quake 2 levels. The Quake stuff is in its own assembly, and is shared by the WinForms resource browser project and the XNA renderer.
I'm also now applying lightmaps via multiplication rather than addition, so they look significantly better.
A shader solution would be optimal. I'm currently just drawing the geometry twice, the second time with some alpha blending enabled.
Keyboard Handler Fix
Friday, 3rd August 2007
ArchG indicated a bug in the TextInputHandler class I posted a while back - no reference to the delegate instance used for the unmanaged callback is held, so as soon as the garbage collector kicks in things go rather horribly wrong.
/* * * * * * * * * * * * * * * * * * * * * * * * * * * * * * * * * * * * * * * * * * * * * * *
 * XnaTextInput.TextInputHandler - benryves@benryves.com                                     *
 * * * * * * * * * * * * * * * * * * * * * * * * * * * * * * * * * * * * * * * * * * * * * * *
 * This is quick and very, VERY dirty.                                                       *
 * It uses Win32 message hooks to grab messages (as we don't get a nicely wrapped WndProc).  *
 * I couldn't get WH_KEYBOARD to work (accessing the data via its pointer resulted in access *
 * violation exceptions), nor could I get WH_CALLWNDPROC to work.                            *
 * Maybe someone who actually knows what they're  doing can work something out that's not so *
 * kludgy.                                                                                   *
 * * * * * * * * * * * * * * * * * * * * * * * * * * * * * * * * * * * * * * * * * * * * * * *
 * This quite obviously relies on a Win32 nastiness, so this is for Windows XNA games only!  *
 * * * * * * * * * * * * * * * * * * * * * * * * * * * * * * * * * * * * * * * * * * * * * * */

#region Using Statements
using System;
using System.Runtime.InteropServices;
using System.Windows.Forms; // This class exposes WinForms-style key events.
#endregion

namespace XnaTextInput {

	/// <summary>
	/// A class to provide text input capabilities to an XNA application via Win32 hooks.
	/// </summary>
	class TextInputHandler : IDisposable {

		#region Win32

		/// <summary>
		/// Types of hook that can be installed using the SetWindwsHookEx function.
		/// </summary>
		public enum HookId {
			WH_CALLWNDPROC = 4,
			WH_CALLWNDPROCRET = 12,
			WH_CBT = 5,
			WH_DEBUG = 9,
			WH_FOREGROUNDIDLE = 11,
			WH_GETMESSAGE = 3,
			WH_HARDWARE = 8,
			WH_JOURNALPLAYBACK = 1,
			WH_JOURNALRECORD = 0,
			WH_KEYBOARD = 2,
			WH_KEYBOARD_LL = 13,
			WH_MAX = 11,
			WH_MAXHOOK = WH_MAX,
			WH_MIN = -1,
			WH_MINHOOK = WH_MIN,
			WH_MOUSE_LL = 14,
			WH_MSGFILTER = -1,
			WH_SHELL = 10,
			WH_SYSMSGFILTER = 6,
		};

		/// <summary>
		/// Window message types.
		/// </summary>
		/// <remarks>Heavily abridged, naturally.</remarks>
		public enum WindowMessage {
			WM_KEYDOWN = 0x100,
			WM_KEYUP = 0x101,
			WM_CHAR = 0x102,
		};

		/// <summary>
		/// A delegate used to create a hook callback.
		/// </summary>
		public delegate int GetMsgProc(int nCode, int wParam, ref Message msg);

		/// <summary>
		/// Install an application-defined hook procedure into a hook chain.
		/// </summary>
		/// <param name="idHook">Specifies the type of hook procedure to be installed.</param>
		/// <param name="lpfn">Pointer to the hook procedure.</param>
		/// <param name="hmod">Handle to the DLL containing the hook procedure pointed to by the lpfn parameter.</param>
		/// <param name="dwThreadId">Specifies the identifier of the thread with which the hook procedure is to be associated.</param>
		/// <returns>If the function succeeds, the return value is the handle to the hook procedure. Otherwise returns 0.</returns>
		[DllImport("user32.dll", EntryPoint = "SetWindowsHookExA")]
		public static extern IntPtr SetWindowsHookEx(HookId idHook, GetMsgProc lpfn, IntPtr hmod, int dwThreadId);

		/// <summary>
		/// Removes a hook procedure installed in a hook chain by the SetWindowsHookEx function.
		/// </summary>
		/// <param name="hHook">Handle to the hook to be removed. This parameter is a hook handle obtained by a previous call to SetWindowsHookEx.</param>
		/// <returns>If the function fails, the return value is zero. To get extended error information, call GetLastError.</returns>
		[DllImport("user32.dll")]
		public static extern int UnhookWindowsHookEx(IntPtr hHook);

		/// <summary>
		/// Passes the hook information to the next hook procedure in the current hook chain.
		/// </summary>
		/// <param name="hHook">Ignored.</param>
		/// <param name="ncode">Specifies the hook code passed to the current hook procedure.</param>
		/// <param name="wParam">Specifies the wParam value passed to the current hook procedure.</param>
		/// <param name="lParam">Specifies the lParam value passed to the current hook procedure.</param>
		/// <returns>This value is returned by the next hook procedure in the chain.</returns>
		[DllImport("user32.dll")]
		public static extern int CallNextHookEx(int hHook, int ncode, int wParam, ref Message lParam);

		/// <summary>
		/// Translates virtual-key messages into character messages.
		/// </summary>
		/// <param name="lpMsg">Pointer to an Message structure that contains message information retrieved from the calling thread's message queue.</param>
		/// <returns>If the message is translated (that is, a character message is posted to the thread's message queue), the return value is true.</returns>
		[DllImport("user32.dll")]
		public static extern bool TranslateMessage(ref Message lpMsg);


		/// <summary>
		/// Retrieves the thread identifier of the calling thread.
		/// </summary>
		/// <returns>The thread identifier of the calling thread.</returns>
		[DllImport("kernel32.dll")]
		public static extern int GetCurrentThreadId();

		#endregion

		#region Hook management and class construction.

		/// <summary>Handle for the created hook.</summary>
		private readonly IntPtr HookHandle;

		private readonly GetMsgProc ProcessMessagesCallback;

		/// <summary>Create an instance of the TextInputHandler.</summary>
		/// <param name="whnd">Handle of the window you wish to receive messages (and thus keyboard input) from.</param>
		public TextInputHandler(IntPtr whnd) {
			// Create the delegate callback:
			this.ProcessMessagesCallback = new GetMsgProc(ProcessMessages);
			// Create the keyboard hook:
			this.HookHandle = SetWindowsHookEx(HookId.WH_GETMESSAGE, this.ProcessMessagesCallback, IntPtr.Zero, GetCurrentThreadId());
		}

		public void Dispose() {
			// Remove the hook.
			if (this.HookHandle != IntPtr.Zero) UnhookWindowsHookEx(this.HookHandle);
		}

		#endregion

		#region Message processing

		private int ProcessMessages(int nCode, int wParam, ref Message msg) {
			// Check if we must process this message (and whether it has been retrieved via GetMessage):
			if (nCode == 0 && wParam == 1) {

					// We need character input, so use TranslateMessage to generate WM_CHAR messages.
					TranslateMessage(ref msg);

					// If it's one of the keyboard-related messages, raise an event for it:
					switch ((WindowMessage)msg.Msg) {
						case WindowMessage.WM_CHAR:
							this.OnKeyPress(new KeyPressEventArgs((char)msg.WParam));
							break;
						case WindowMessage.WM_KEYDOWN:
							this.OnKeyDown(new KeyEventArgs((Keys)msg.WParam));
							break;
						case WindowMessage.WM_KEYUP:
							this.OnKeyUp(new KeyEventArgs((Keys)msg.WParam));
							break;
					}

			}

			// Call next hook in chain:
			return CallNextHookEx(0, nCode, wParam, ref msg);
		}

		#endregion

		#region Events

		public event KeyEventHandler KeyUp;
		protected virtual void OnKeyUp(KeyEventArgs e) {
			if (this.KeyUp != null) this.KeyUp(this, e);
		}

		public event KeyEventHandler KeyDown;
		protected virtual void OnKeyDown(KeyEventArgs e) {
			if (this.KeyDown != null) this.KeyDown(this, e);
		}

		public event KeyPressEventHandler KeyPress;
		protected virtual void OnKeyPress(KeyPressEventArgs e) {
			if (this.KeyPress != null) this.KeyPress(this, e);
		}

		#endregion
	}
}
I wrote a crude ZSoft PCX loader (only handles 8-bit per plane, single-plane images, which is sufficient for Quake 2).
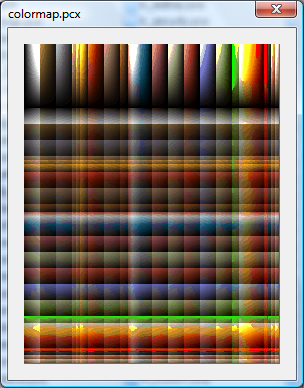
Using this loader I found colormap.pcx, which appears to perform the job of palette and colour map for Quake II.
.wal files now open with the correct palette. I've also copied over most of the BSP loading code, but it needs a good going-over to make it slightly more sane (especially where the hacks for Quake II support have been added).
Loader Change
Thursday, 2nd August 2007
I've started rewriting the underlying resource loading code to better handle multiple versions of the game.
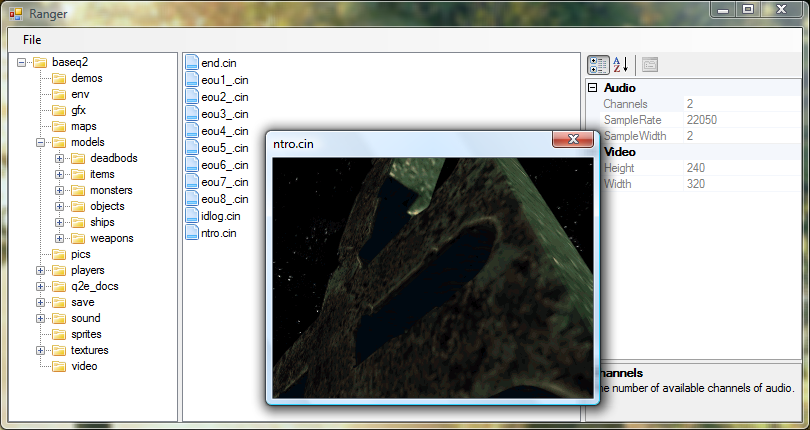
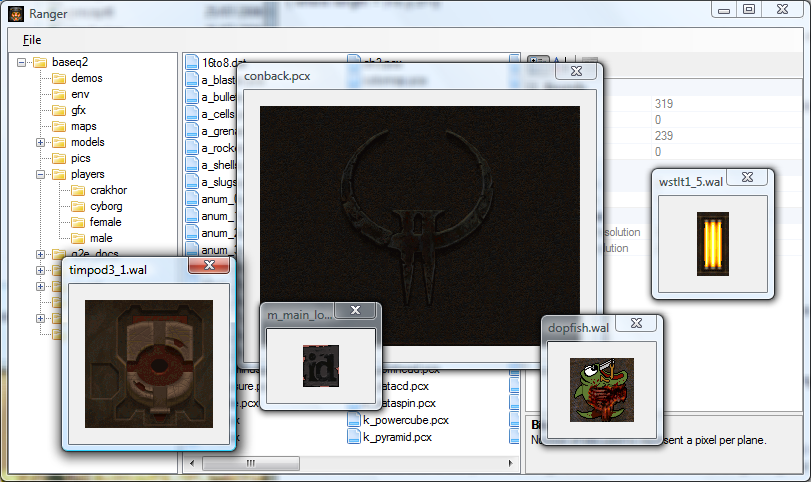
To help with this I'm writing a WinForms-based resource browser.
(That's the only real Quake-related change visible in the above screenshot. I've written a cinematic (.cin, used in Quake 2) loader).
To aid loading resources I've added a number of new generic types. For example, the Picture class always represents a 32-bit per pixel ARGB 2D picture. The decoders for various formats will always have access to the resource manager, so they can request palette information if they need it. To further aid issues, there are some handy interfaces that a specific format class can implement - for example, a class (such as WallTexture for handling .wal files) implementing IPictureLoader will always have a GetPicture() method.
The loader classes are also given attributes specifying which file extensions are handled. (This project uses quite a bit of reflection now). The only issue I can see with this are files that use the same extension but have different types, such as the range of .lmp files.
In addition, certain single files within the packages have multiple sub-files (for example, the .wad files in Quake). I'm not sure how I'll handle this, but I'm currently thinking of having the .wad loader implement IPackage so you could access files via gfx/somewad.wad/somefileinthewad, but some files don't have names or extensions.
Quake 2 and Emulation
Wednesday, 1st August 2007
The current design of the Quake project is that there are a bunch of classes in the Data namespace that are used to decode Quake's structures in a fairly brain-dead manner. To do anything useful with it you need to build up your own structures suitable for the way you intend on rendering the level.
The problem comes in when you try to load resources from different versions of Quake. Quake 1 and Quake 2 have quite a few differences. One major one is that every BSP level in Quake contains its own mip textures. You can call a method in the BSP class which returns sane texture coordinates as it can inspect the texture dimensions inside itself. Quake 2 stores all of the textures externally in .wal resources - the BSP class can no longer calculate texture coordinates as it can't work out how large the textures are as it can't see outside itself.
I guess the only sane way to work this out is to hide the native types from the end user and wrap everything up, but I've never liked this much as you might neglect to wrap up something that someone else would find very important, or you do something that is unsuitable for the way they really wanted to work.
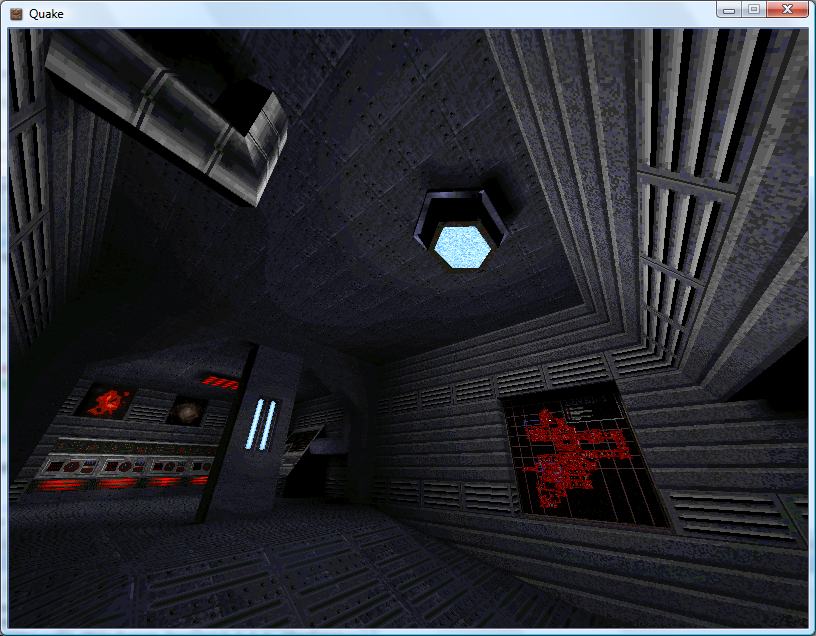
Anyhow. I've hacked around the BSP loader to within an inch of its life and it seems to be (sort of) loading Quake 2 levels for brute-force rendering. Quake 2 boasts truecolour lightmaps, improving the image quality quite significantly!
The truecolour lightmaps show off the Strogg disco lighting to its best effect. One of the problems with the Quake II BSP file format is that the indexing of lumps inside the file has changed. Not good.
That's a bit better. Quake II's lightmaps tend to stick to the red/brown/yellow end of the spectrum, but that is a truecolour set of lightmaps in action!
The lightmaps tend to look a bit grubby where they don't line up between faces. Some trick to join all lightmaps for a plane together into a single texture should do the trick, and reduce the overhead of having to load thousands of tiny textures (which I'm guessing have to be scaled up to a power-of-two). I'll have to look into it.
On to .wal (wall texture) loading - and I can't find a palette anywhere inside the Quake II pack files. I did find a .act (Photoshop palette) that claimed to be for Quake II, but it doesn't quite seem to match. It's probably made up of the right colours, but not in the right order.
Fortunately I have some PAK files with replacement JPEG textures inside them and can load those instead for the moment.


The brightness looks strange due to the bad way I apply the lightmaps - some kludgy forced two-pass affair with alpha blending modes set to something that sort of adds the two textures together in a not-very-convincing manner.
Can anyone recommend a good introduction to shaders for XNA? I'm not really trying to do anything that exciting.
This is a really bad and vague overview of the emulation technique I use in Cogwheel, so I apologise in advance. Emulation itself is very simple when done in the following manner - all you really need is a half-decent knowledge of how the computer you're emulating works at the assembly level. The following is rather Z80-specific.
At the heart of the system is its CPU. This device reads instructions from memory and depending on the value it reads it performs a variety of different actions. It has a small amount of memory inside itself which it uses to store its registers, variables used during execution. For example, the PC register is used as a pointer to the next instruction to fetch and execute from memory, and the SP register points at the top of the stack.
It can interact with the rest of the system in three main ways:
- Read/Write Memory
- Input/Output Hardware
- Interrupt Request
I assume you're familiar with memory. The hardware I refer to are peripheral devices such as video display processors, keypads, sound generators and so on. Data is written to and read from these devices on request. What the hardware device does with that data is up to it. I'll ignore interrupt requests for the moment.
The CPU at an electronic level communicates with memory and hardware using two buses and a handful of control pins. The two buses are the address bus and data bus. The address bus is read-only (when viewed from outside the CPU) and is used to specify a memory address or a hardware port number. It is 16 bits wide, meaning that 64KB memory can be addressed. Due to the design, only the lower 8-bits are normally used for hardware addressing, giving you up to 256 different hardware devices.
The data bus is 8-bits wide (making the Z80 an "8-bit" CPU). It can be read from or written to, depending on the current instruction.
The exact function of these buses - whether you're addressing memory or a hardware device, or whether you're reading or writing - is relayed to the external hardware via some control pins on the CPU itself. The emulator author doesn't really need to emulate these. Rather, we can do something like this:
class CpuEmulator {

	public virtual void WriteMemory(ushort address, byte value) {
		// Write to memory.
	}

	public virtual byte ReadMemory(ushort address) {
		// Read from memory.
		return 0x00;
	}

	public virtual void WriteHardware(ushort address, byte value) {
		// Write to hardware.
	}

	public virtual byte ReadHardware(ushort address) {
		// Read from hardware.
		return 0x00;
	}

}
A computer with a fixed 64KB RAM, keyboard on hardware port 0 and console (for text output) on port 1 might look like this:
class SomeBadComputer : CpuEmulator {

	private byte[] AllMemory = new byte[64 * 1024];

	public override void WriteMemory(ushort address, byte value) {
		AllMemory[address] = value;
	}

	public override byte ReadMemory(ushort address) {
		return AllMemory[address];
	}

	public override void WriteHardware(ushort address, byte value) {
		switch (address & 0xFF) {
			case 1:
				Console.Write((char)value);
				break;
		}
	}

	public override byte ReadHardware(ushort address) {
		switch (address & 0xFF) {
			case 0:
				return (byte)Console.ReadKey();
			default:
				return 0x00;
		}
	}

}
This is all very well, but how does the CPU actually do anything worthwhile?
It needs to read instructions from memory, decode them, and act on them. Suppose our CPU had two registers - 16-bit PC (program counter) and 8-bit A (accumulator) and this instruction set:
00nn   : Load 'nn' into accumulator.
01nn   : Output accumulator to port N.
02nn   : Input to accumulator from port N.
03nnnn : Read from memory address nnnn to accumulator.
04nnnn : Write accumulator to memory address nnnn.
05nnnn : Jump to address nnnn.
Extending the above CpuEmulator class, we could get something like this:
partial class CpuEmulator {

	public ushort RegPC = 0;
	public byte RegA = 0;

	private int CyclesPending = 0;

	public void FetchExecute() {
		switch (ReadMemory(RegPC++)) {
			case 0x00:
				RegA = ReadMemory(RegPC++);
				CyclesPending += 8;
				break;
			case 0x01:
				WriteHardware(ReadMemory(RegPC++), RegA);
				CyclesPending += 8;
				break;
			case 0x02:
				RegA = ReadHardware(ReadMemory(RegPC++));
				CyclesPending += 16;
				break;
			case 0x03:
				RegA = ReadMemory((ushort)(ReadMemory(RegPC++) + ReadMemory(RegPC++) * 256));
				CyclesPending += 16;
				break;
			case 0x04:
				WriteMemory((ushort)(ReadMemory(RegPC++) + ReadMemory(RegPC++) * 256), RegA);
				CyclesPending += 24;
				break;
			case 0x05:
				RegPC = (ushort)(ReadMemory(RegPC++) + ReadMemory(RegPC++) * 256);
				CyclesPending += 24;
				break;
			default:
				// NOP
				CyclesPending += 4;
				break;
		}
	}

}
The CyclesPending variable is used for timing. Instructions take a variable length of time to run (depending on complexity, length of opcode, whether it needs to access memory and so on). This time is typically measured in the number of clock cycles taken for the CPU to execute the instruction.
Using the above CyclesPending += x style one can write a function that will execute a particular number of cycles:
partial class CpuEmulator {

	public void Tick(int cycles) {
		CyclesPending -= cycles;
		while (CyclesPending < 0) FetchExecute();
	}

}
For some truly terrifying code, an oldish version of Cogwheel's instruction decoding switch block. That code has been automatically generated from a text file, I didn't hand-type it all.
Um... that's pretty much all there is. The rest is reading datasheets! Your CPU would need to execute most (if not all) instructions correctly, updating its internal state (and registers) as the hardware would. The non-CPU hardware (video processor, sound processor, controllers and so on) would also need to conform to data reads and writes correctly.
As far as timing goes, various bits of hardware need to run at their own pace. One scanline (of the video processor) is a good value for the Master System. Cogwheel provides this method to run the emulator for a single frame:
public void RunFrame() {
	this.VDP.RunFramePending = false;
	while (!this.VDP.RunFramePending) {
		this.VDP.RasteriseLine();
		this.FetchExecute(228);
	}
}
In the Master System's case, one scanline is displayed every 228 clock cycles. Some programs update the VDP on every scanline (eg changing the background horizontal scroll offset to skew the image in a driving game).
The above is embarrassingly vague, so if anyone is interested enough to want clarification on anything I'd be happy to give it.
Let There Be Lightmaps
Monday, 30th July 2007
Eventually I gave up on my mod (double shotguns).
Heh, you might like the Killer Quake Pack. 
I've added some primitive parsing and have now loaded the string table, instructions, functions and definitions from progs.dat but can't do a lot with them until I work out what the instructions are. Quake offers some predefined functions as well (quite a lot of them) so that'll require quite a lot of porting.
I seem to recall that the original Quake used "Truebright" colours (Which were either the first or last 16 colours in the palette), and these colours weren't affected by lighting. How the rendering was done, I've no idea.
I haven't looked at the data structures so could be making this up entirely: Quake does lighting using a colour map (a 2D structure with colour on one axis and brightness on the other). I'm assuming, therefore, that for the fullbright colours they map to the same colour for all brightnesses, rather than fade to black.
How could you simulate that? I guess that the quickest and dirtiest method would be to load each texture twice, once with the standard palette and once with the palette adjusted for the darkest brightness and use that as a luma texture. I believe Scet did some interesting and clever things with pixel shaders for DOOM, but that would end up playing merry Hell with 24-bit truecolour external textures.
Aye, it's fun.
I think I've cracked those blasted lightmaps.

The lightmaps are small greyscale textures applied to faces to provide high-quality lighting effects with a very small performance overhead. Most of the visible faces have a lightmap.
They are stored in the BSP file. Extracting them has been a little awkward, not helped by a very stupid mistake I made.
Each face has a pointer to its lightmap. To get a meaningful texture out of the BSP we also need to know its width and height, which are based on the bounds of the face's vertices.
However, a lightmap is a 2D texture, and a face occupies three dimensional space. We need to scrap an axis!
Each face is associated with a plane. Each plane has a value which indicates which axis it closest lies orthogonal to. I could use this property to pick the component to discard!
This didn't work too well. Most of the textures were scrambled, and most of them were the same width. This should have rung warning bells, but I ignored this and moved on to other things. The problem was that each face (made up of edges) specifies which of the level's global list of edges comes first, and how many edges it uses (edges are stored consecutively).
// My code looked a bit like this:
for (int i = 0; i < Face.EdgeCount; ++i) {
    Edge = level.Edges[i];
    //
}

// It should have looked like this:
for (int i = 0; i < Face.EdgeCount; ++i) {
    Edge = level.Edges[i + Face.FirstEdge];
    //
}
With that all in position, sane lightmap textures appear as if by magic!
The textures aren't really orientated very well. Some are mirrored, some are rotated - and the textures of some are still clearly the wrong width and height. This 3D-to-2D conversion isn't working very well.
Each face references some texture information, including two vectors denoting the horizontal and vertical axes for aligning the texture. This information can surely also be used to align the lightmaps correctly (where 2D.X = Vector2.Dot(3D, Horizontal), 2D.Y = Vector2.Dot(3D, Vertical))?
I now draw these textures after the main textures and before the luma textures.
Problem: There are typically > 4000 lightmap textures. Rendering all of the lightmaps drops the > 200FPS framerate down to about 35FPS. This isn't great!
Coupling this problem with the other problem that drawing non-world BSP objects (such as ammo crates) isn't very practical at the moment gives me a good excuse to write a new renderer.
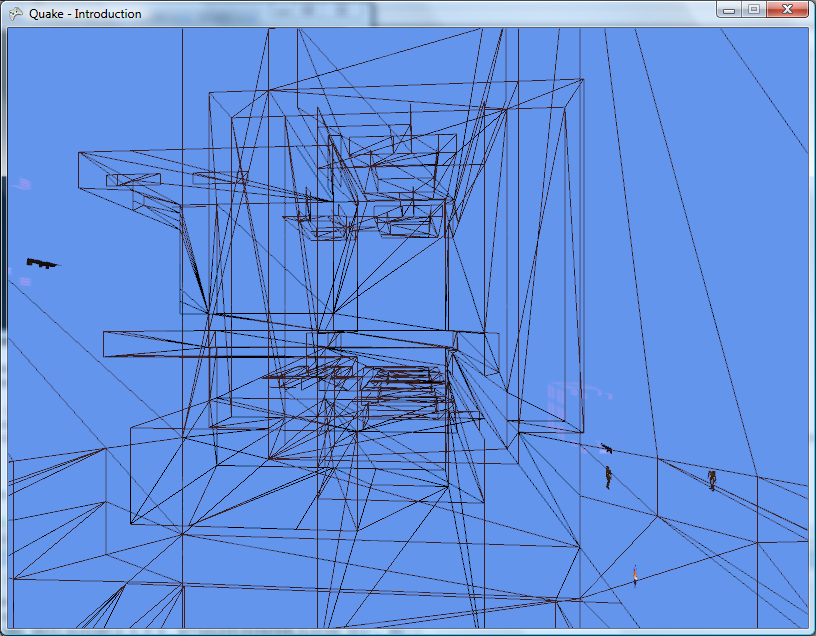
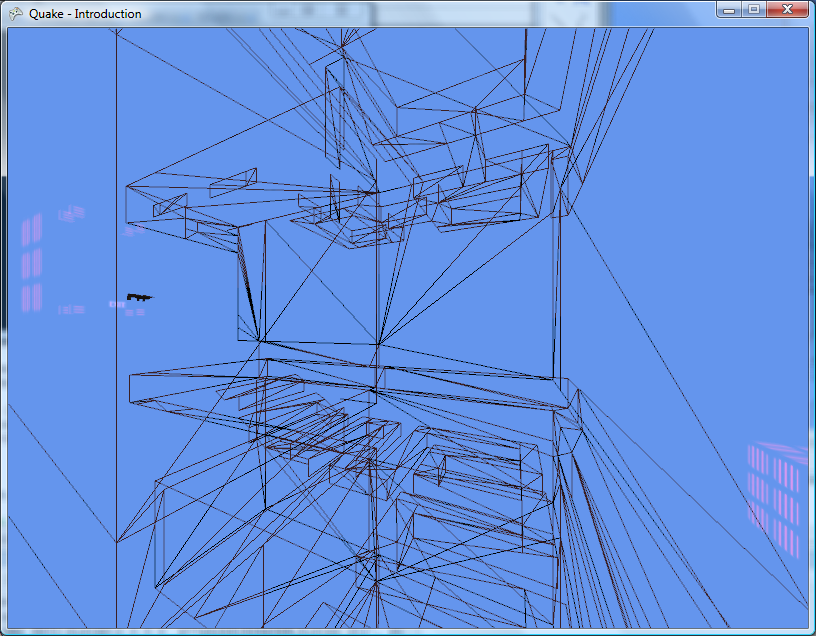
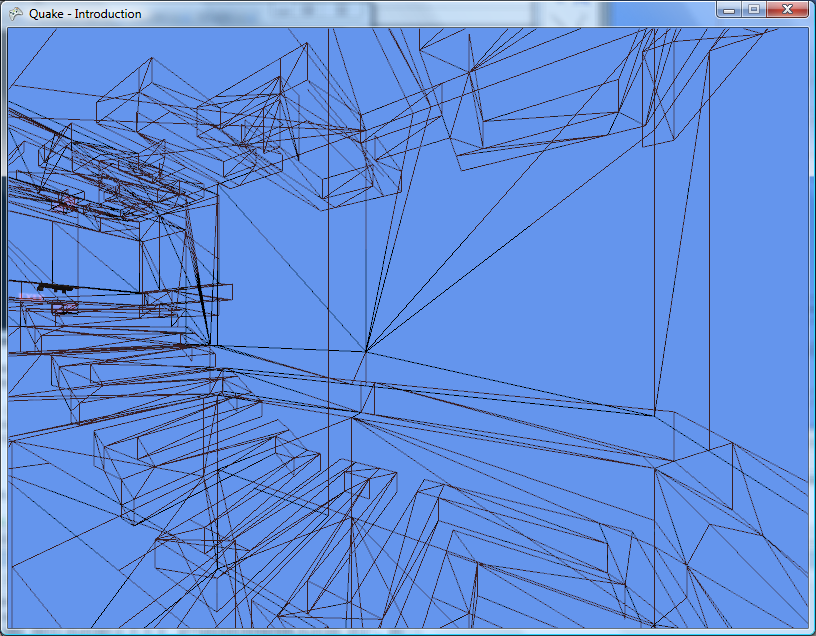
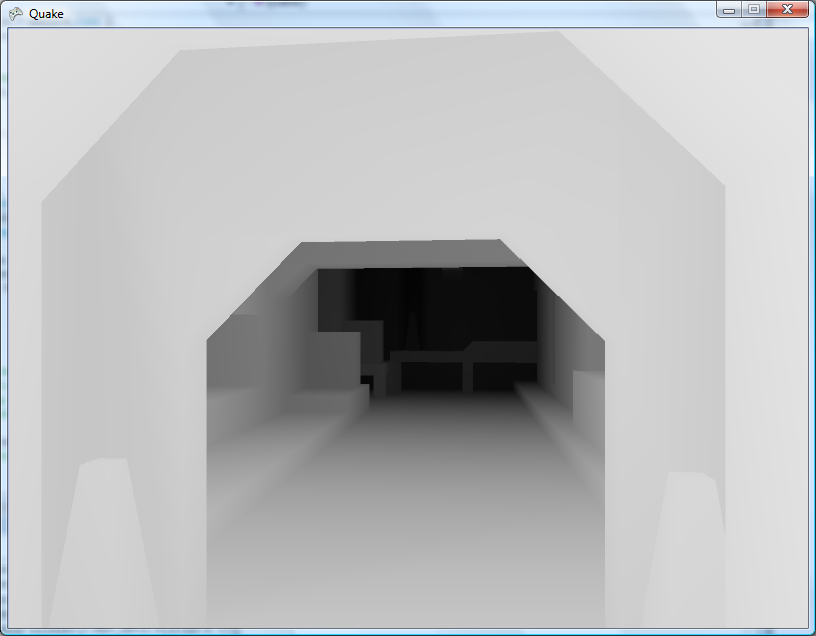
Quake uses a BSP tree to speed up rendering. Each leaf has a compressed visibility list attached to it, indicating which other leaves are visible from that one. Each leaf also contains information about which faces are inside it, and so by working out which leaf the camera is in you can easily get a list of which faces are available.
/// <summary>Gets the leaf that contains a particular position.</summary>
/// <param name="position">The position to find a leaf for.</param>
/// <returns>The containing leaf.</returns>
public Node.Leaf GetLeafFromPosition(Vector3 position) {
	// Start from the model's root node:
	Node SearchCamera = this.RootNode;
	for (; ; ) {
		// Are we in front of or behind the partition plane?
		if (Vector3.Dot(SearchCamera.Partition.Normal, position) > SearchCamera.Partition.D) {
			// We're in front of the partition plane.
			if (SearchCamera.FrontLeaf != null) {
				return SearchCamera.FrontLeaf;
			} else {
				SearchCamera = SearchCamera.FrontNode;
			}
		} else {
			// We're behind the partition plane.
			if (SearchCamera.BackLeaf != null) {
				return SearchCamera.BackLeaf;
			} else {
				SearchCamera = SearchCamera.BackNode;
			}
		}
	}
}
The following three screenshots show a wireframe view of going around a sharp corner using the visibility list information from the level's BSP file.
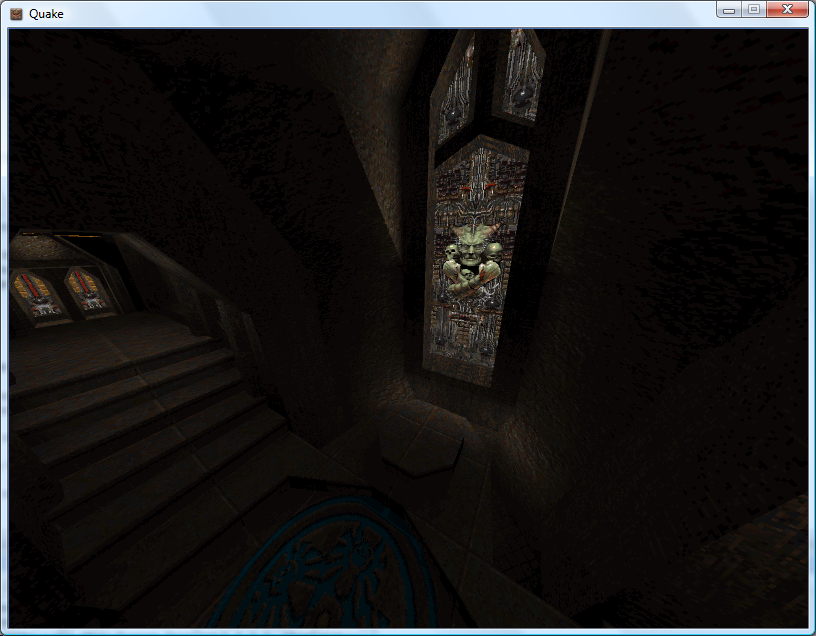
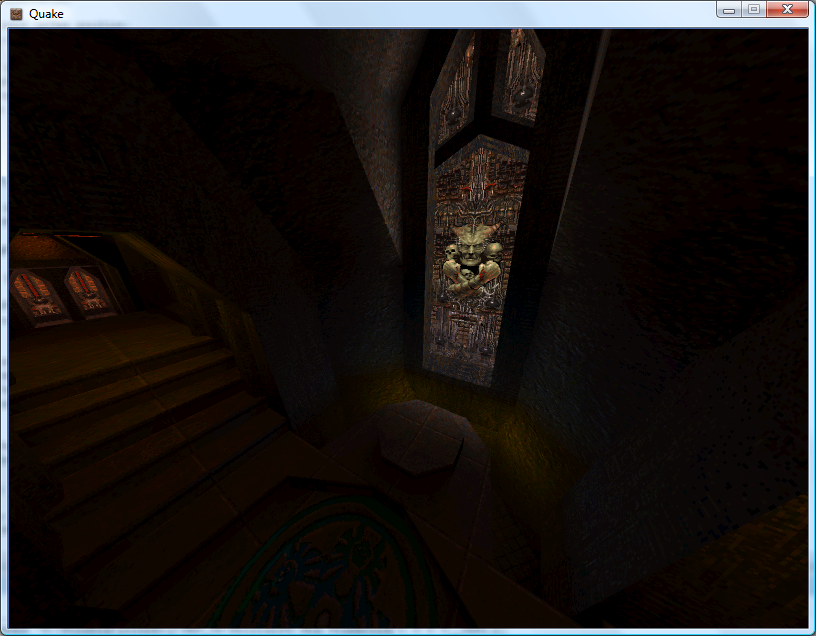
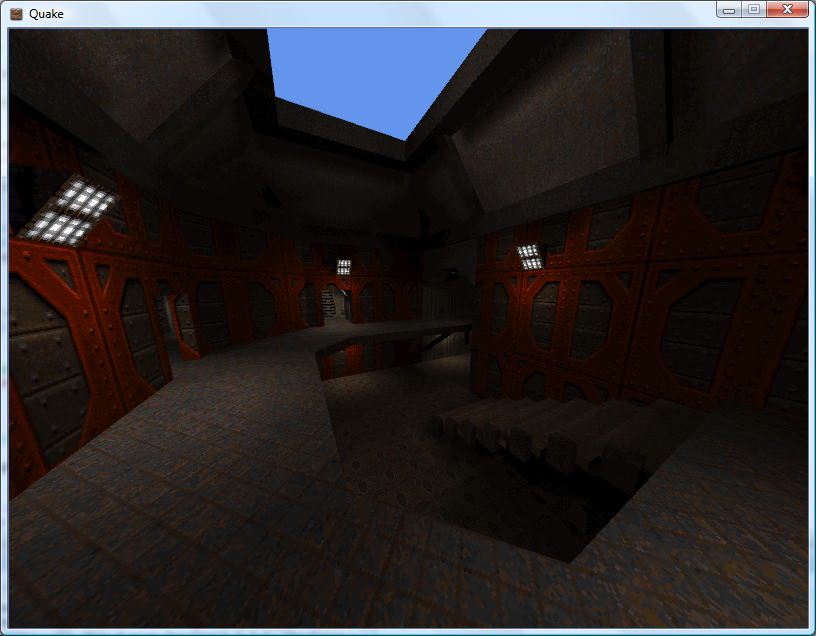
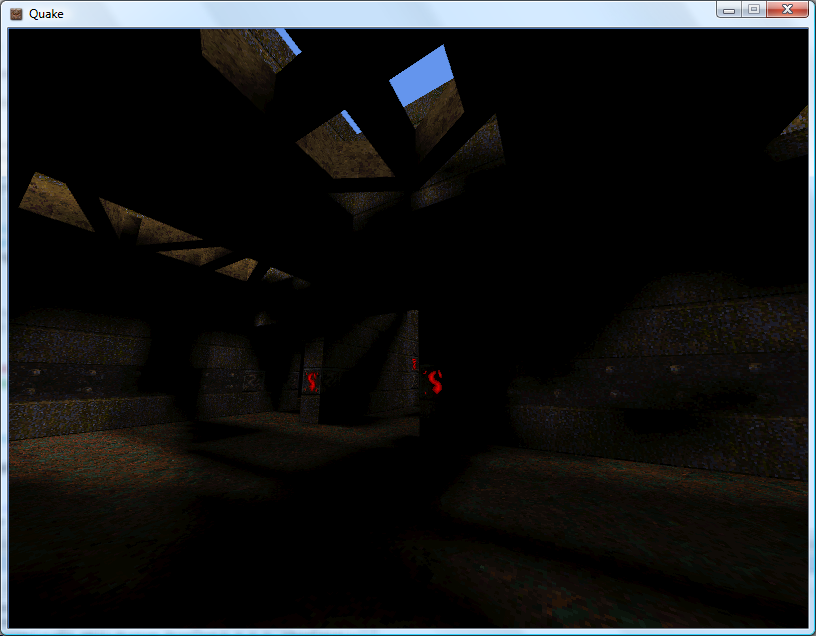
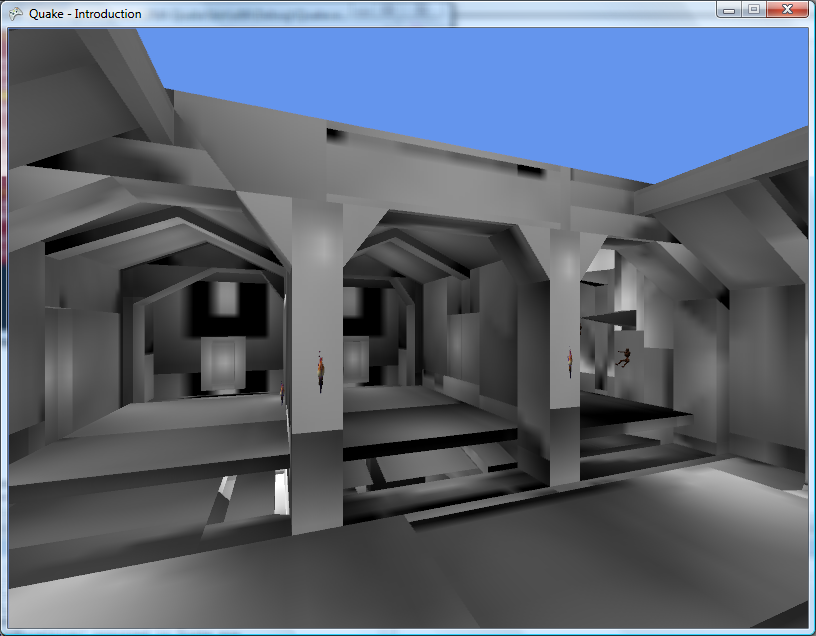
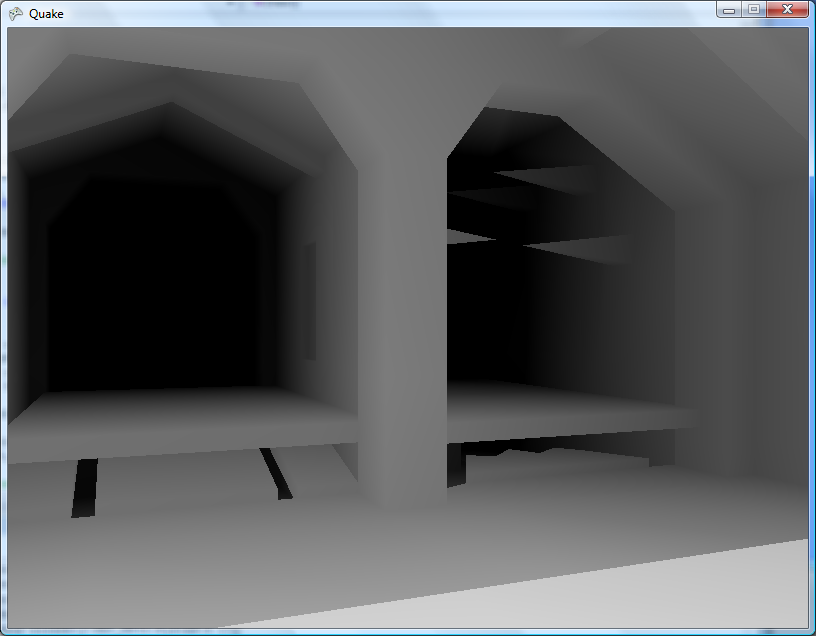
Another fix in the new renderer is the correction of faces that don't have a lightmap texture. Some faces - such as those which are completely dark, or the faces used for the sky texture - don't have such information, and are currently rendered at full brightness.
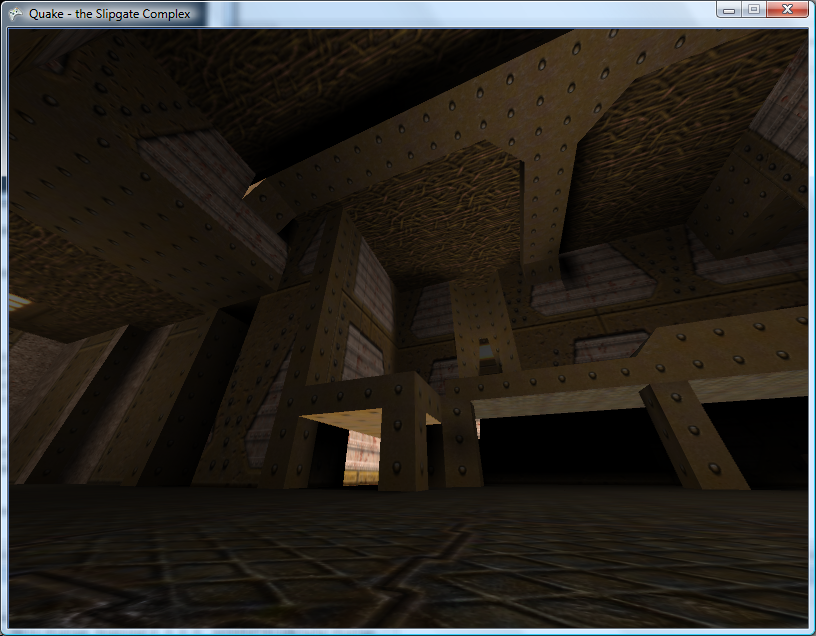
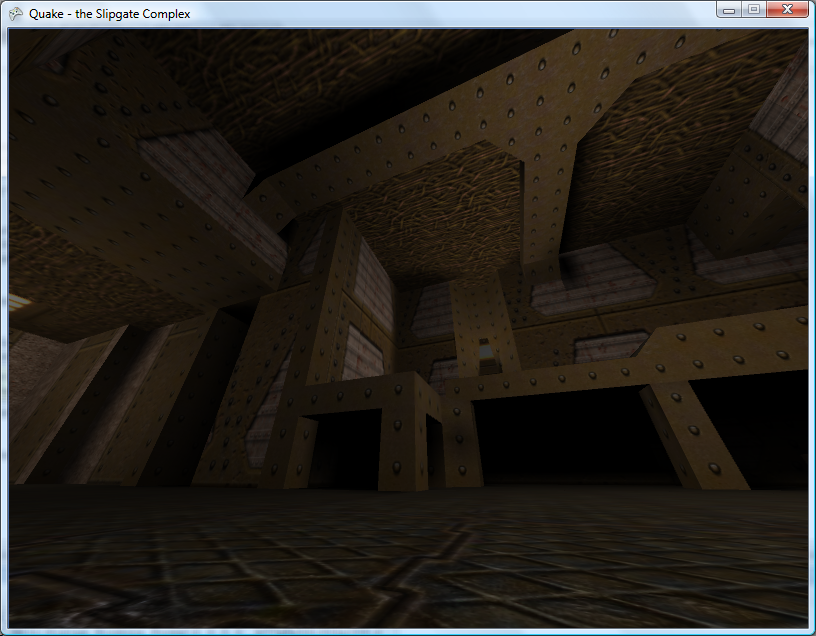
Before and after the fix
If the renderer encounters a lightmap-less face, it enables lighting, sets the ambient light to the face's brightness level, draws the face, then disables lighting again. As you can see from the screenshots this looks a lot better.
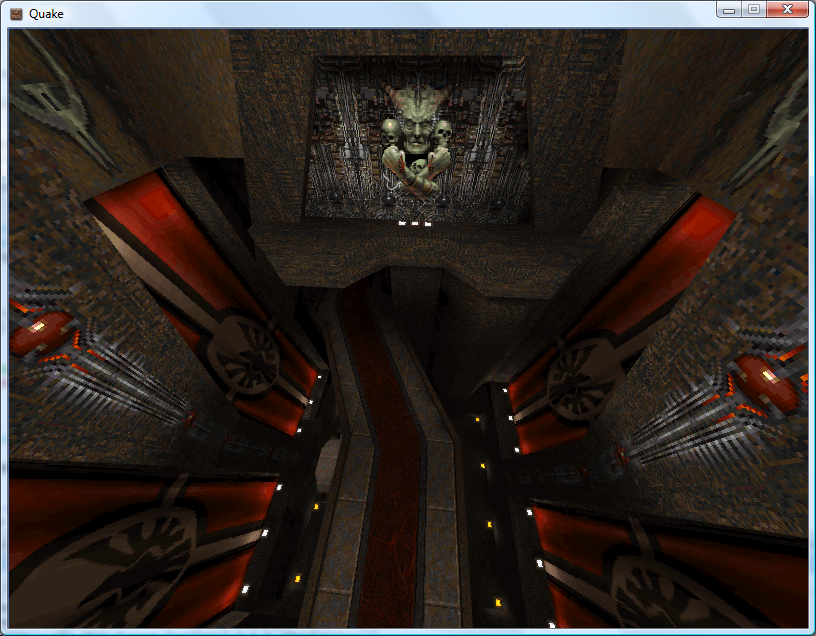
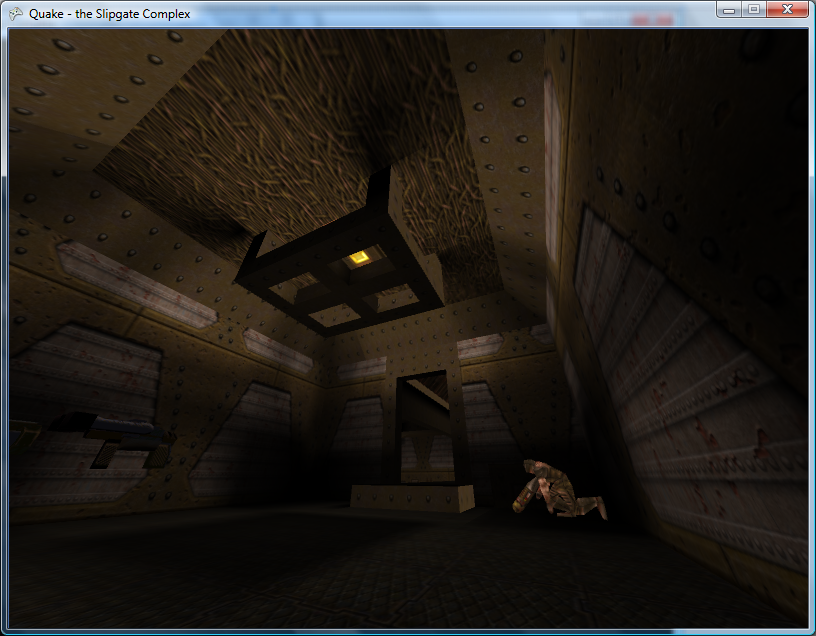
The new renderer not only renders the levels using the BSP tree - it also breaks them down into individual models. A level file contains multiple models. The first model is the main level architecture. Other models form parts of the level that can be moved.
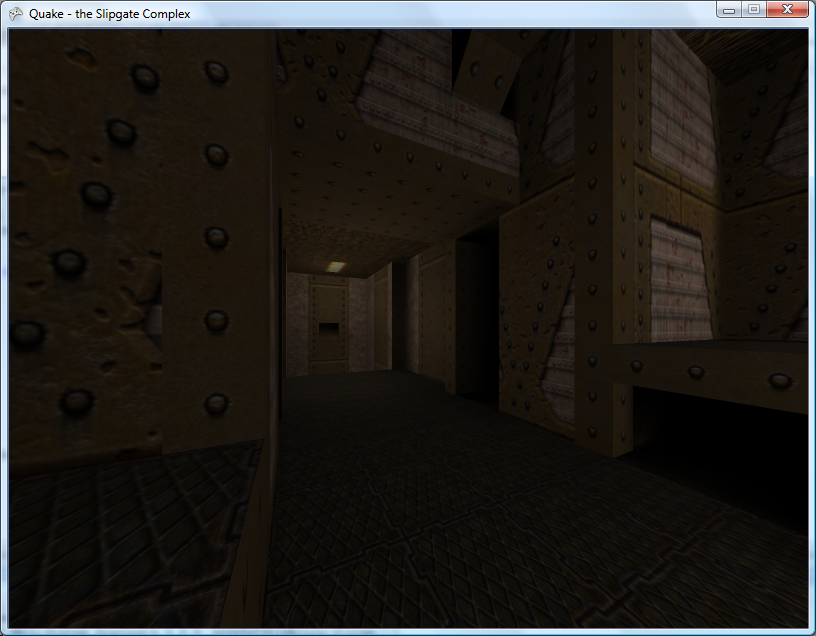
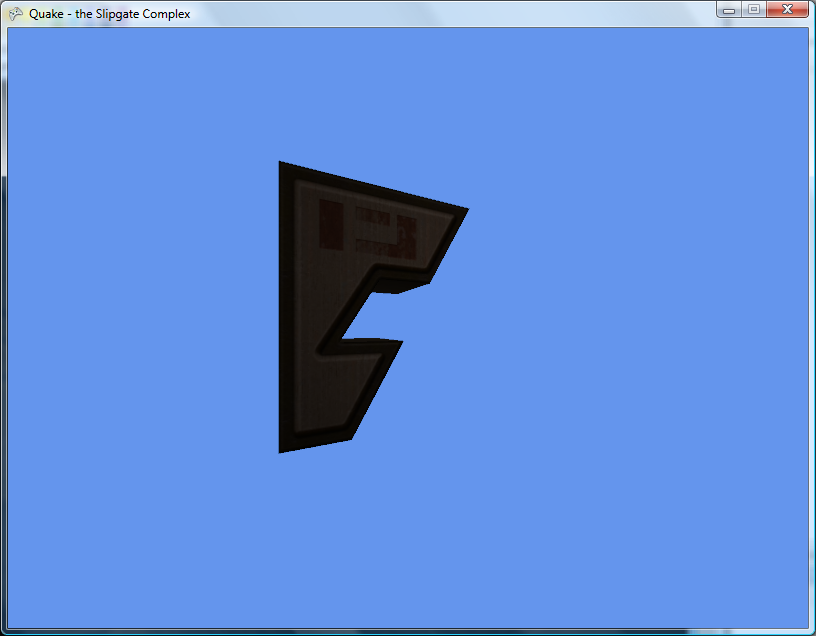
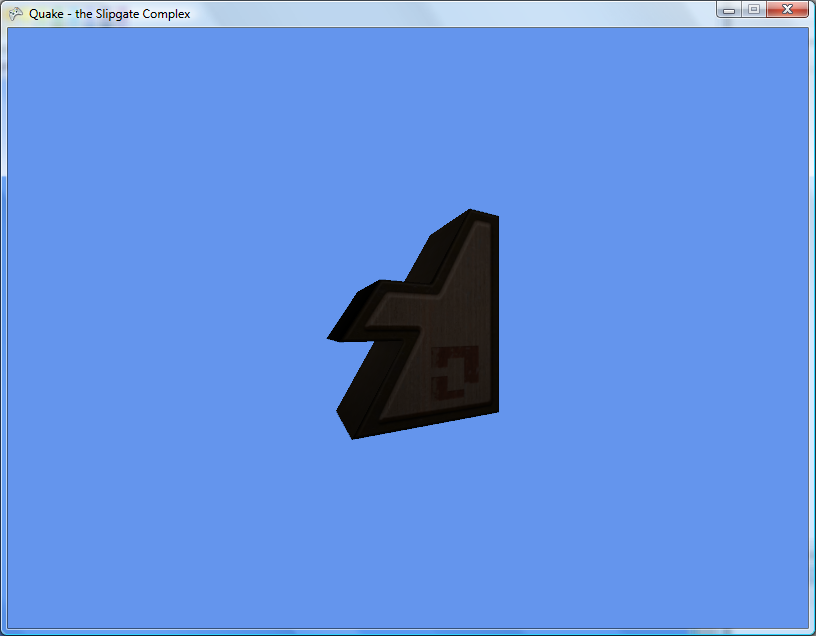
Models 0, 1 and 2 of The Slipgate Complex
Having multiple BSP renderer objects means that I can now render the ammo boxes and health packs.
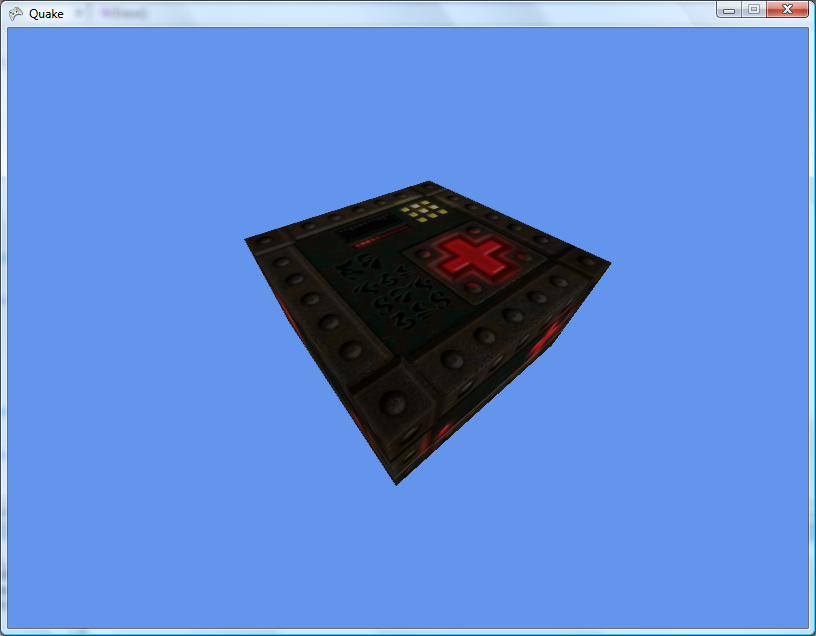
maps/b_bh25.bsp
I'm not sure what advantage there is to using BSP models instead of Alias models for these items.

Place of Two Deaths has a Place of Two Medikits
High-Resolution/Luma Textures and Monsters
Thursday, 26th July 2007
Yup, I've done soem QuakeC modding before. The progs.dat is basically all the game code, and quake.exe is all the engine code. if you can load progs.dat properly, you should be able to get behaviour exactly like the original Quake.
Progs.dat is responsible for all monster types AI, and I think you're right about triggers and bridges and stuff.
Ah, makes sense! According to the Unofficial Quake Specs it's p-code, which at least makes parsing easier. Working out which opcodes do what will (I assume) require a perusal of the Quake/QuakeC compiler source.
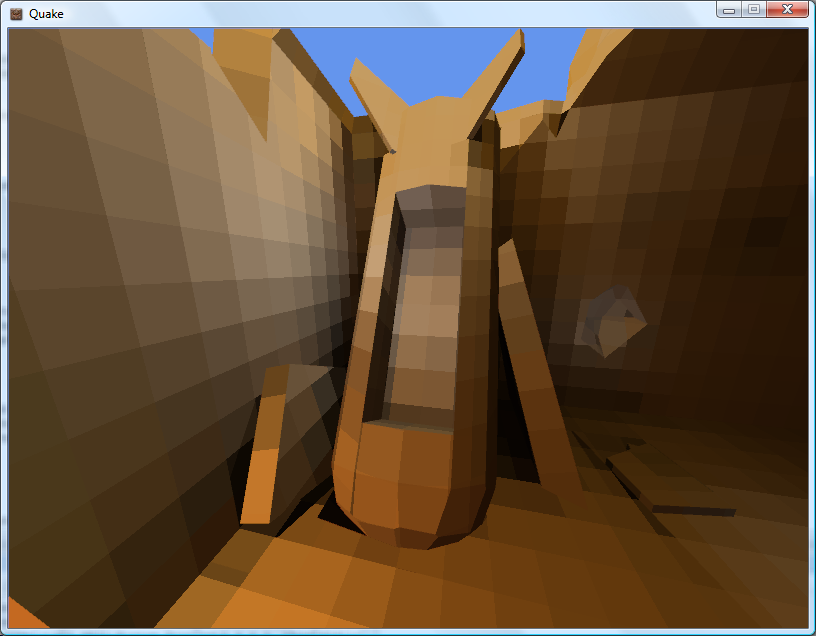
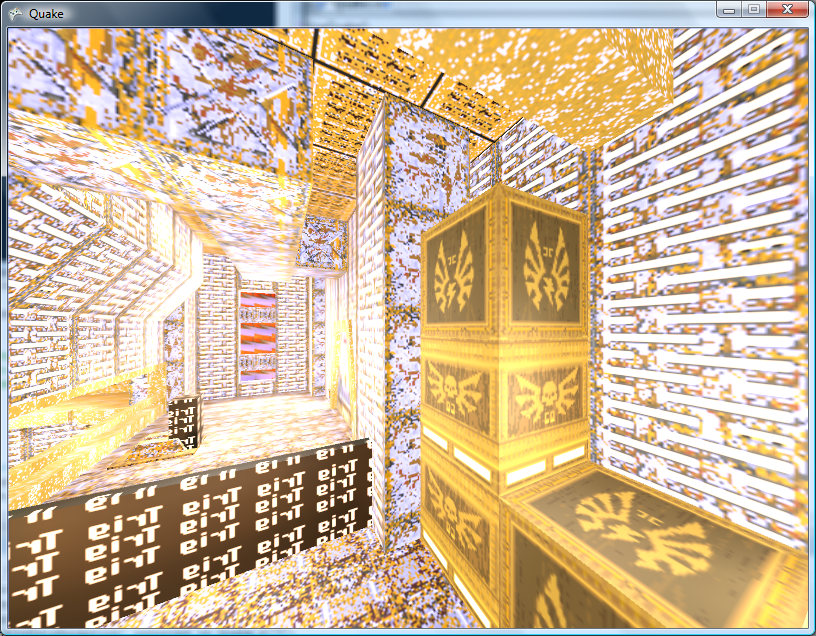
One quick and dirty way to (possibly) improve Quake's elderly graphics is to use a modern texture pack, which provides high-resolution reinterpretations of Quake's own offerings.
Personally, I'm not too keen on these packs - high-resolution textures on low-poly structures emphasises their sharp edges, and texture alignment issues - Quake's textures are aligned pretty badly in places - are made even more obvious. In the same vein, low-resolution textures look very bad to me when magnified using a smoothing filter - I'd much rather see chunky pixels.
Anyway, adding support for them is very simple. When loading textures from the BSP, I simply check to see if a file textures/texturename.tga is available, and if so load that instead.

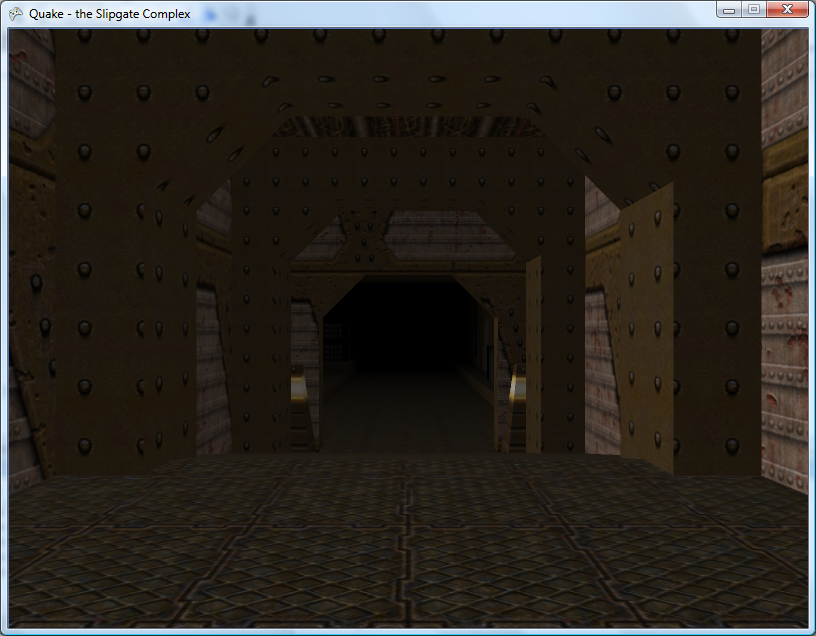
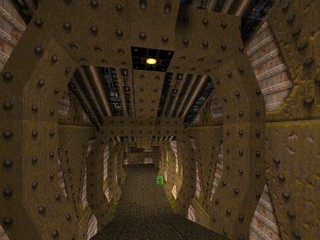
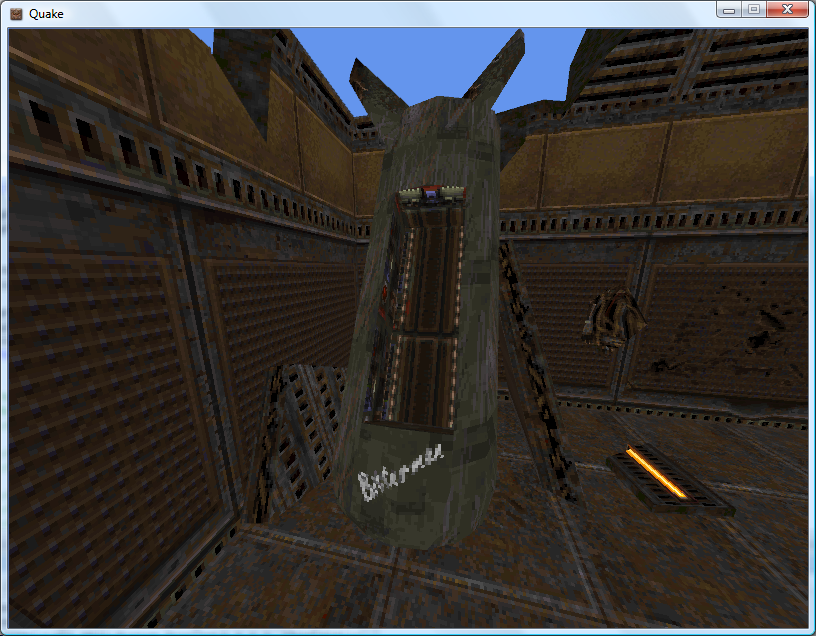
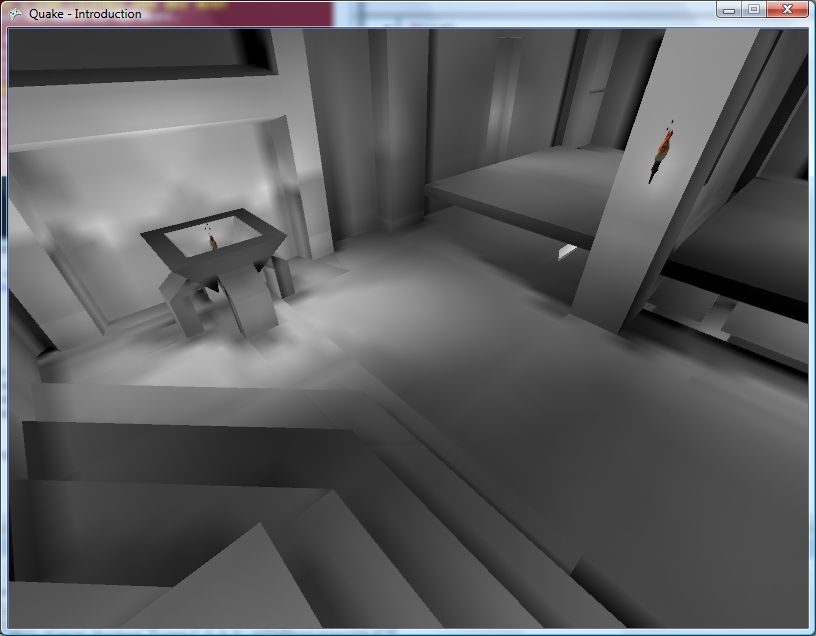
The Slipgate Complex with the original and high-resolution textures.
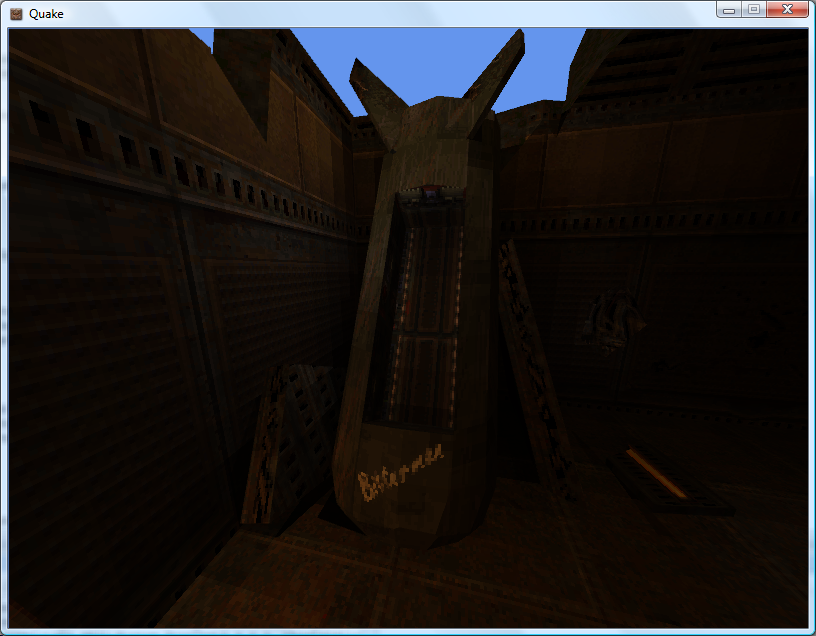
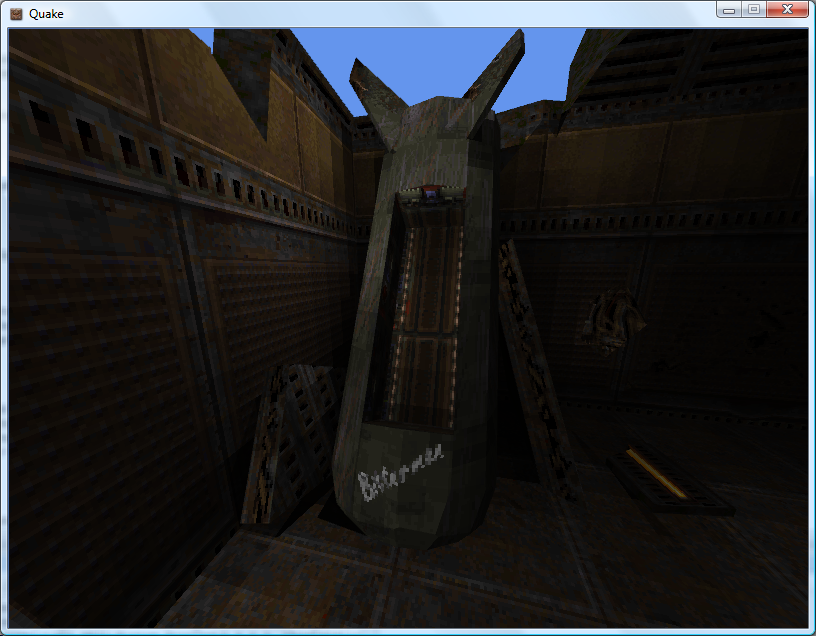
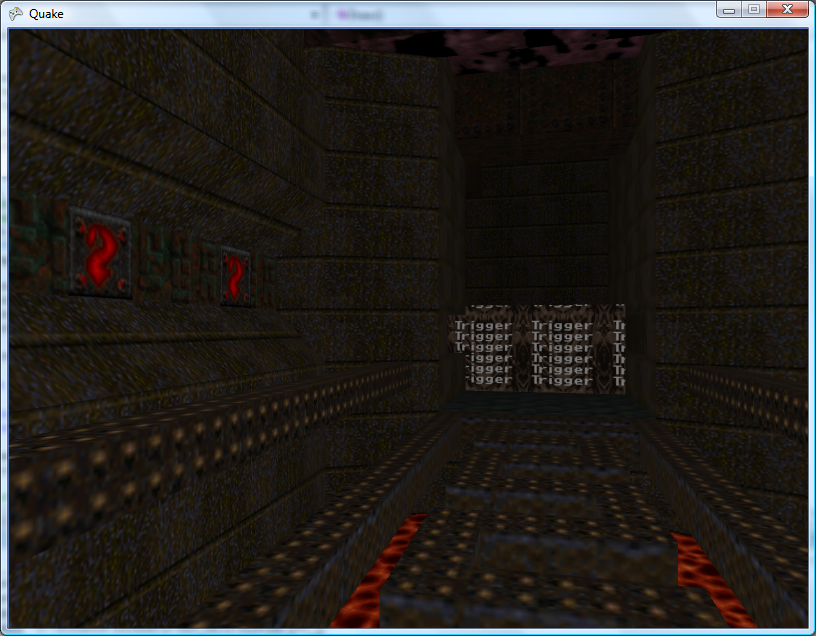
One advantage of these high resolution texture packs are their luma variations. These are available for certain textures that need to 'glow', such as lights, computer displays or runes. These are mostly black textures with the only the part that lights up drawn.
I draw the world geometry twice. The first time I draw it normally. The second time I disable lighting and fog, enable alpha blending, use an additive blend function and the luma textures instead of the regular textures.
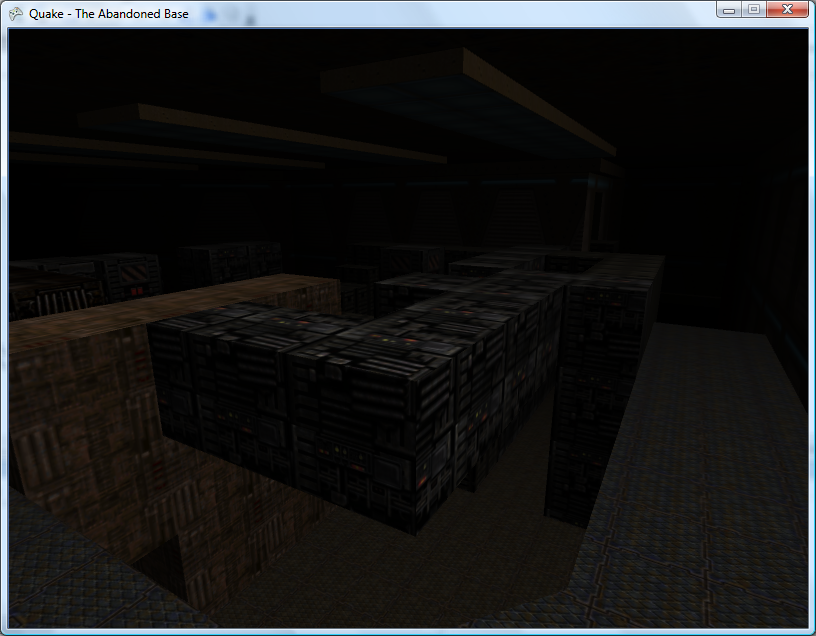
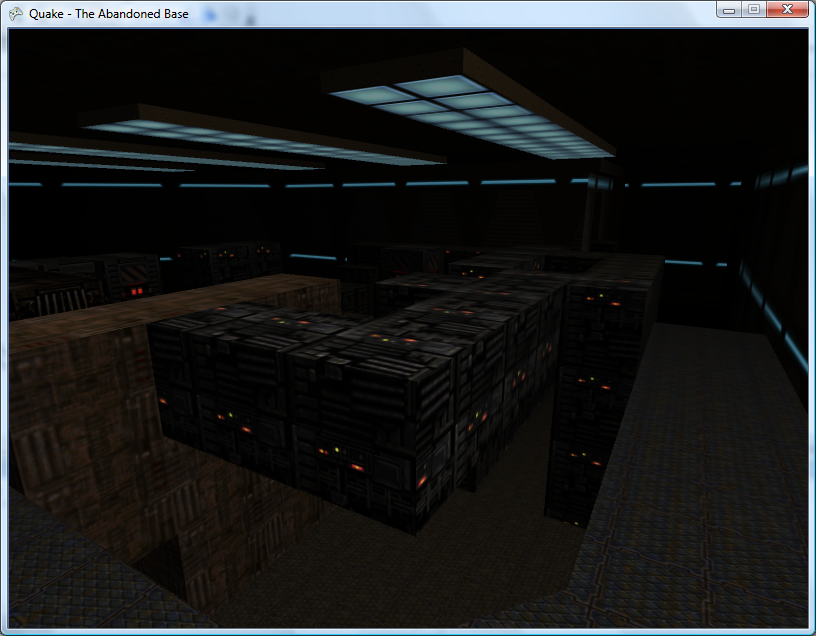
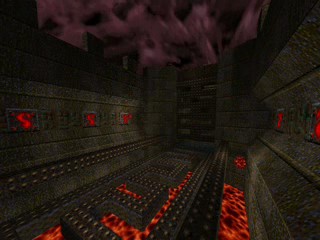
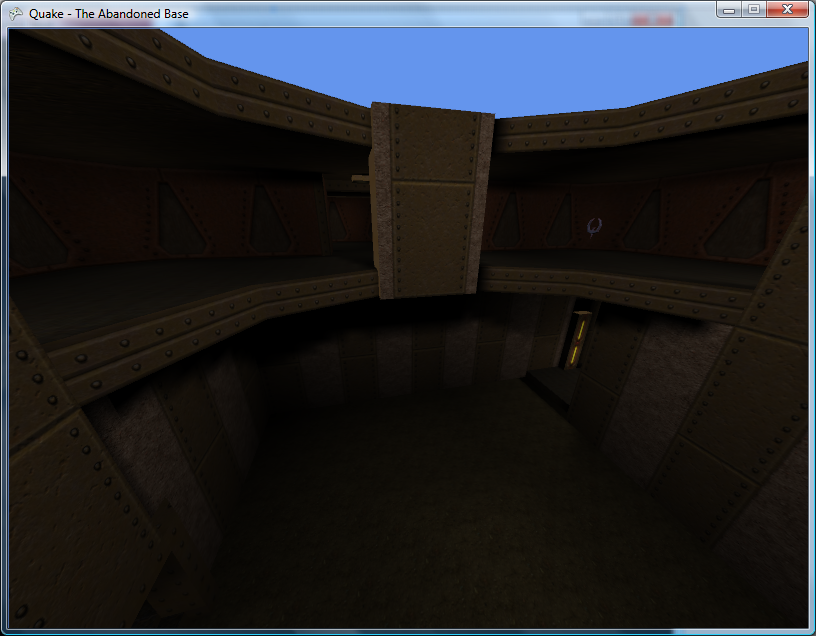
The Abandoned Base before and after the addition of luma textures.
Quake's maps have limited support for animated textures. If the texture is named +0xyz (where xyz is the descriptive name of the texture) then chances there's a +1xyz, +2xyz (and so on) texture to go with it. Once a level's textures have been loaded, I go through looking for any names starting with +0. From this I can search for the indices of its other frames.
Texture2D OldFirstWall = this.WallTextures[ATD.TextureIds[0]];
Texture2D OldFirstLuma = this.LumaTextures[ATD.TextureIds[0]];
for (int i = 0; i < ATD.TextureIds.Length - 1; ++i) {
	this.WallTextures[ATD.TextureIds[i]] = this.WallTextures[ATD.TextureIds[i + 1]];
	this.LumaTextures[ATD.TextureIds[i]] = this.LumaTextures[ATD.TextureIds[i + 1]];
}
this.WallTextures[ATD.TextureIds[ATD.TextureIds.Length - 1]] = OldFirstWall;
this.LumaTextures[ATD.TextureIds[ATD.TextureIds.Length - 1]] = OldFirstLuma;
Once I've collected up the indices of each animated texture's frames, I simply rotate them using the code above.
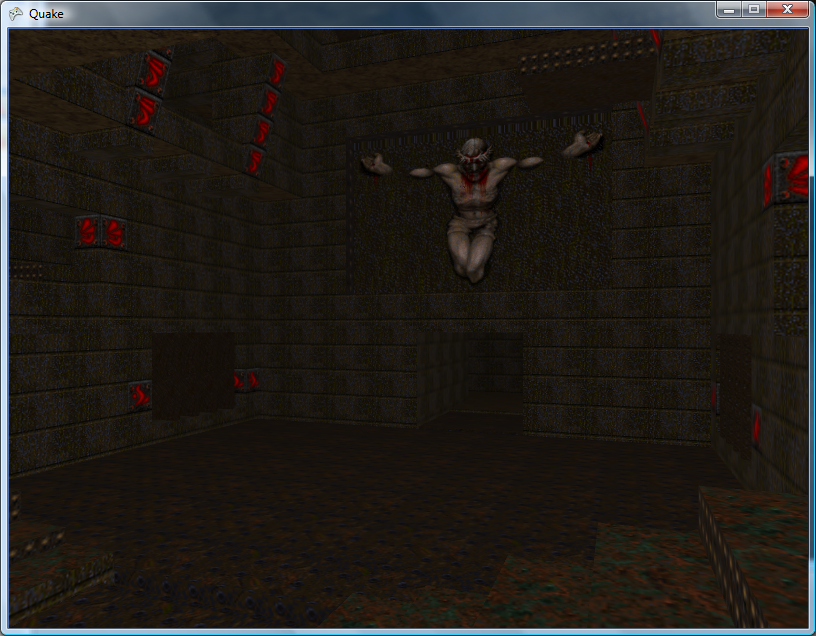
The levels do look rather lonely without the various monsters patrolling them. This can be remedied by parsing the entities lump. In the true brute-force tradition, the models are loaded once (at startup), but to render them I just loop through the entire entities block (which contains many irrelevant entities) hunting for types referencing a model - if so, I pull out their angle and offset and render the model at the specified position.
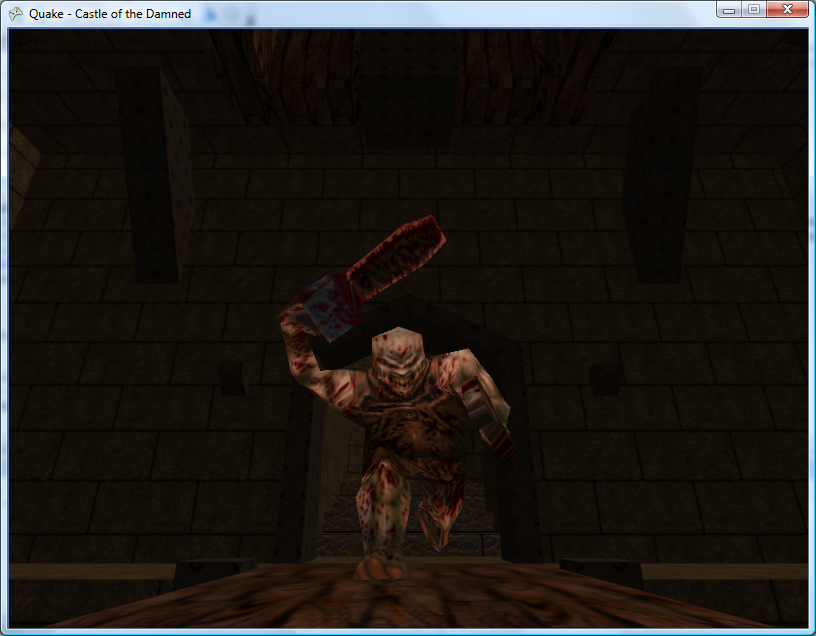


Most of the items spread out throughout the level - powerups, weapons and armour - are represented by Alias models, so adding support for those is easy enough:
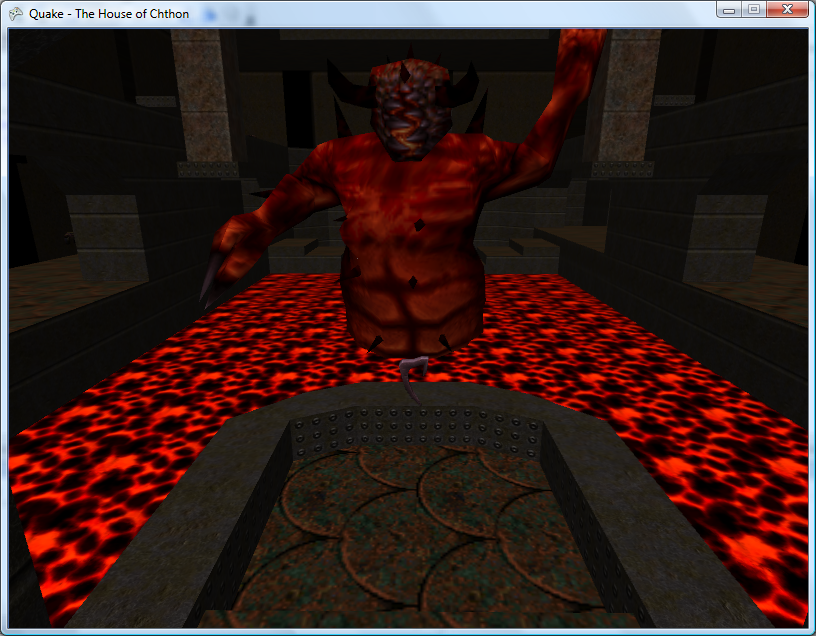

Some of the other items - such as ammo crates - are represented by BSP models, so are currently not supported.
Models
Wednesday, 25th July 2007
Do you intend to parse the progs.dat file (I think that's what it was called) - the QuakeC compiled code? I've no idea what's actually involved in that, however...
I'm not sure either (I haven't looked into it). As the source code for Quake and the QuakeC compiler have been released I might be able to do something. I have a hunch that said code is responsible for level events (switches, bridges, lifts, doors and so on) so it would seem pretty important.
You might want to check the version of your BSP files versus the one used in the Unofficial Quake Specs.
...
Also here's some API independent code for loading Quake MDL models.
So far I've had one minor problem that was resolved with a hex editor (something simple like a short becoming an int or vice-versa). I'll take a look at your MDL code - thank you!
I've made progress with the Alias model loader and written a ModelRenderer class to go with it.
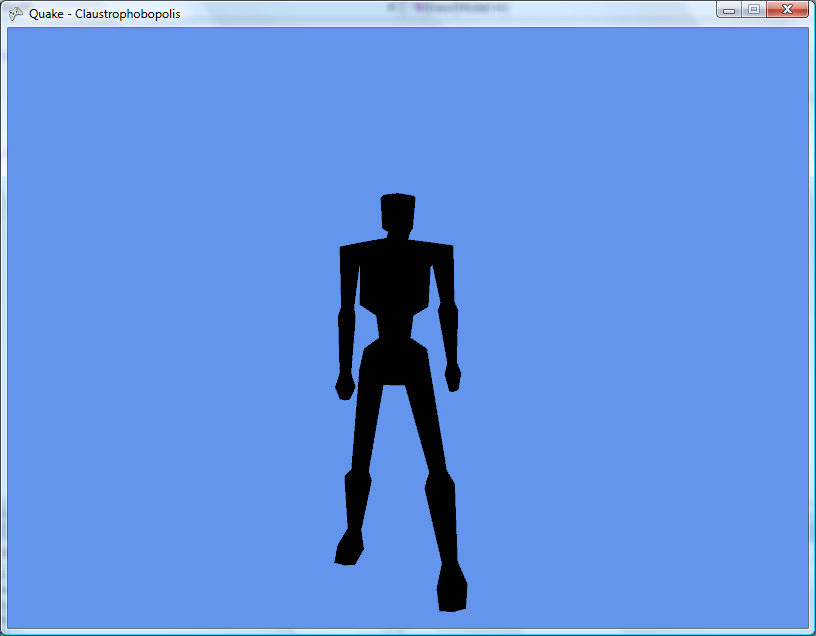
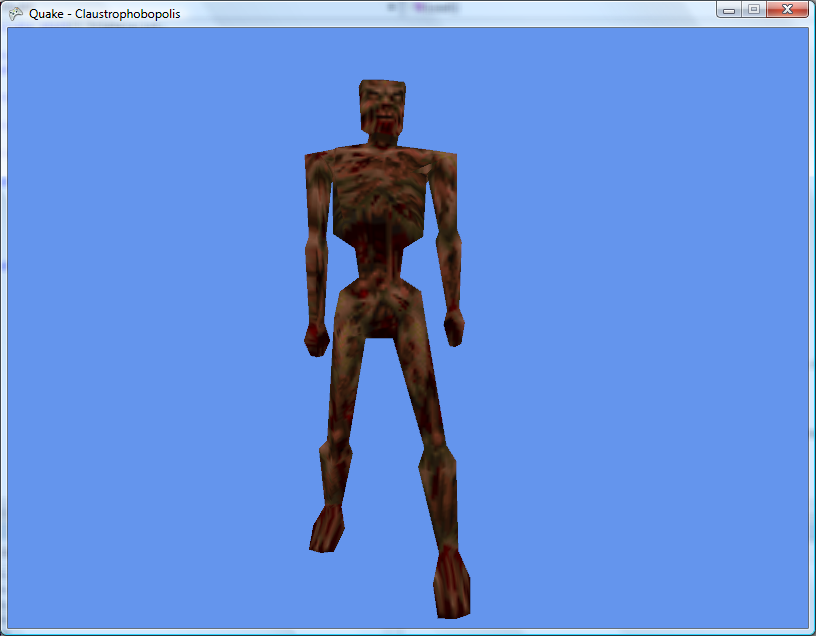
zombie.mdl before and after texturing support.
Animation isn't handled very well just yet - the frames aren't grouped by action (such as the 'attack' animation, 'walk' animation and so on) and the Draw call just takes a frame number.
It'll do for the moment as a test.
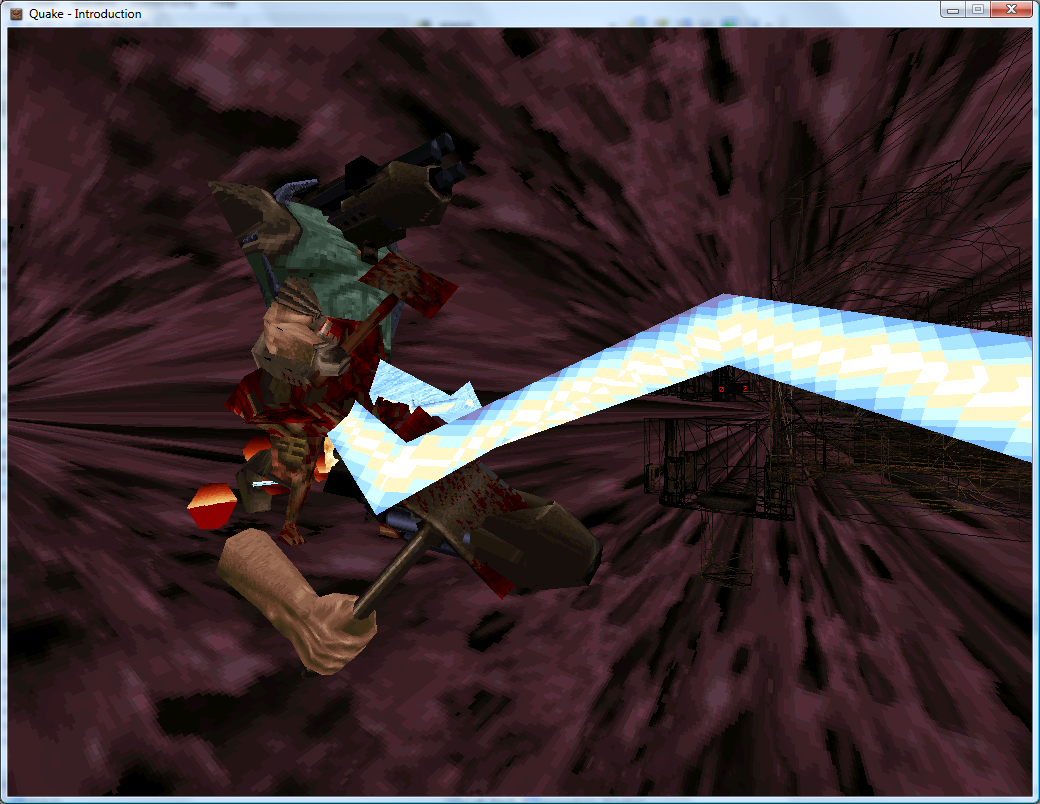
I'm still having problems with textures not wrapping correctly.
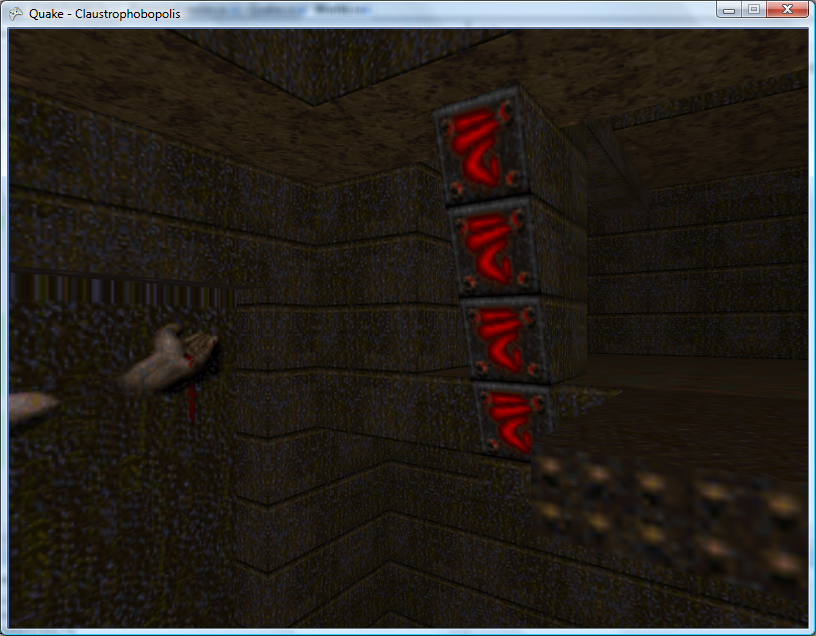
As you can see the texture above the hand is distorted. I was pointed in the direction of a solution via the texture wrapping options, and have added these lines:
graphics.GraphicsDevice.SamplerStates[0].AddressU = TextureAddressMode.Wrap;
graphics.GraphicsDevice.SamplerStates[0].AddressV = TextureAddressMode.Wrap;
This, unfortunately, hasn't helped. Experimentation has shown that this does change something, and by using the TextureAddressMode.Mirror I get the following -
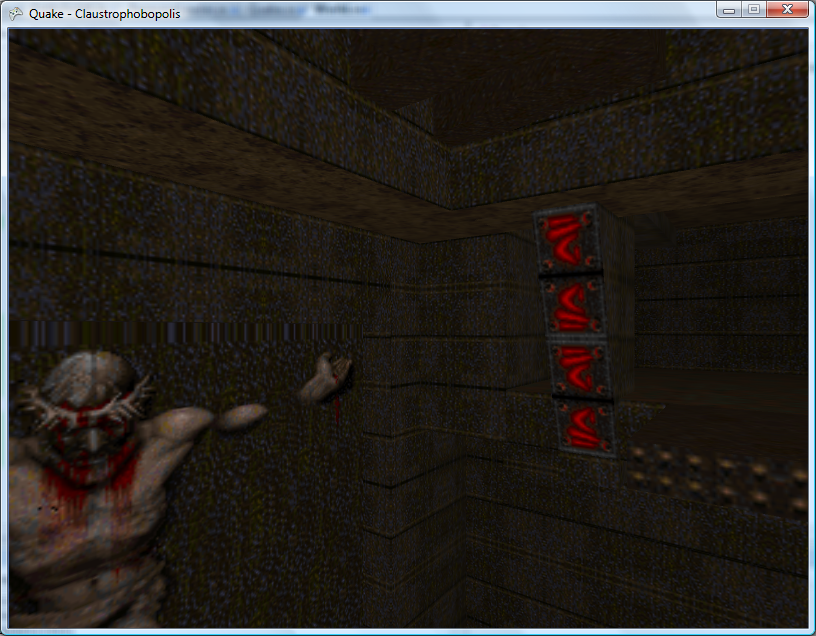
Note the orientation of the red symbols
I still can't get decent looking light maps out of the level - they all have the "diagonal stripes" effect that usually is caused by an erroneous width. I think I'll have to start trawling through Quake's source code.
Custom Levels and Model Skins
Tuesday, 24th July 2007
Do you plan on making anything out of it, or will it just be a bsp viewer?
An XNA Quake implementation the way I intend on working - that is, to start from scratch - is not really worth it (as far as getting the gameplay 100% identical to DOS Quake).
As a learning project, there's a decent quantity of further material (as far as maps, high-resolution textures and so on go), and I intend on trying to learn how to write a 'FPS-friendly' 3D engine based around Quake's data. Whether I shoehorn some sort of game into that or not is yet to be decided.
Anyhow, I mentioned that I'd be moving on to light maps. Unfortunately the documentation I have is rather vague on this topic (the Unofficial Quake Specs), and I can't get meaningful data out of the BSP files.
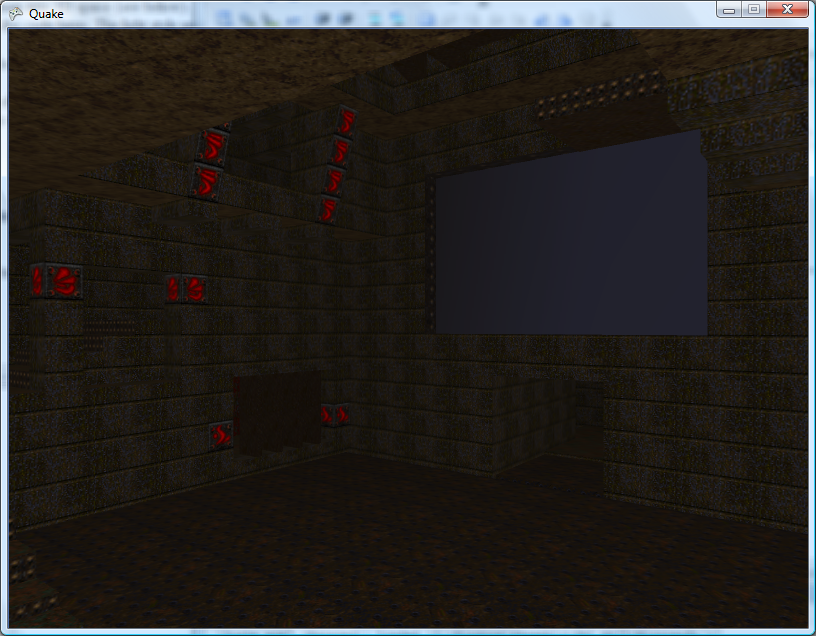
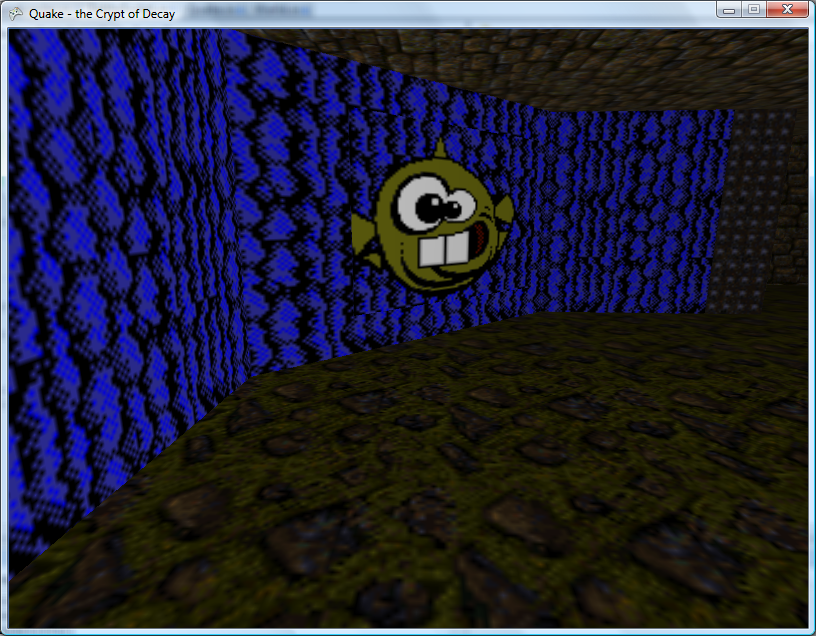
I had a slight issue to resolve. Certain textures were appearing as a single colour, like the above. As far as I know this is a symptom of using crazy texture coordinates. I wrote a crude routine that attempts to shunt vertices into the 0..1 range, and the result looks a bit better:
As you can see, the top edge of the large texture is still badly distorted.
I modified the resource loader slightly to handle loading files outside the main pack files.

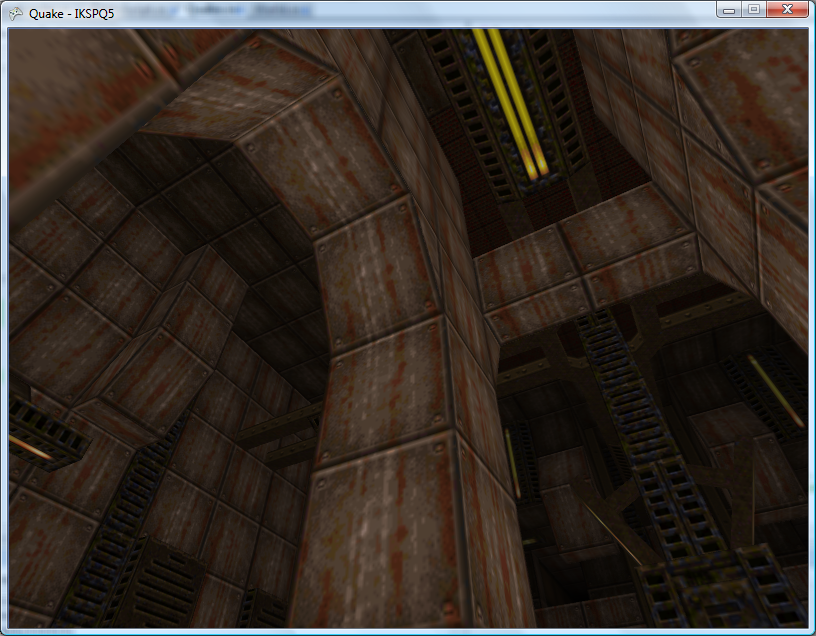
The result is that I can low load resource files - such as external levels - as you would any other resource, with a call to LoadResource<Data.Level>("maps/ikspq5.bsp"). The level loader also parses the entity declaration block inside the .bsp, putting the player in the correct starting place and - more noticably in the screenshots - finding out the title of the level.
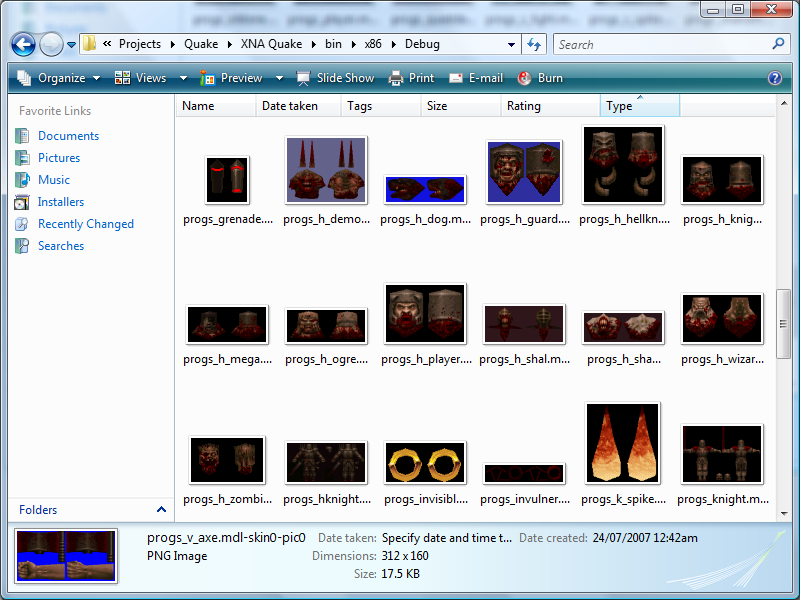
I've made a start at loading the Alias .mdl files, but their structure is rather convoluted so the only visible result thus far is a dump of all of the skin pictures.
There doesn't seem to be much information about Quake BSPs (plenty on Quake 3 BSPs, however!) so if anyone has any recommendations I'd be grateful. Looking at flipcode's article on Quake 2 BSPs it would appear that they're not too different, so I'll have a go with that.
XNA Quake
Thursday, 19th July 2007
After pratting around with DOOM with MDX, it's logical to move up to Quake with XNA. After all, the levels are "true" 3D, and there's a healthy amount of new textures (including bump and gloss maps) so that it would make creating an advanced engine easier. My problem is always finding resources.
On the subject of resources, I'm using a system whereby the various classes for game resources (such as the Level or Model class) can implement ResourceLoader.ILoadable<T>, so I can do things like this:
ResourceLoader = new ResourceLoader(@"C:\Program Files\Quake\ID1");

Palette DefaultPalette = ResourceLoader.Load<Palette>("gfx/palette.lmp");
Level SomeLevel = ResourceLoader.Load<Level>("maps/start.bsp");
This way the ResourceLoader can handle dragging data out of multiple pack (.pak) files or loading override files.
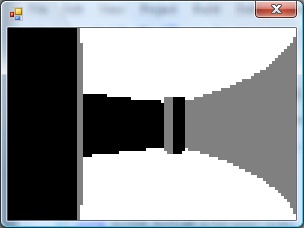
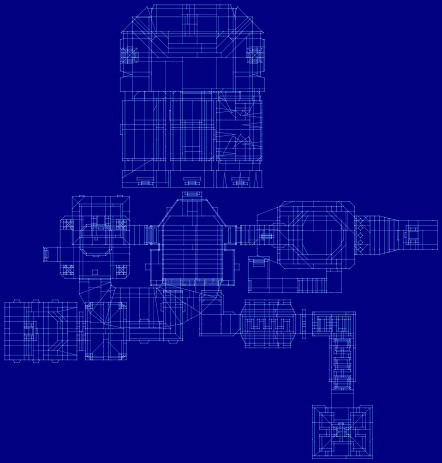
First things first - loading levels. This is nice and easy (unlike DOOM) - the .bsp files contain a list of vertices and a list of edges (each edge contains a start and end vertex index). For testing purposes, I used the Graphics class to draw out each level in 2D:
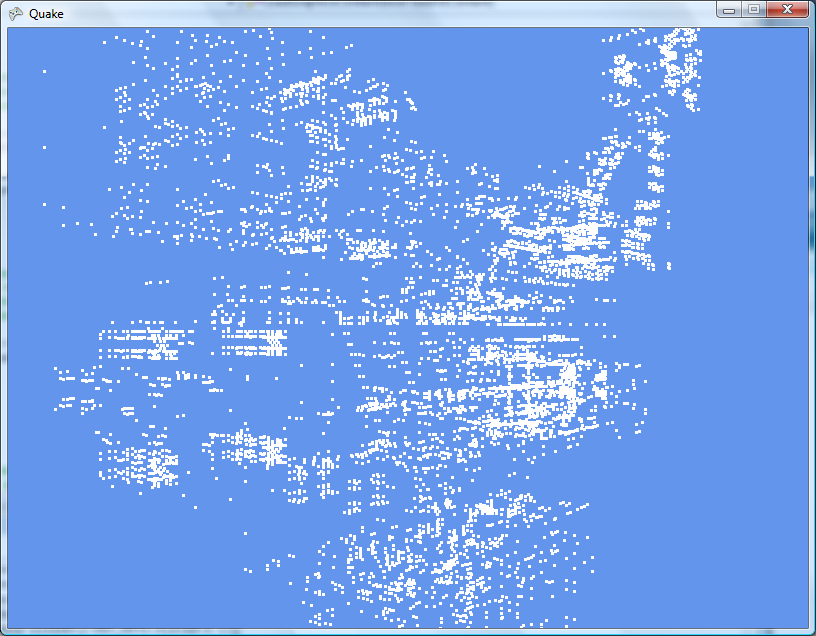
Next up, I create a point list and render those in 3D:
...and now the edges as a line list:
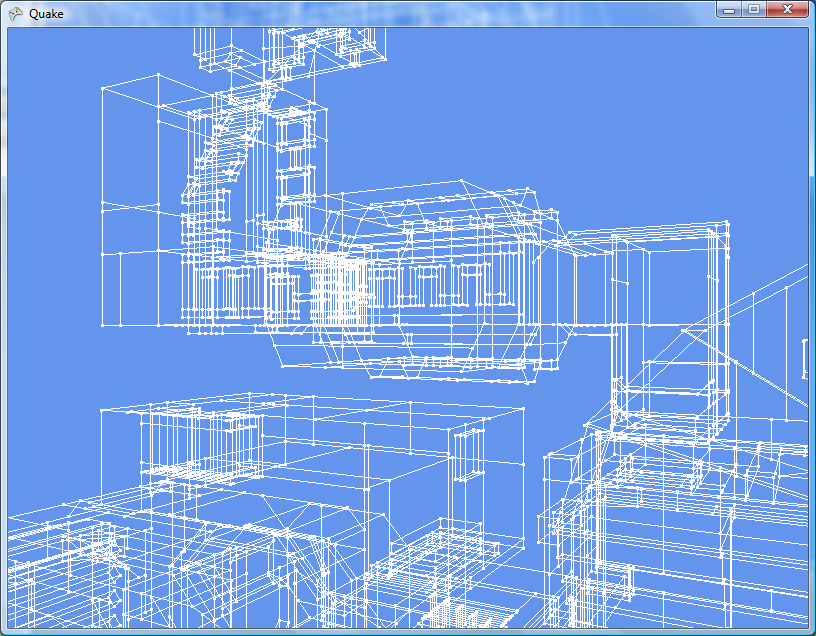
That seems to be on its side. Quake uses (x, y) as a 2D floor plan and z for height, so I need to swap z and y (and negate y whilst we're at it).
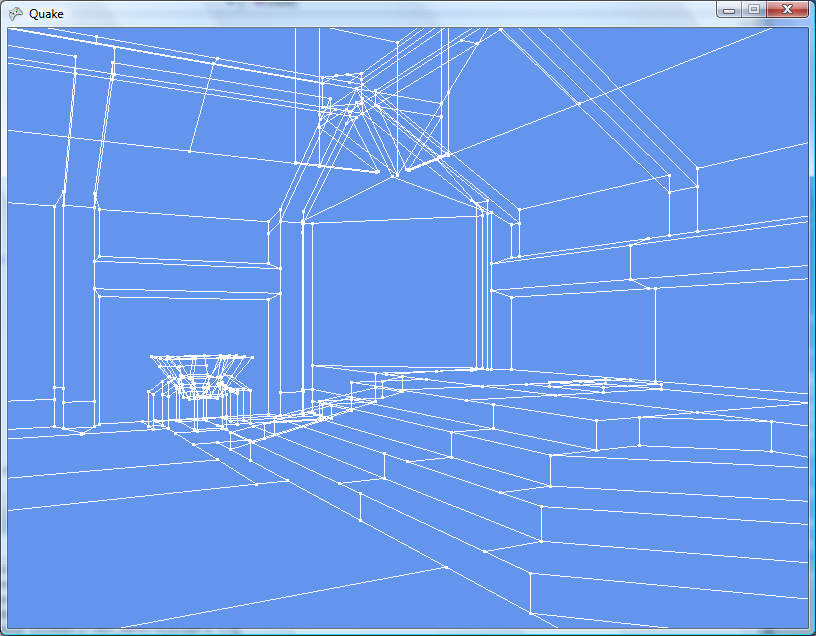
Quake uses faces for solid walls, which are simply convex polygons made up from lists of the aforementioned edges (and may have more than three sides). I'm creating a simple triangle list, and applying some fog to make the world look 3D (there's no lighting):
Texturing would make a welcome addition. Quake uses a rather novel texture coordinate system (at least, I've never seen anything quite like it) whereby each face references a TextureInfo structure, which contains the index of the texture itself, a pair of vectors indicating the horizontal and vertical axis (for aligning the texture against the surface of the face) and an offset in texels (so the texture can be aligned to the edges of the face). Fortunately, the BSP documentation I have indicates how to use this information to calculate the texture offset per-vertex, and by dividing by the texture's width and height I can get "conventional" texture coordinates.
The real Quake textures would be nice, I suppose. As I break up the faces into triangle indices, I group them by texture index. The final triangle list is made up of groups of triangles by texture, so that (for example) triangles 0 to 10 will be texture 0, triangles 11 to 14 will be texture 1, triangle 15 will be texture 2 and so on. I also maintain a list of which triangles use which texture, so to render I simply set the texture, draw a range of triangles from the single list, then move on to the next texture.

It's all pretty brute-force stuff at the moment, but it's still very fast on modern hardware. Next up will be lightmaps.
Event-Driven Keyboard Input for XNA
Friday, 6th July 2007
Edit: The following code has a bug in it. Please make sure you use the corrected code!
After a conversation with Thevenin regarding the Game class in XNA not letting you use event-driven keyboard input (useful, for example, for entering text) I rolled out this monstrosity.
/* * * * * * * * * * * * * * * * * * * * * * * * * * * * * * * * * * * * * * * * * * * * * * *
 * XnaTextInput.TextInputHandler - benryves@benryves.com                                     *
 * * * * * * * * * * * * * * * * * * * * * * * * * * * * * * * * * * * * * * * * * * * * * * *
 * This is quick and very, VERY dirty.                                                       *
 * It uses Win32 message hooks to grab messages (as we don't get a nicely wrapped WndProc).  *
 * I couldn't get WH_KEYBOARD to work (accessing the data via its pointer resulted in access *
 * violation exceptions), nor could I get WH_CALLWNDPROC to work.                            *
 * Maybe someone who actually knows what they're  doing can work something out that's not so *
 * kludgy.                                                                                   *
 * * * * * * * * * * * * * * * * * * * * * * * * * * * * * * * * * * * * * * * * * * * * * * *
 * This quite obviously relies on a Win32 nastiness, so this is for Windows XNA games only!  *
 * * * * * * * * * * * * * * * * * * * * * * * * * * * * * * * * * * * * * * * * * * * * * * */

#region Using Statements
using System;
using System.Runtime.InteropServices;
using System.Windows.Forms; // This class exposes WinForms-style key events.
#endregion

namespace XnaTextInput {

	/// <summary>
	/// A class to provide text input capabilities to an XNA application via Win32 hooks.
	/// </summary>
	class TextInputHandler : IDisposable {

		#region Win32

		/// <summary>
		/// Types of hook that can be installed using the SetWindwsHookEx function.
		/// </summary>
		public enum HookId {
			WH_CALLWNDPROC = 4,
			WH_CALLWNDPROCRET = 12,
			WH_CBT = 5,
			WH_DEBUG = 9,
			WH_FOREGROUNDIDLE = 11,
			WH_GETMESSAGE = 3,
			WH_HARDWARE = 8,
			WH_JOURNALPLAYBACK = 1,
			WH_JOURNALRECORD = 0,
			WH_KEYBOARD = 2,
			WH_KEYBOARD_LL = 13,
			WH_MAX = 11,
			WH_MAXHOOK = WH_MAX,
			WH_MIN = -1,
			WH_MINHOOK = WH_MIN,
			WH_MOUSE_LL = 14,
			WH_MSGFILTER = -1,
			WH_SHELL = 10,
			WH_SYSMSGFILTER = 6,
		};

		/// <summary>
		/// Window message types.
		/// </summary>
		/// <remarks>Heavily abridged, naturally.</remarks>
		public enum WindowMessage {
			WM_KEYDOWN = 0x100,
			WM_KEYUP = 0x101,
			WM_CHAR = 0x102,
		};

		/// <summary>
		/// A delegate used to create a hook callback.
		/// </summary>
		public delegate int GetMsgProc(int nCode, int wParam, ref Message msg);

		/// <summary>
		/// Install an application-defined hook procedure into a hook chain.
		/// </summary>
		/// <param name="idHook">Specifies the type of hook procedure to be installed.</param>
		/// <param name="lpfn">Pointer to the hook procedure.</param>
		/// <param name="hmod">Handle to the DLL containing the hook procedure pointed to by the lpfn parameter.</param>
		/// <param name="dwThreadId">Specifies the identifier of the thread with which the hook procedure is to be associated.</param>
		/// <returns>If the function succeeds, the return value is the handle to the hook procedure. Otherwise returns 0.</returns>
		[DllImport("user32.dll", EntryPoint = "SetWindowsHookExA")]
		public static extern IntPtr SetWindowsHookEx(HookId idHook, GetMsgProc lpfn, IntPtr hmod, int dwThreadId);

		/// <summary>
		/// Removes a hook procedure installed in a hook chain by the SetWindowsHookEx function.
		/// </summary>
		/// <param name="hHook">Handle to the hook to be removed. This parameter is a hook handle obtained by a previous call to SetWindowsHookEx.</param>
		/// <returns>If the function fails, the return value is zero. To get extended error information, call GetLastError.</returns>
		[DllImport("user32.dll")]
		public static extern int UnhookWindowsHookEx(IntPtr hHook);

		/// <summary>
		/// Passes the hook information to the next hook procedure in the current hook chain.
		/// </summary>
		/// <param name="hHook">Ignored.</param>
		/// <param name="ncode">Specifies the hook code passed to the current hook procedure.</param>
		/// <param name="wParam">Specifies the wParam value passed to the current hook procedure.</param>
		/// <param name="lParam">Specifies the lParam value passed to the current hook procedure.</param>
		/// <returns>This value is returned by the next hook procedure in the chain.</returns>
		[DllImport("user32.dll")]
		public static extern int CallNextHookEx(int hHook, int ncode, int wParam, ref Message lParam);

		/// <summary>
		/// Translates virtual-key messages into character messages.
		/// </summary>
		/// <param name="lpMsg">Pointer to an Message structure that contains message information retrieved from the calling thread's message queue.</param>
		/// <returns>If the message is translated (that is, a character message is posted to the thread's message queue), the return value is true.</returns>
		[DllImport("user32.dll")]
		public static extern bool TranslateMessage(ref Message lpMsg);


		/// <summary>
		/// Retrieves the thread identifier of the calling thread.
		/// </summary>
		/// <returns>The thread identifier of the calling thread.</returns>
		[DllImport("kernel32.dll")]
		public static extern int GetCurrentThreadId();

		#endregion

		#region Hook management and class construction.

		/// <summary>Handle for the created hook.</summary>
		private readonly IntPtr HookHandle;

		/// <summary>Create an instance of the TextInputHandler.</summary>
		/// <param name="whnd">Handle of the window you wish to receive messages (and thus keyboard input) from.</param>
		public TextInputHandler(IntPtr whnd) {
			// Create the keyboard hook:
			this.HookHandle = SetWindowsHookEx(HookId.WH_GETMESSAGE, new GetMsgProc(ProcessMessages), IntPtr.Zero, GetCurrentThreadId());
		}

		public void Dispose() {
			// Remove the hook.
			if (this.HookHandle != IntPtr.Zero) UnhookWindowsHookEx(this.HookHandle);
		}

		#endregion

		#region Message processing

		private int ProcessMessages(int nCode, int wParam, ref Message msg) {
			// Check if we must process this message (and whether it has been retrieved via GetMessage):
			if (nCode == 0 && wParam == 1) {

					// We need character input, so use TranslateMessage to generate WM_CHAR messages.
					TranslateMessage(ref msg);

					// If it's one of the keyboard-related messages, raise an event for it:
					switch ((WindowMessage)msg.Msg) {
						case WindowMessage.WM_CHAR:
							this.OnKeyPress(new KeyPressEventArgs((char)msg.WParam));
							break;
						case WindowMessage.WM_KEYDOWN:
							this.OnKeyDown(new KeyEventArgs((Keys)msg.WParam));
							break;
						case WindowMessage.WM_KEYUP:
							this.OnKeyUp(new KeyEventArgs((Keys)msg.WParam));
							break;
					}

			}

			// Call next hook in chain:
			return CallNextHookEx(0, nCode, wParam, ref msg);
		}

		#endregion

		#region Events

		public event KeyEventHandler KeyUp;
		protected virtual void OnKeyUp(KeyEventArgs e) {
			if (this.KeyUp != null) this.KeyUp(this, e);
		}

		public event KeyEventHandler KeyDown;
		protected virtual void OnKeyDown(KeyEventArgs e) {
			if (this.KeyDown != null) this.KeyDown(this, e);
		}

		public event KeyPressEventHandler KeyPress;
		protected virtual void OnKeyPress(KeyPressEventArgs e) {
			if (this.KeyPress != null) this.KeyPress(this, e);
		}

		#endregion
	}
}
Might be useful if your Windows game needs text input. Win32 veterans, feel free to lambast my lack of skills.
Subscribe to an RSS feed that only contains items with the XNA tag.