De-Dead Zone
Improve the performance of the Dreamcast's race controller with a simple microcontroller circuit.
Thank you very much for your interest in this modification! This page has a series of pictures showing the installation process and some notes on using the modification. If you have any further questions, please do get in touch.
Installation Instructions
Materials
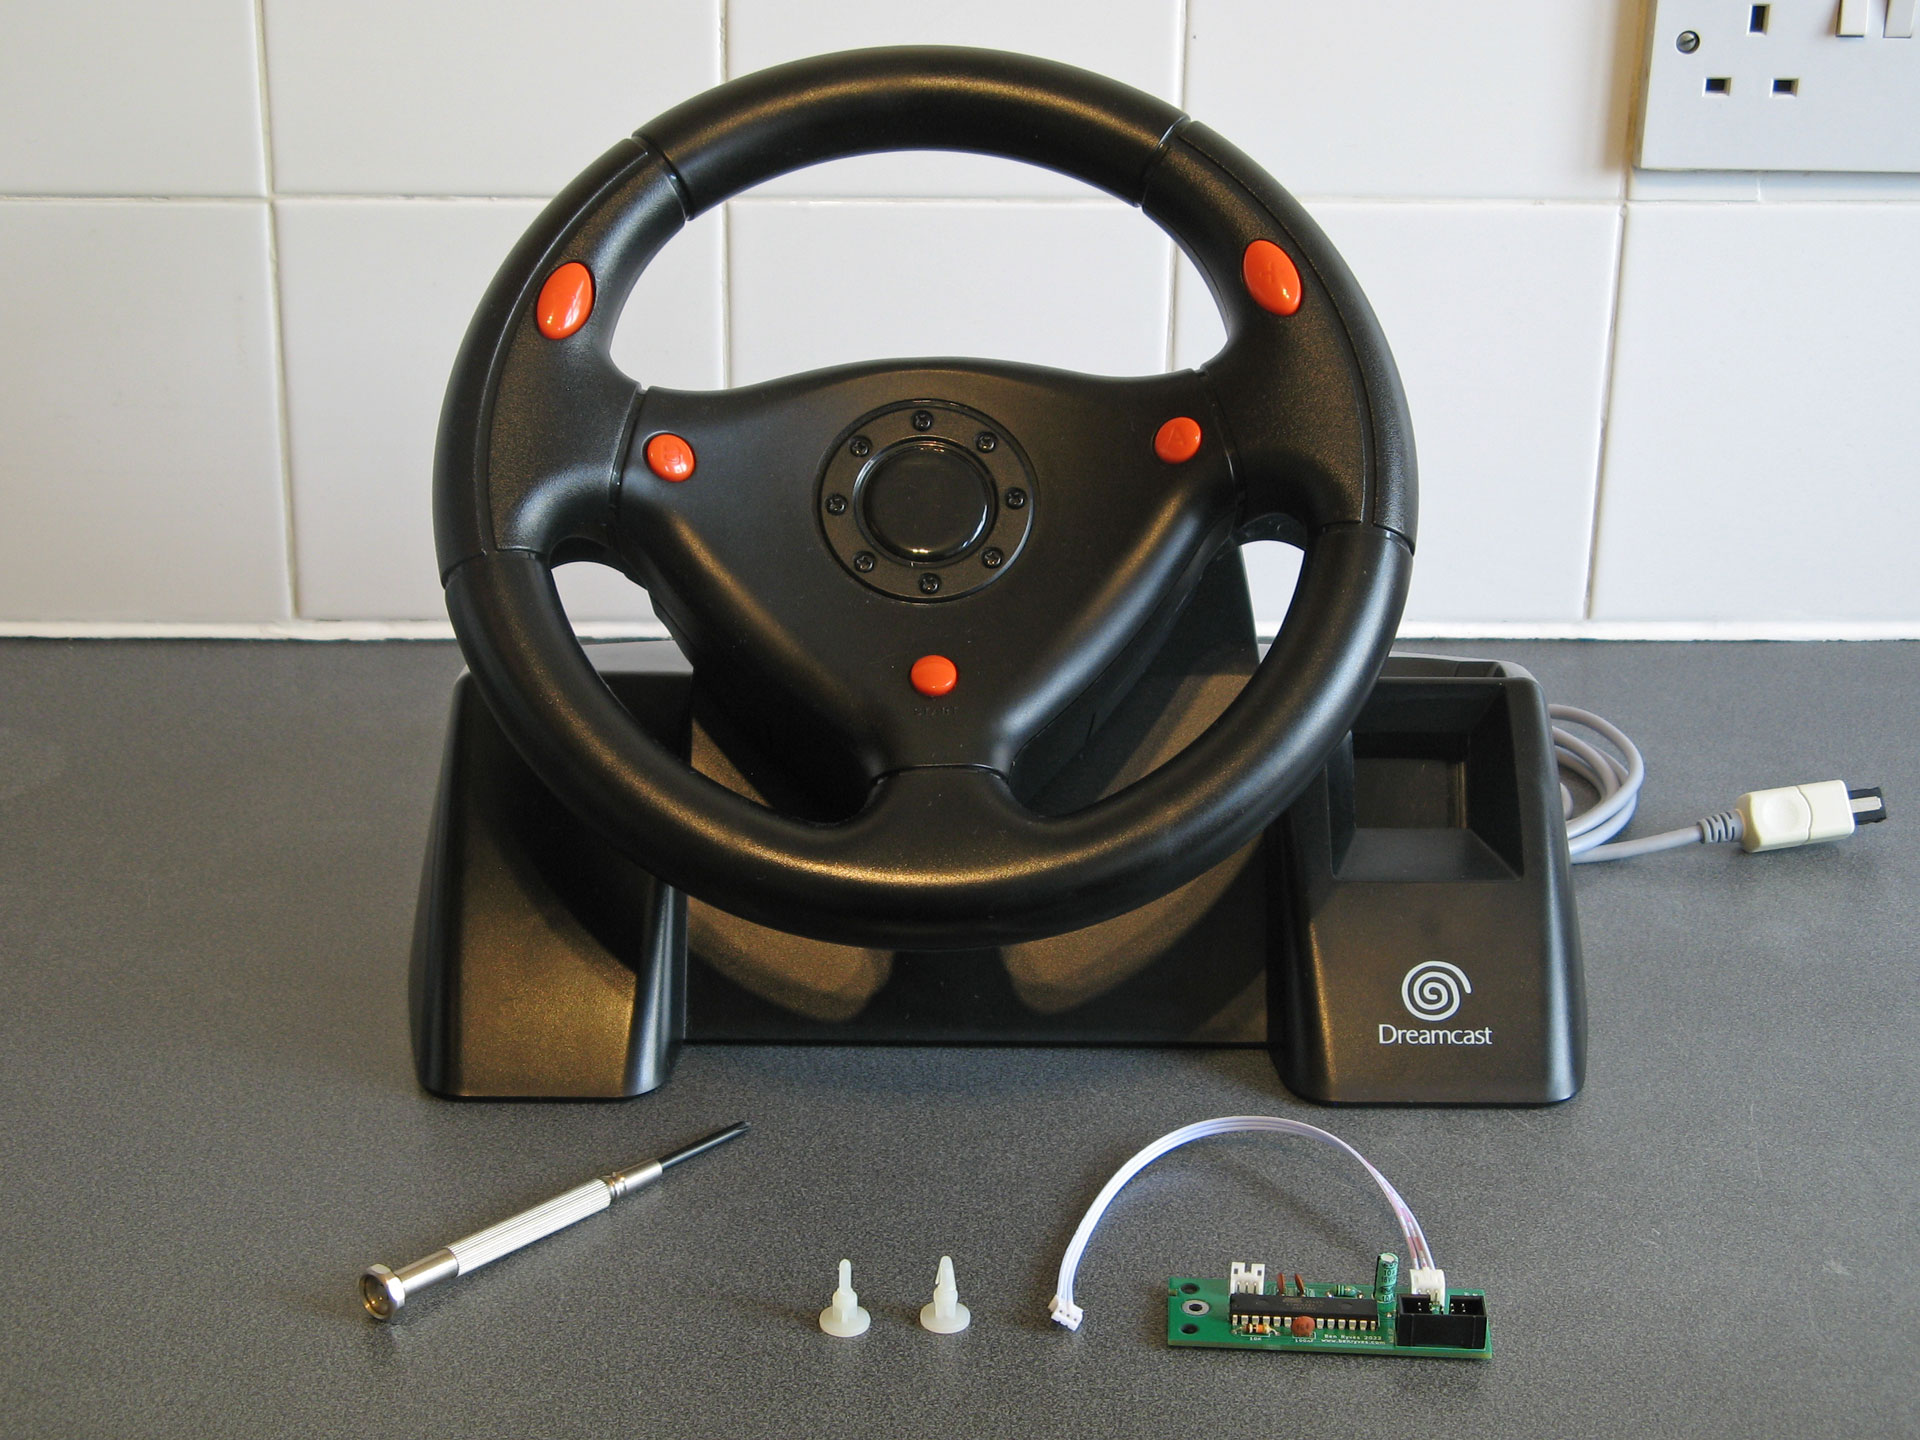
You will need the Dreamcast Race Controller, the modification board with its three-pin cable attached, two plastic clips, and a Phillips screwdriver.
If the three-pin cable is not currently attached to the modification board, connect it to the socket labelled "Stock PCB", furthest away from the end of the board with the three holes.
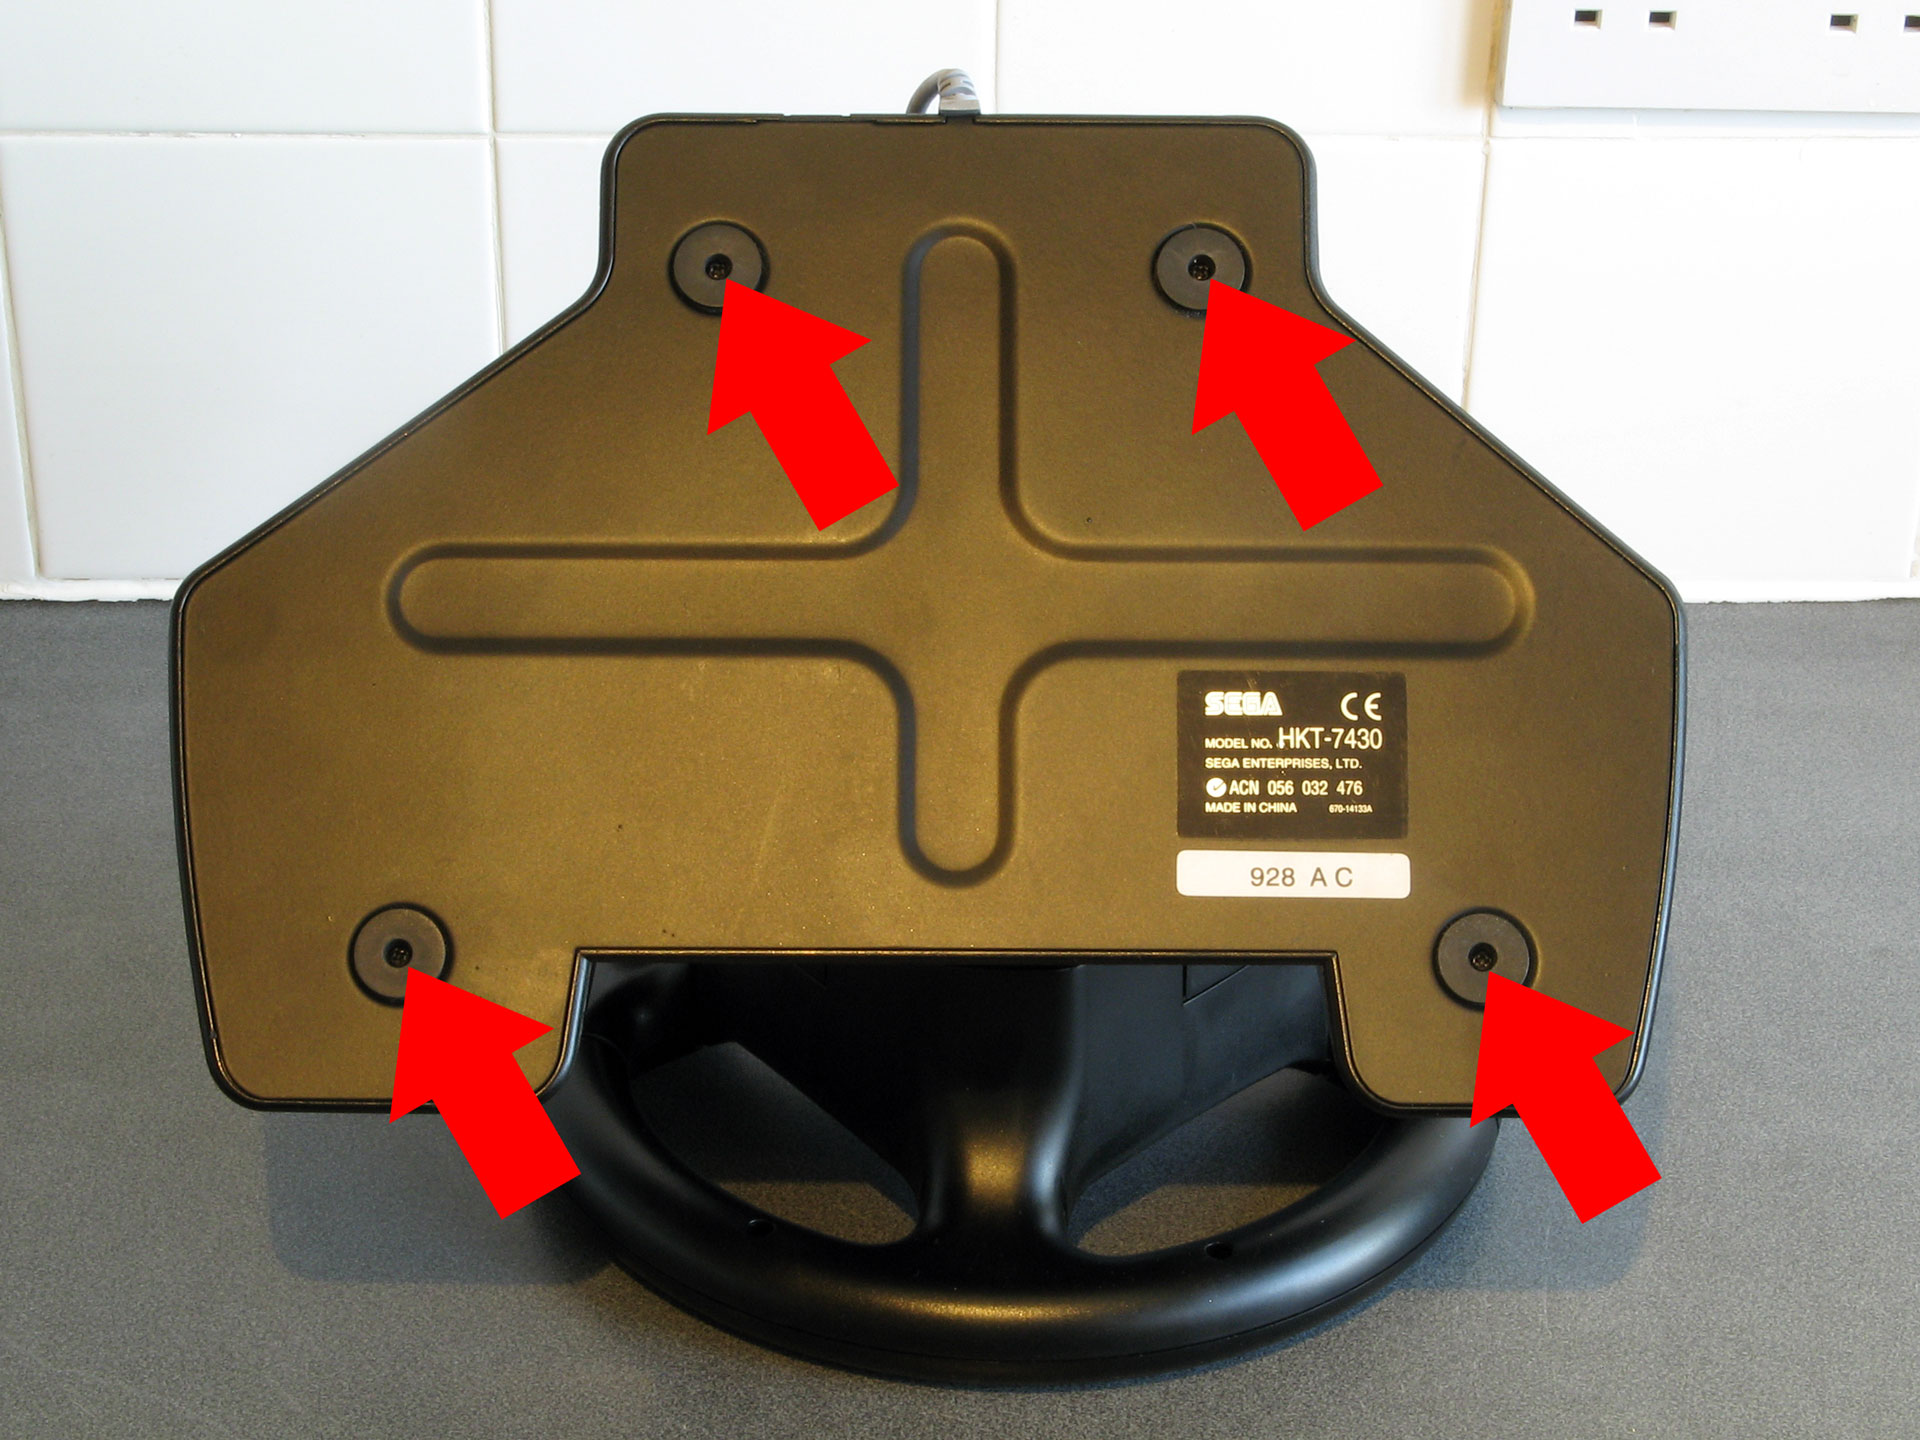
1. Getting inside the wheel
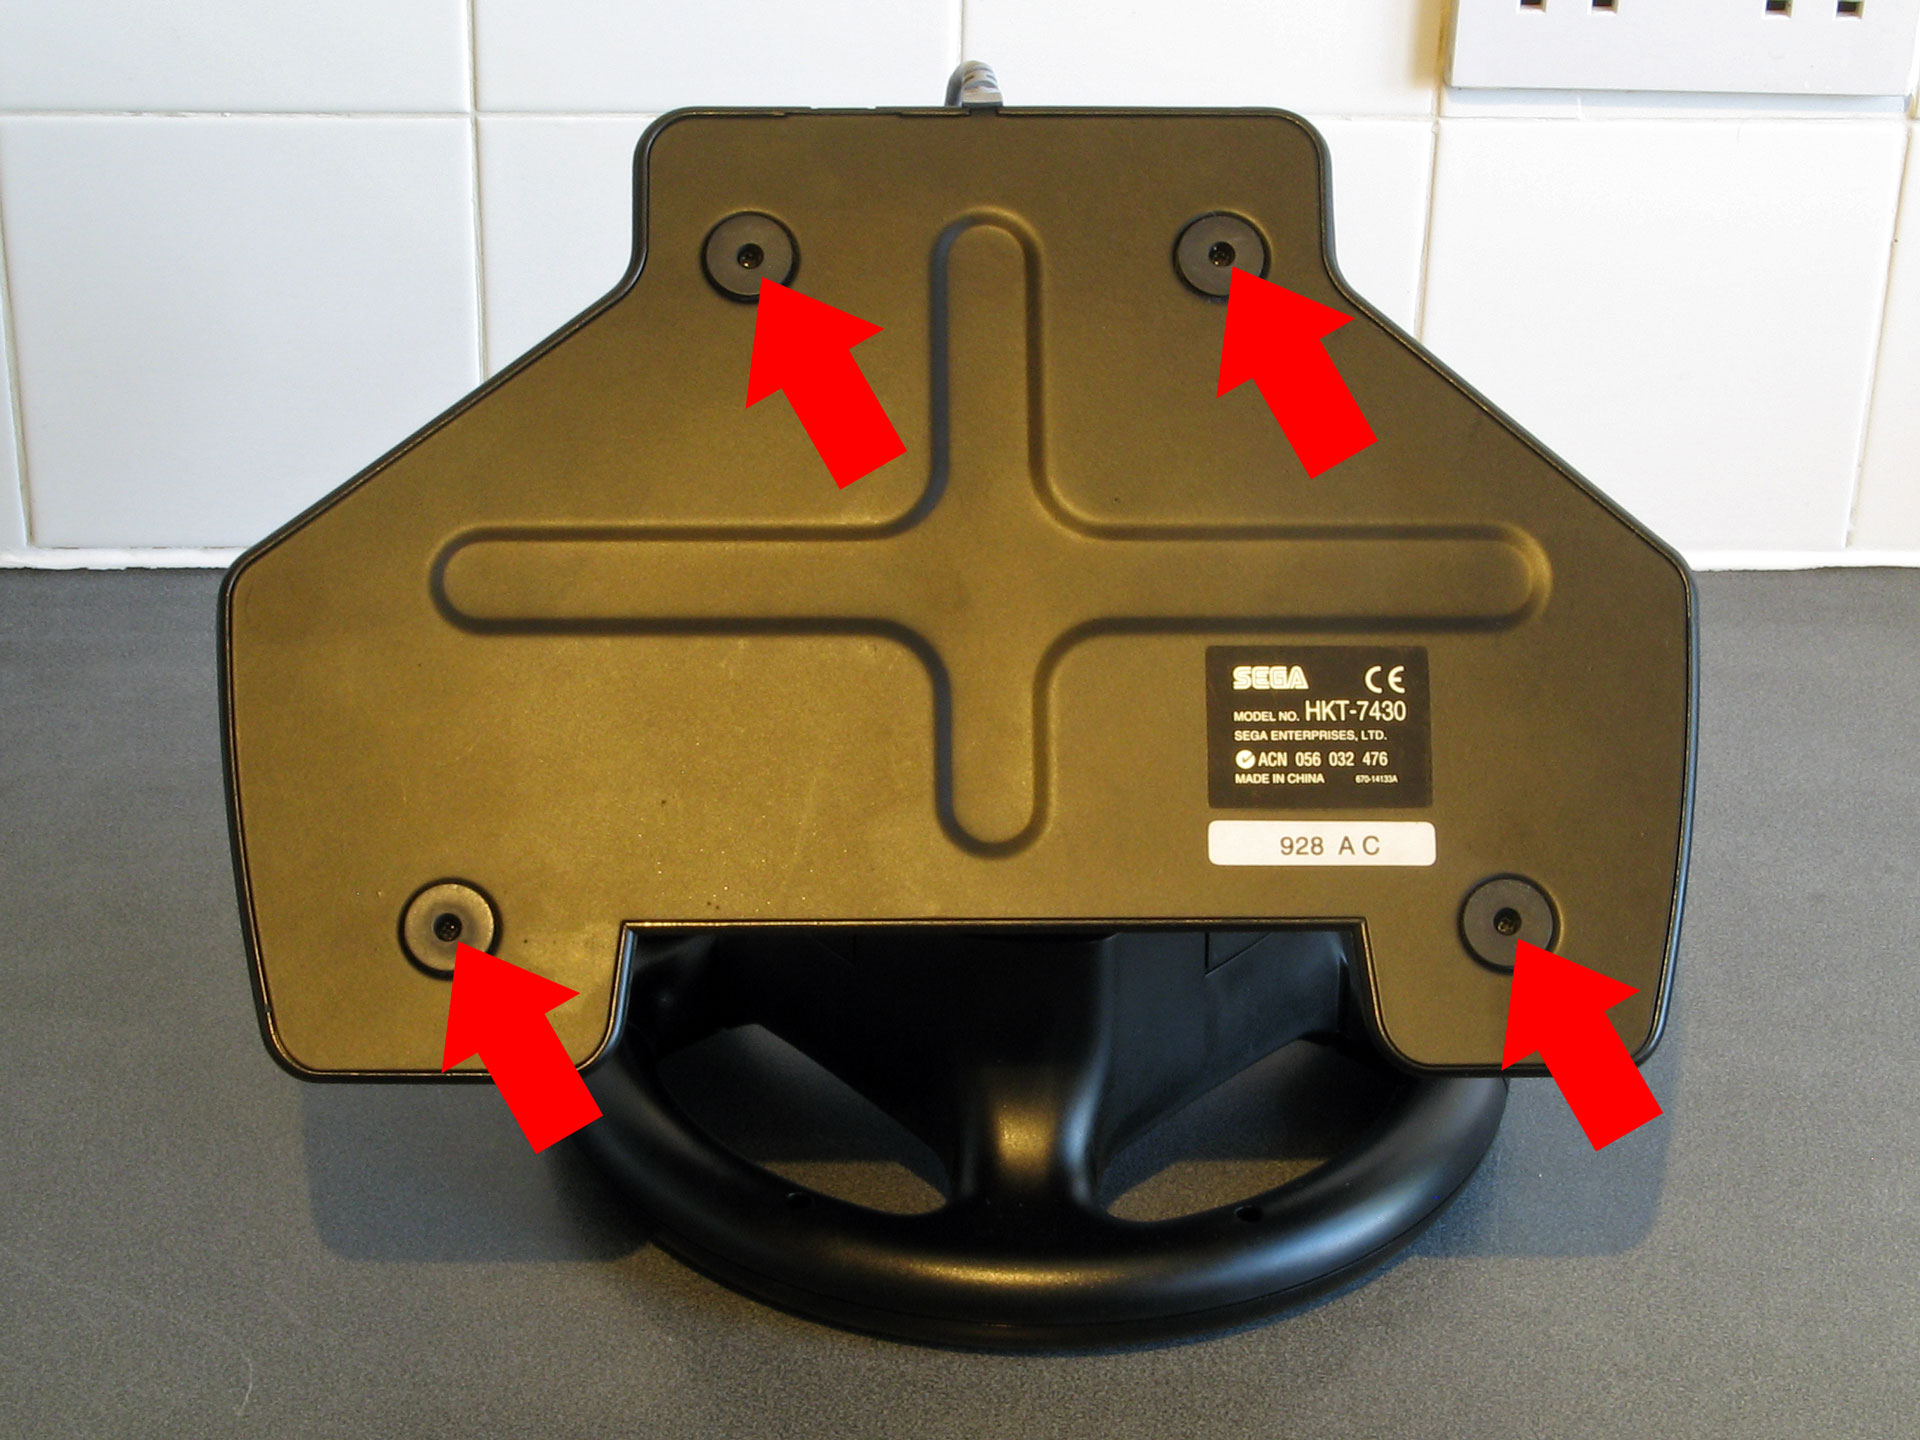
Remove the four screws from the bottom of the Race Controller.
2. Remove the bottom plate
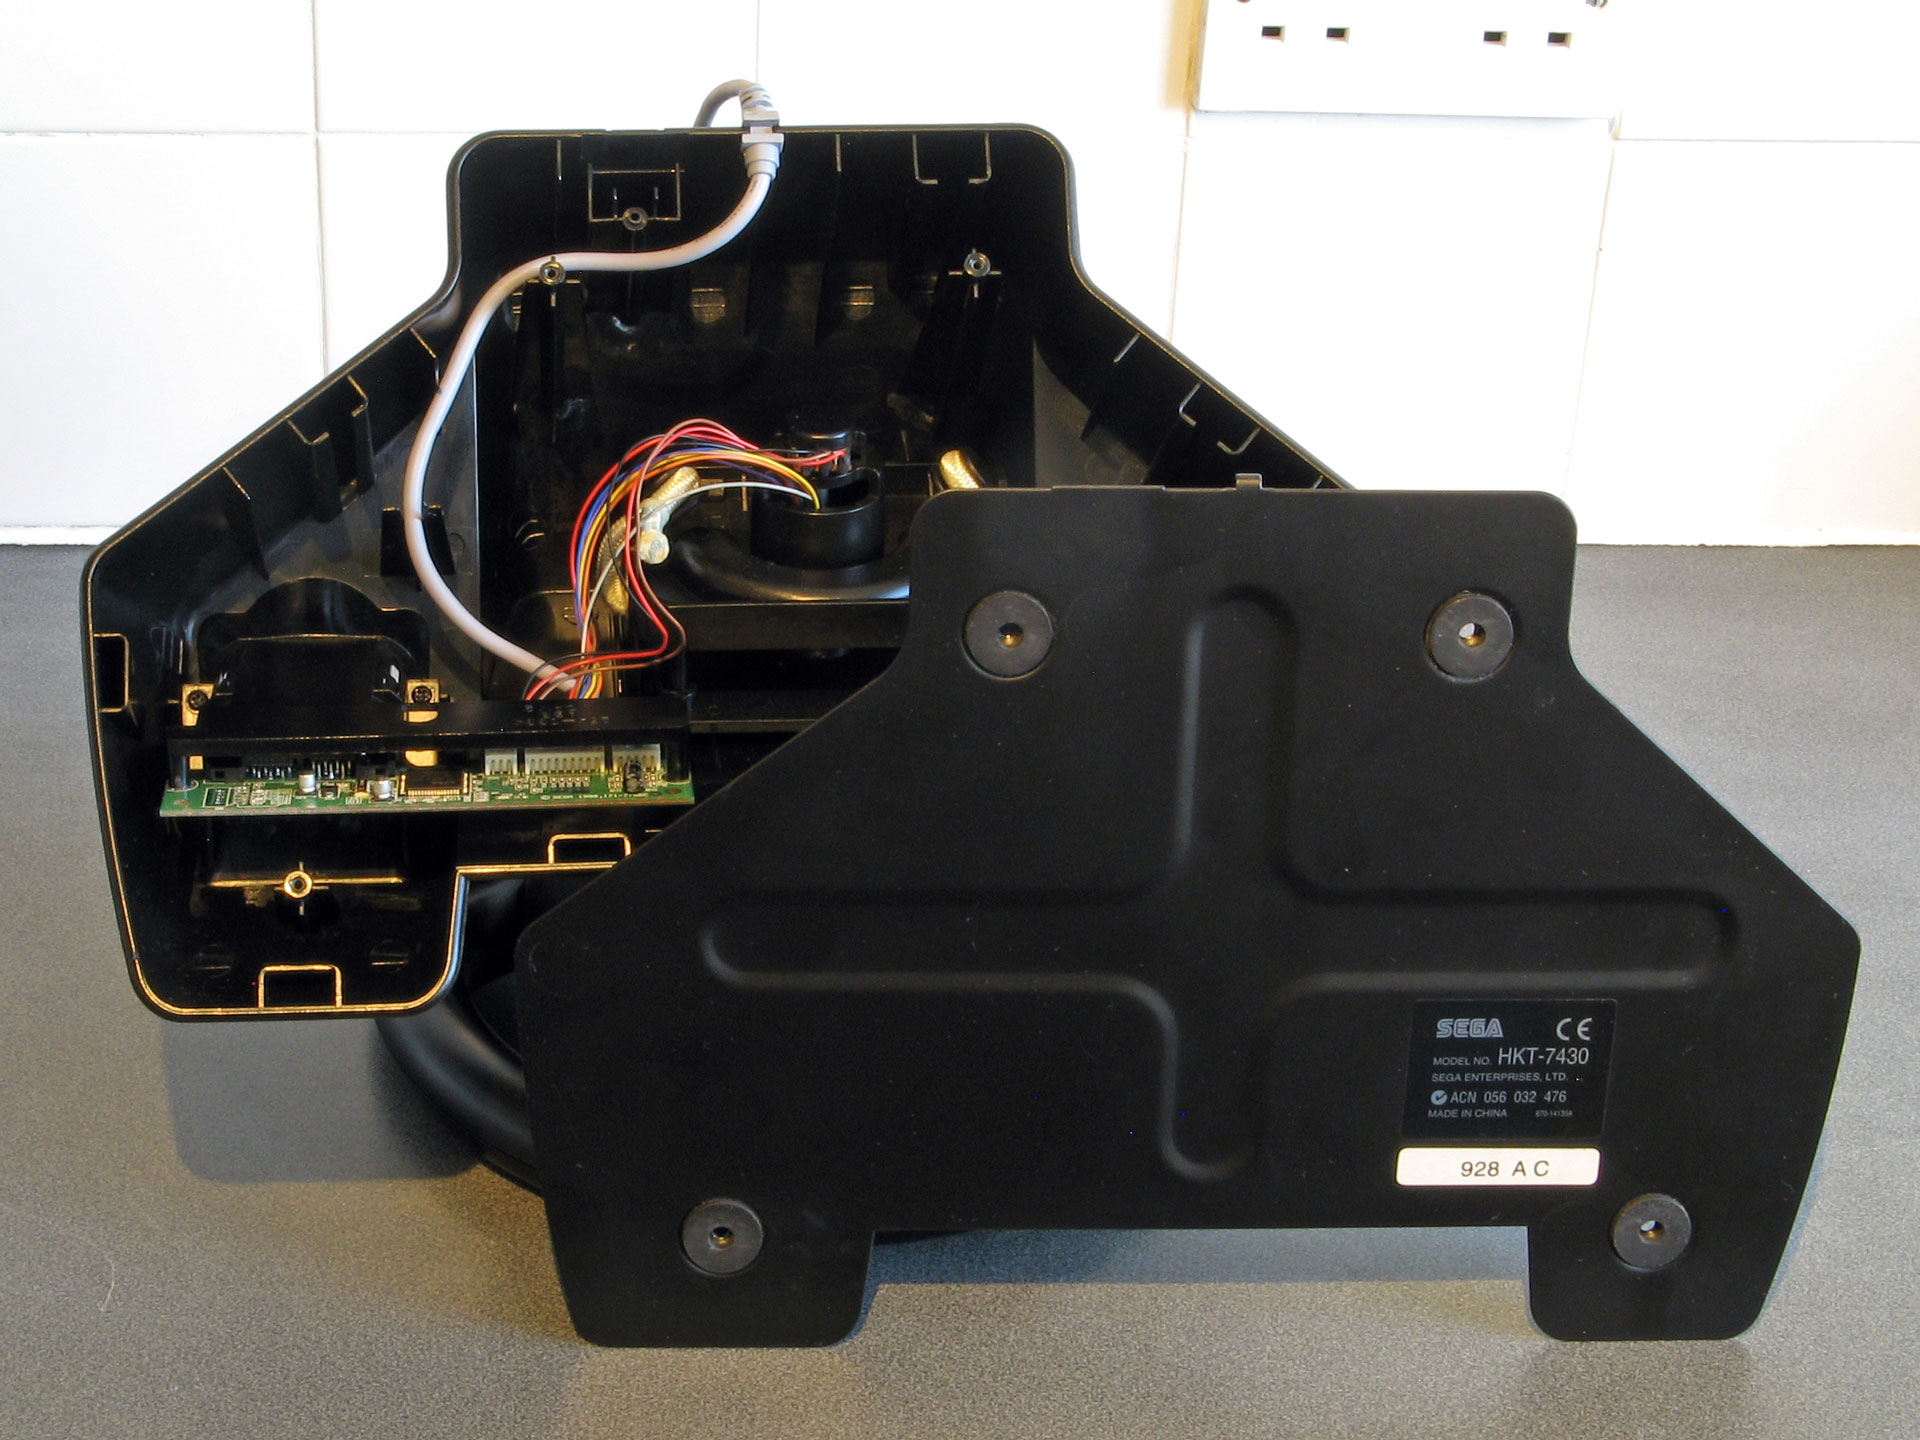
Once the four screws have been removed the bottom plate should lift off.
3. Freeing the stock PCB
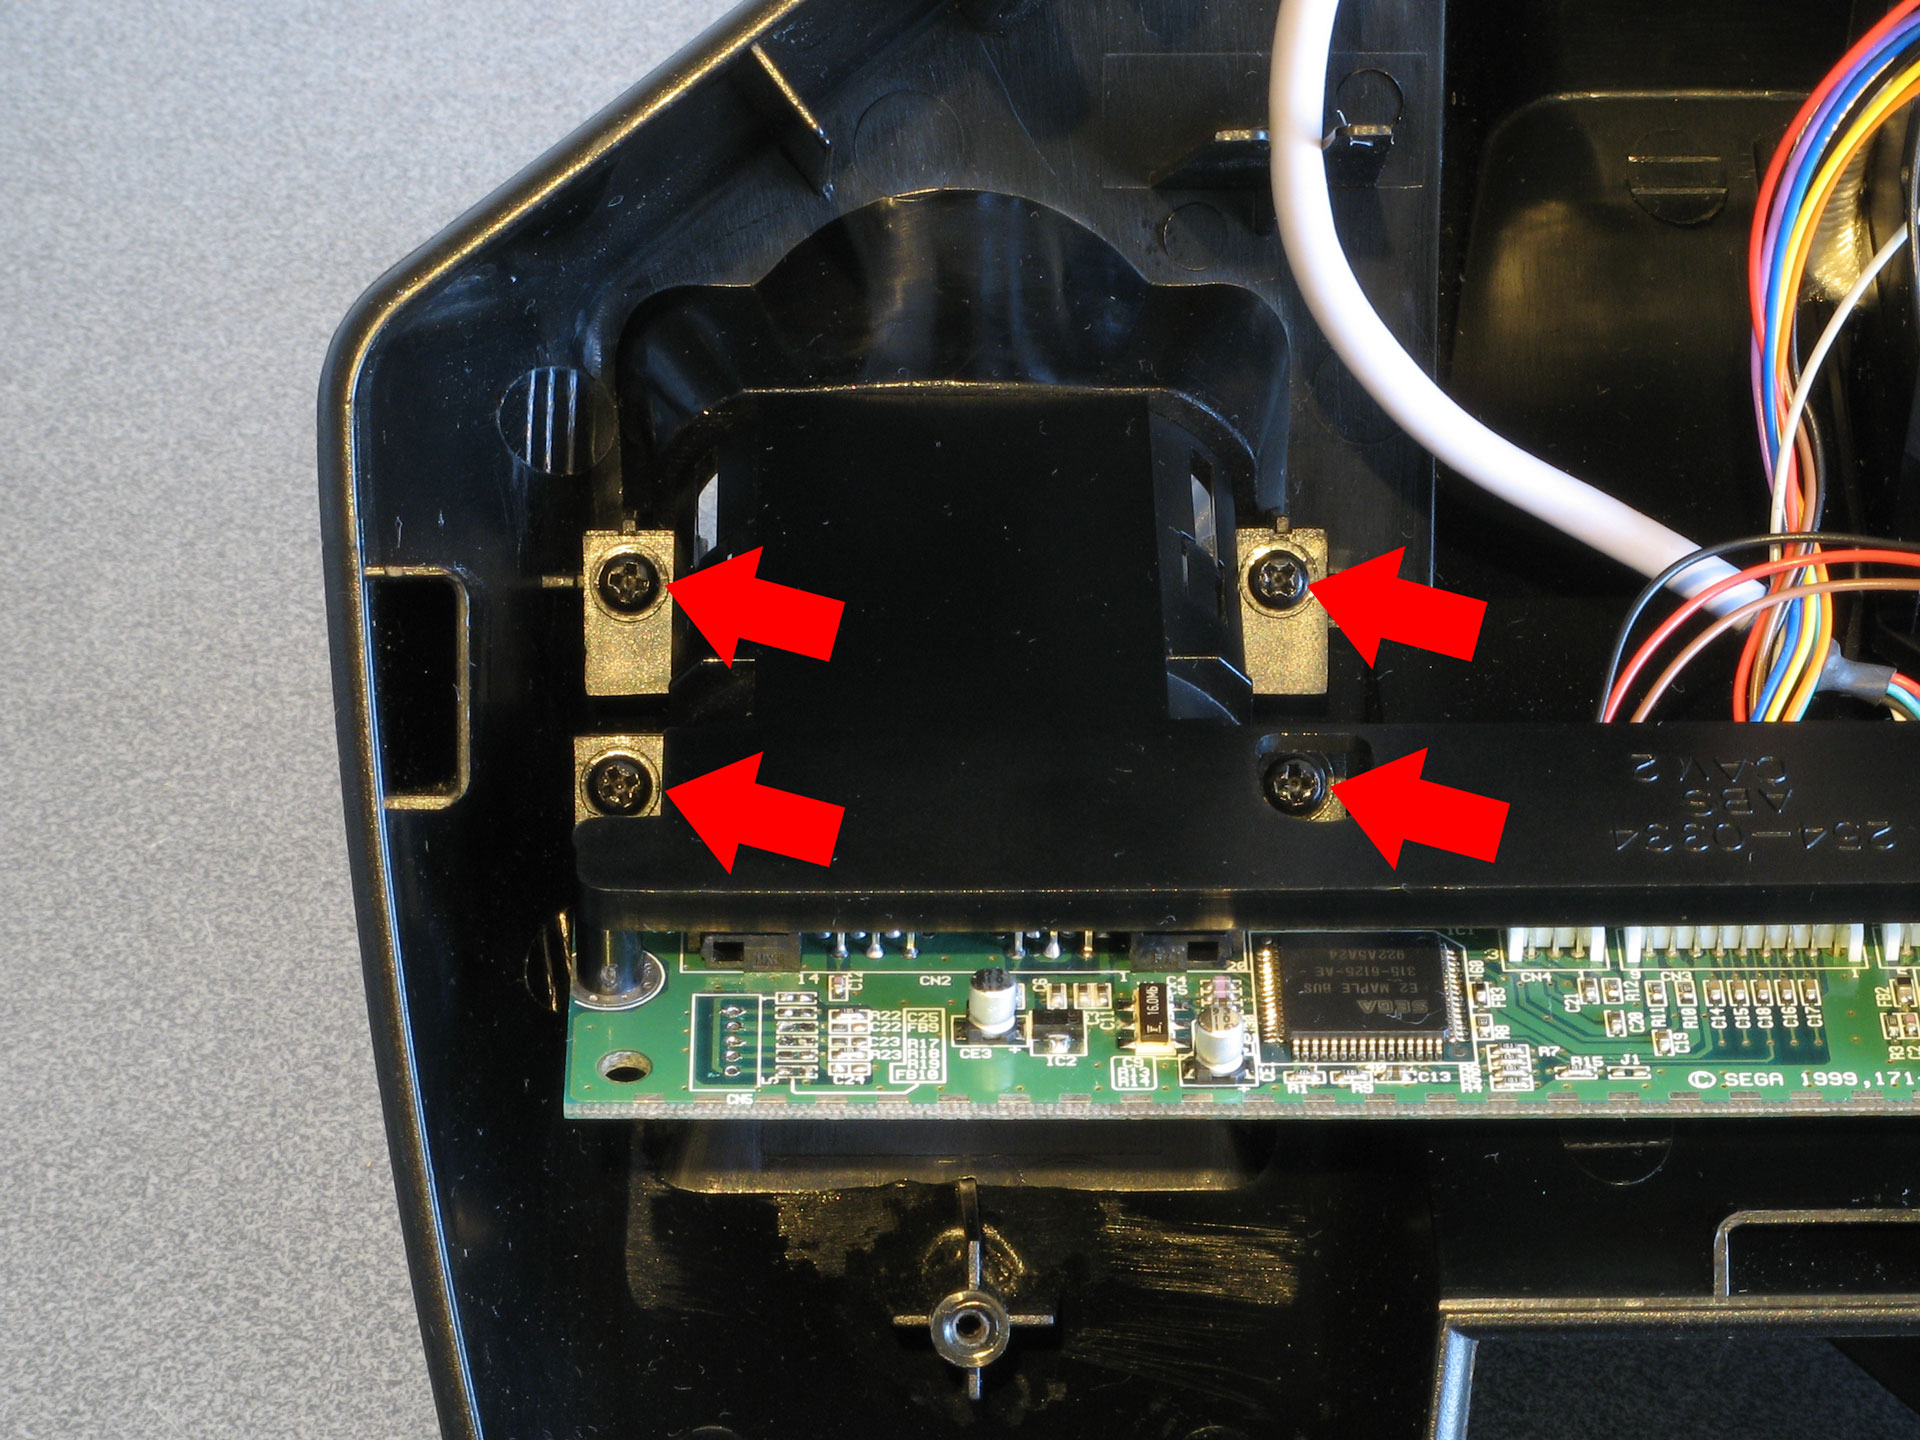
The stock PCB is attached to a plastic bracket that is held against the VMU slot by four screws which should now be removed.
4. Move the stock PCB
Once the four screws have been removed the bracket and PCB should be free to move. The thick grey cable that connects the wheel to the Dreamcast may be held in place inside the wheel with some hot-melt glue, if so this can be carefully peeled away.
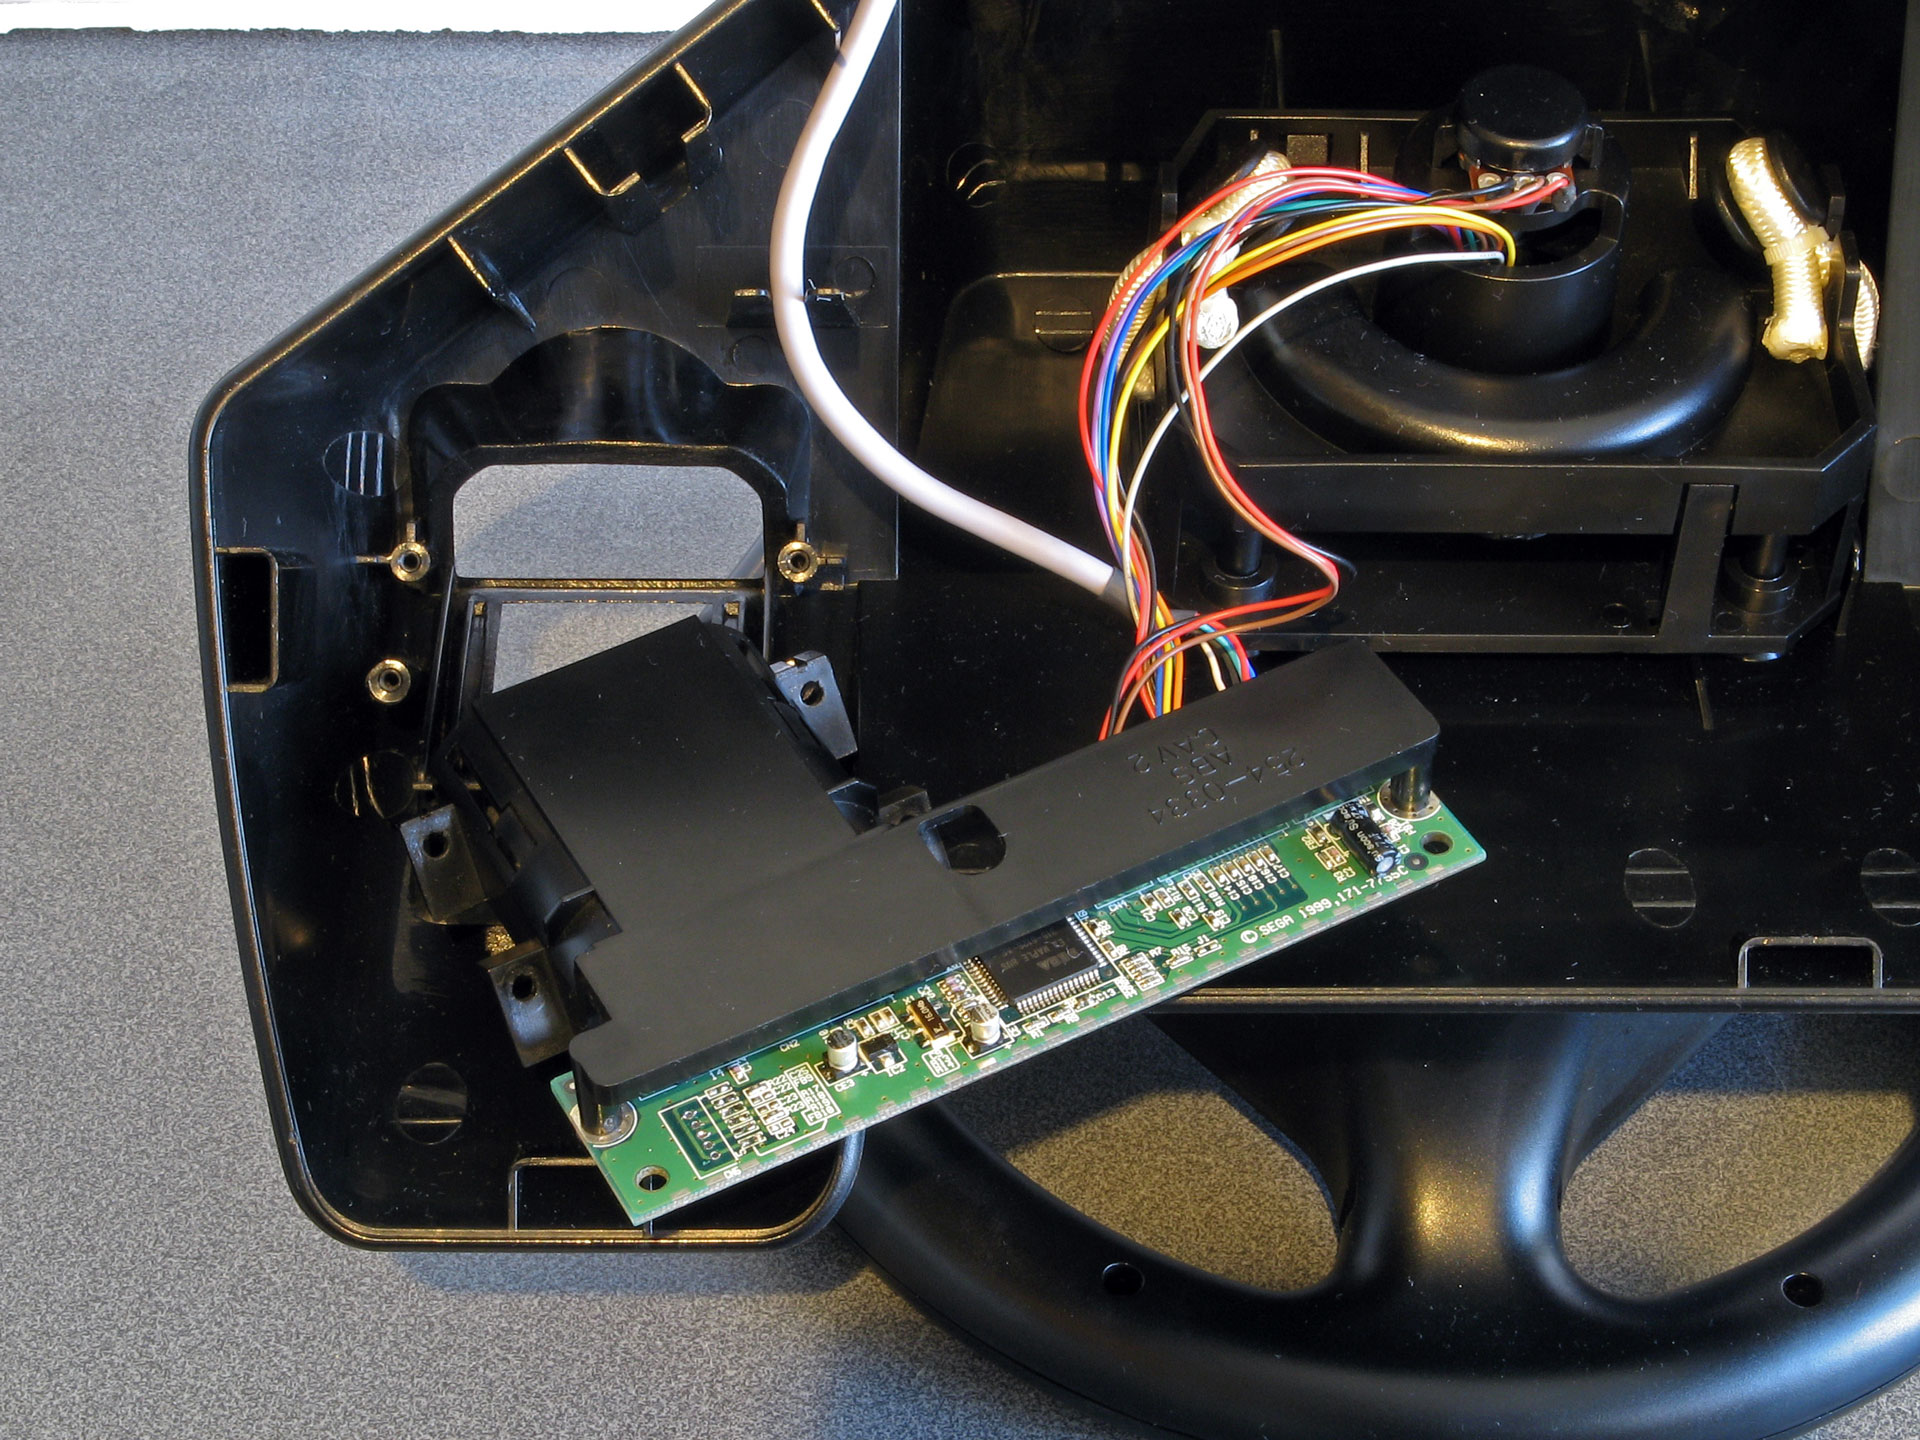
5. Flip the stock PCB over
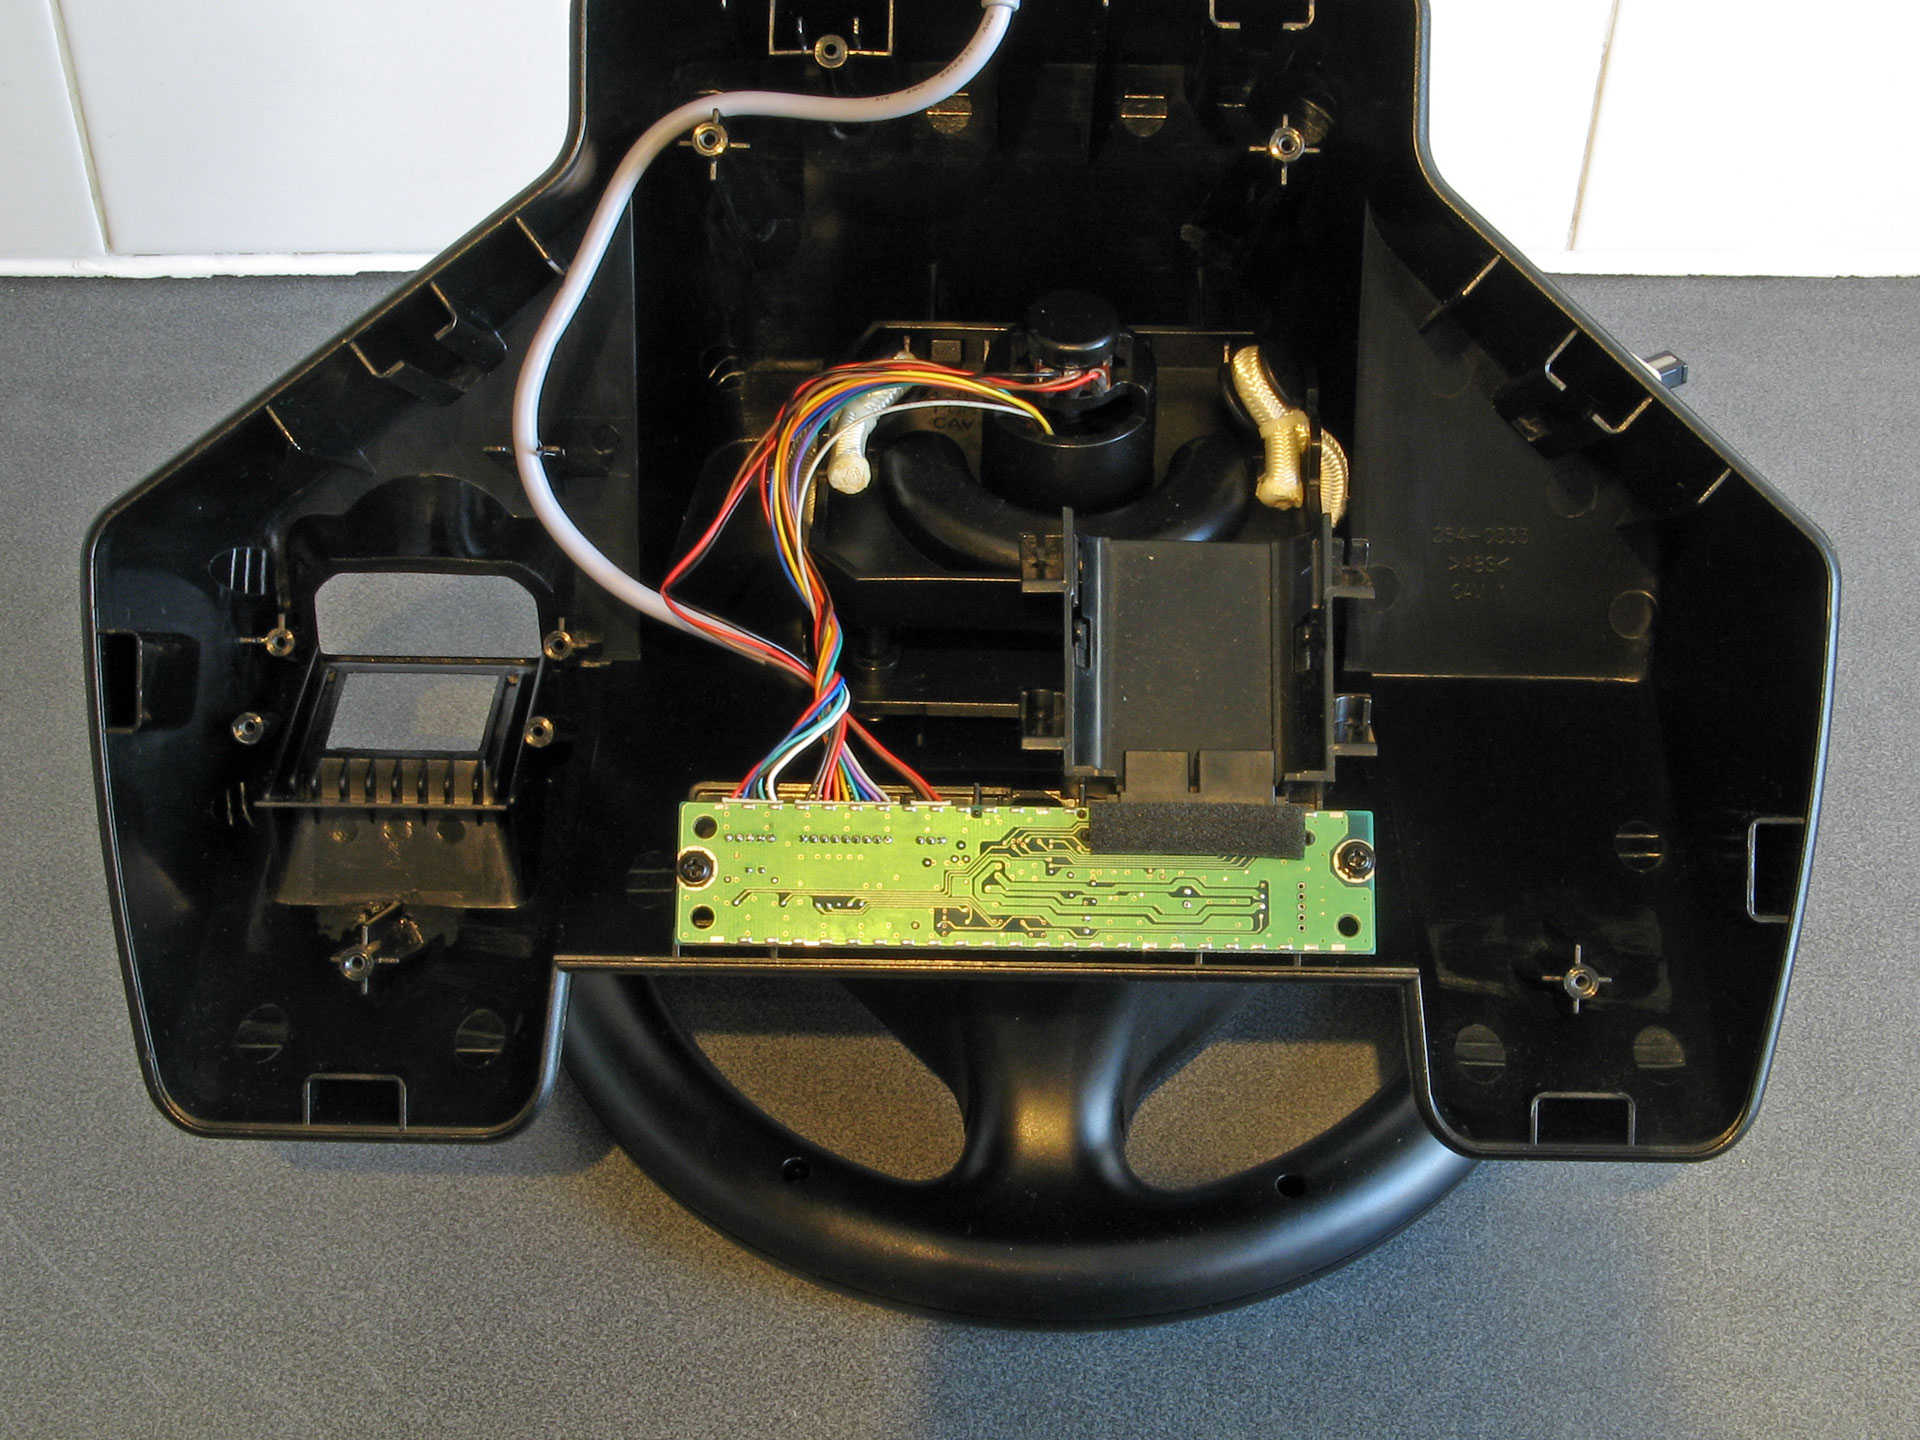
Flip the stock PCB and bracket over, being careful not to strain any wires.
6. Disconnect the wheel from the stock PCB

Carefully unplug the three-wire cable from its socket on the stock PCB. These wires and connectors are fragile so please do not tug on the wire itself or wiggle the connector too much!
The screw on the left hand side should also be removed.
7. Start clipping in the modification board

Line up the three holes on the modification board with the three holes on the stock PCB then start securing it by pushing in one of the clips, as pictured.
8. Add the second plastic clip
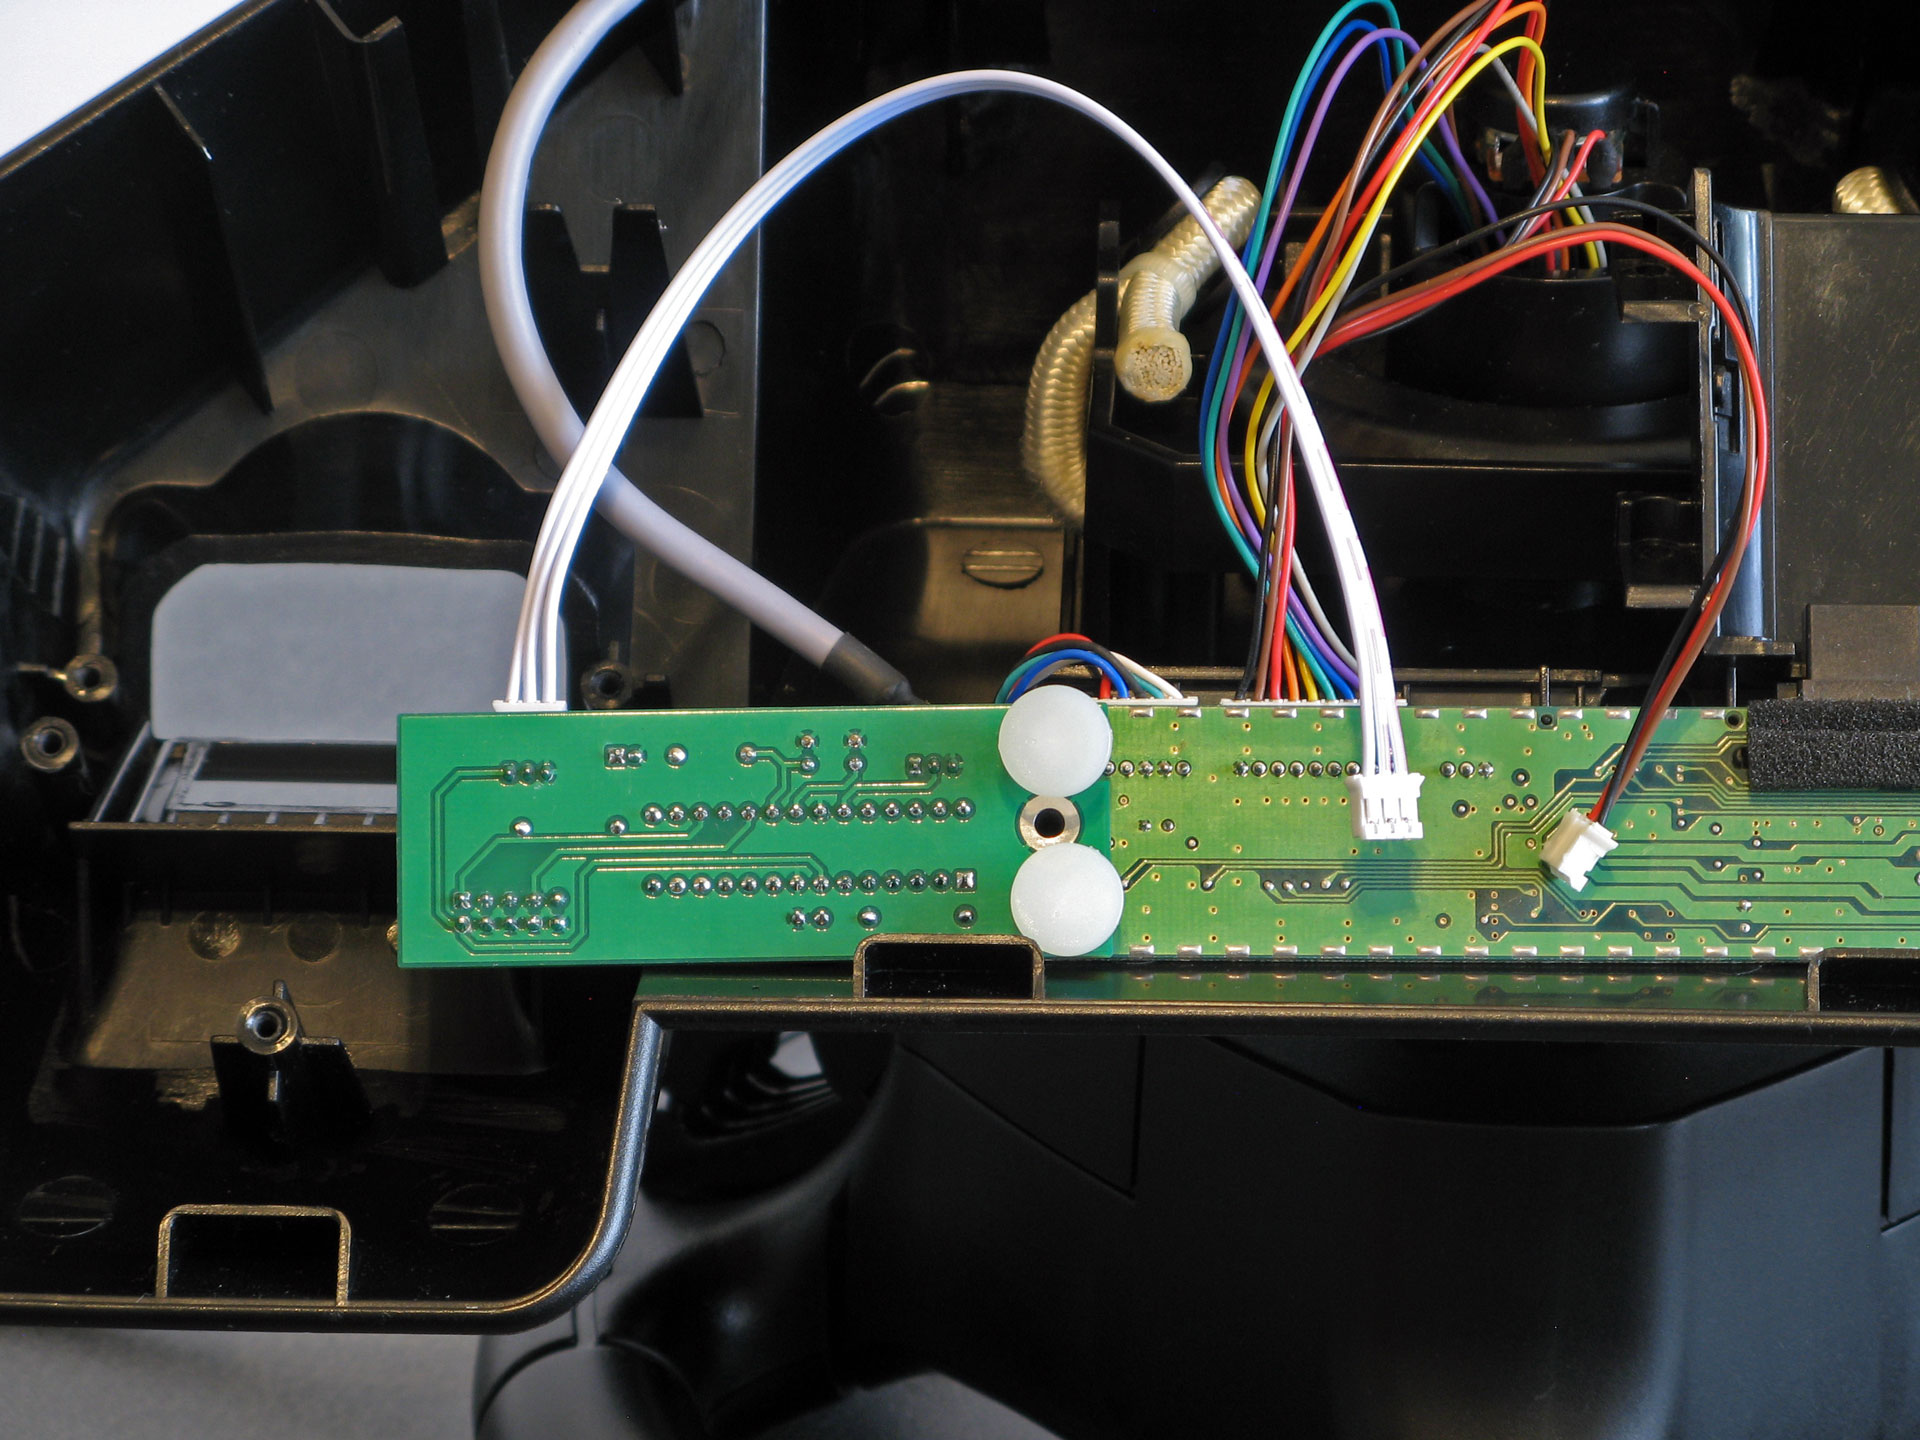
The second plastic clip should straighten up the board somewhat.
9. Screw the modification board to the stock PCB and plastic bracket
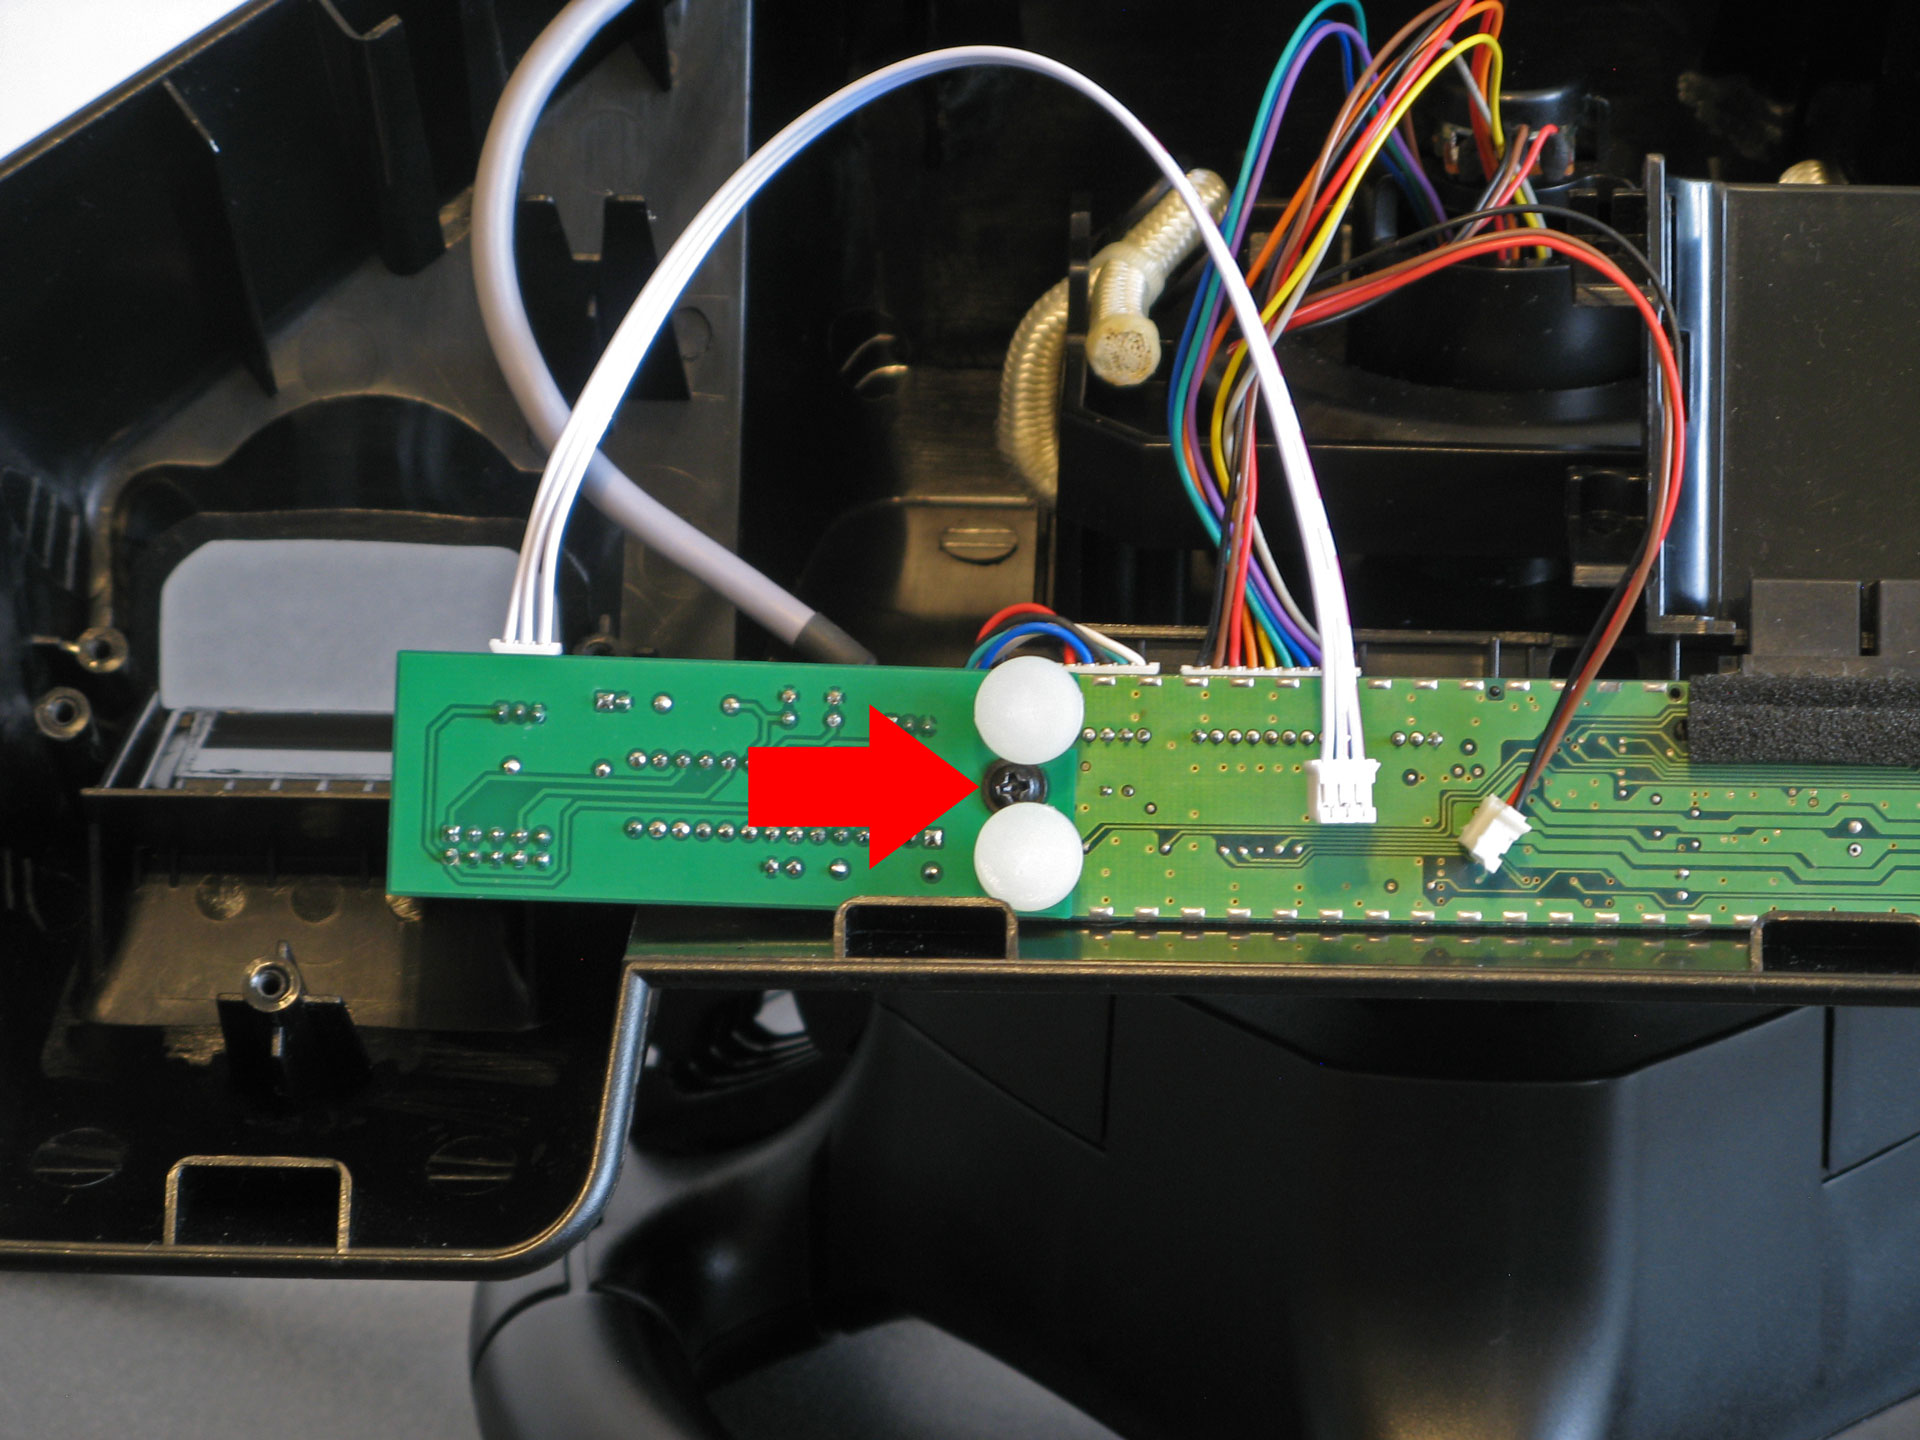
Replace the screw that was removed earlier to securely attach the modification board to the plastic bracket through the stock PCB.
10. Connect the modification board to the stock PCB
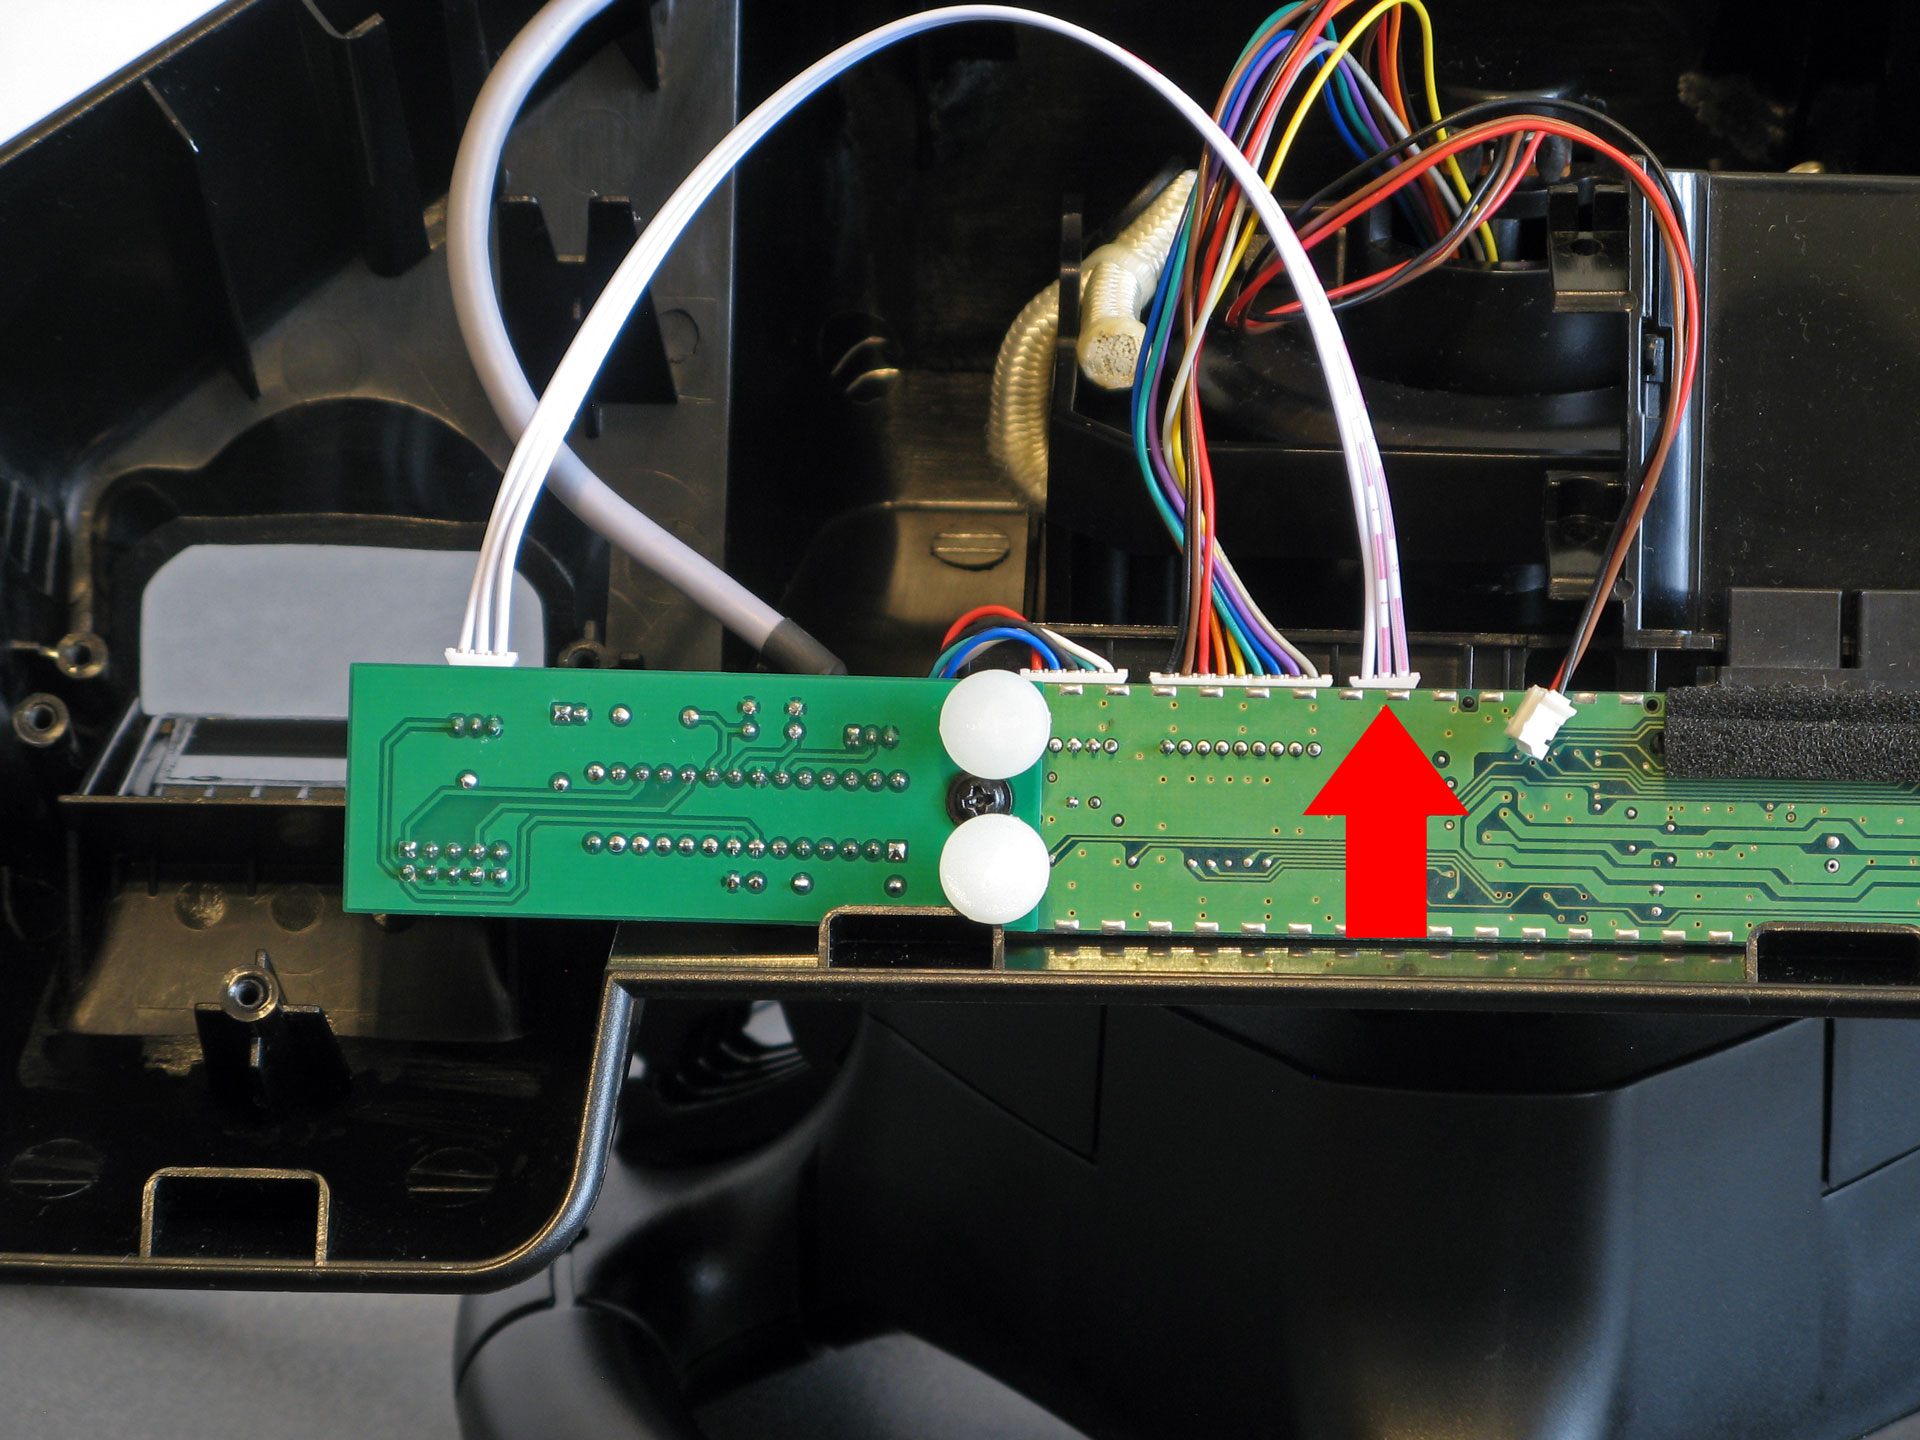
Plug the three-wire cable coming out of the modification board into the socket on the stock PCB that previously had the wheel potentiometer plugged into it.
11. Flip the stock PCB back over
When flipping the board make sure you haven't twisted the wires up as they need to be free to move around as the wheel is turned.
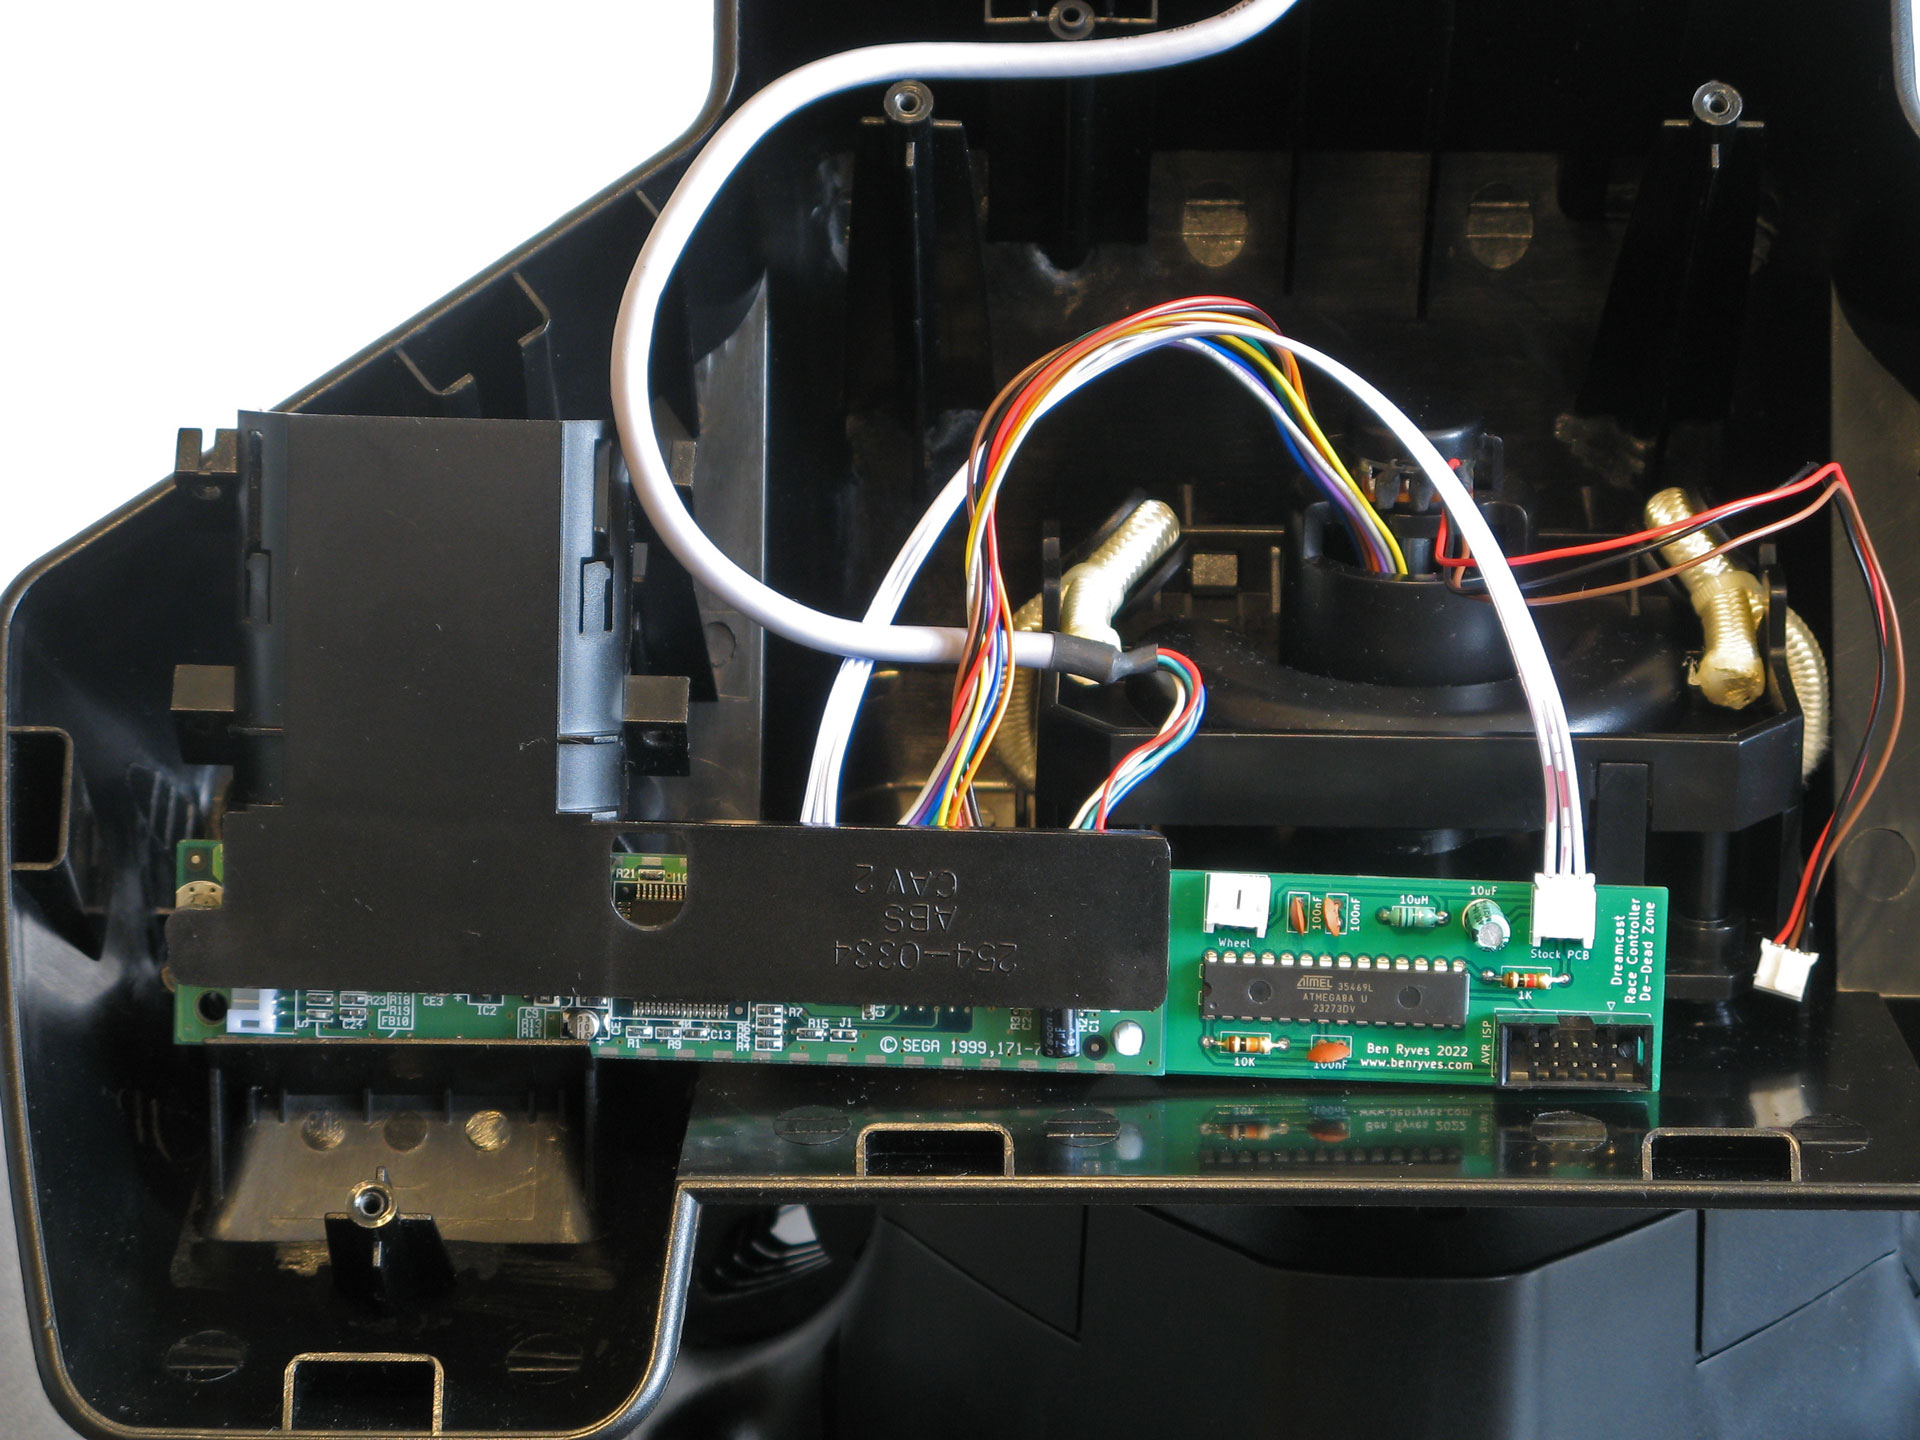
12. Plug the wheel into the modification board
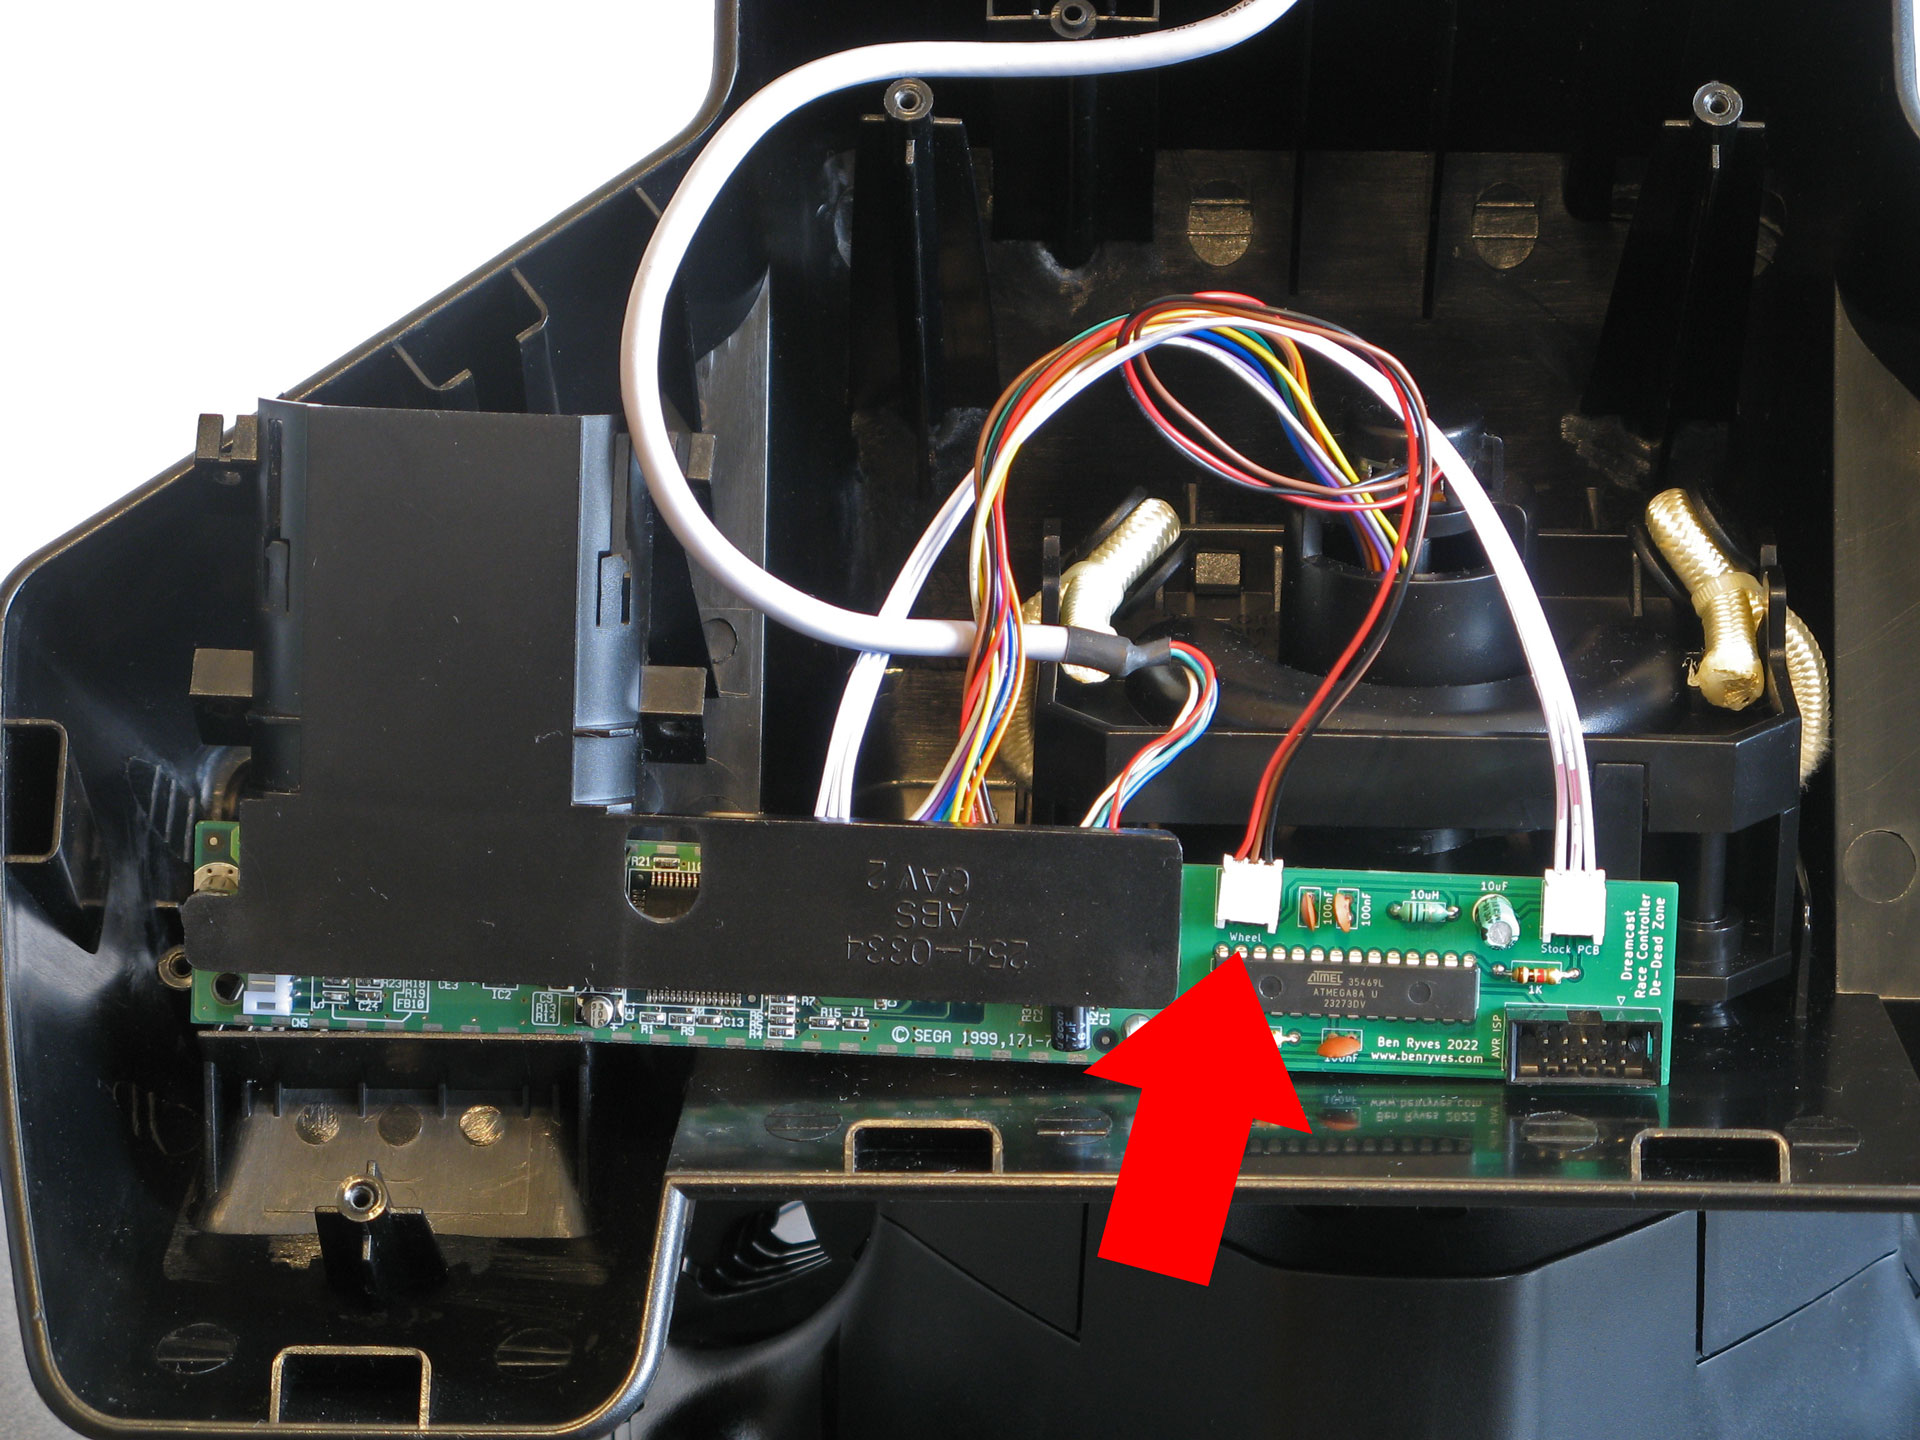
The three-wire cable coming from the wheel mechanism should be plugged into the socket marked "Wheel" on the modification board.
13. Screw the plastic bracket back in
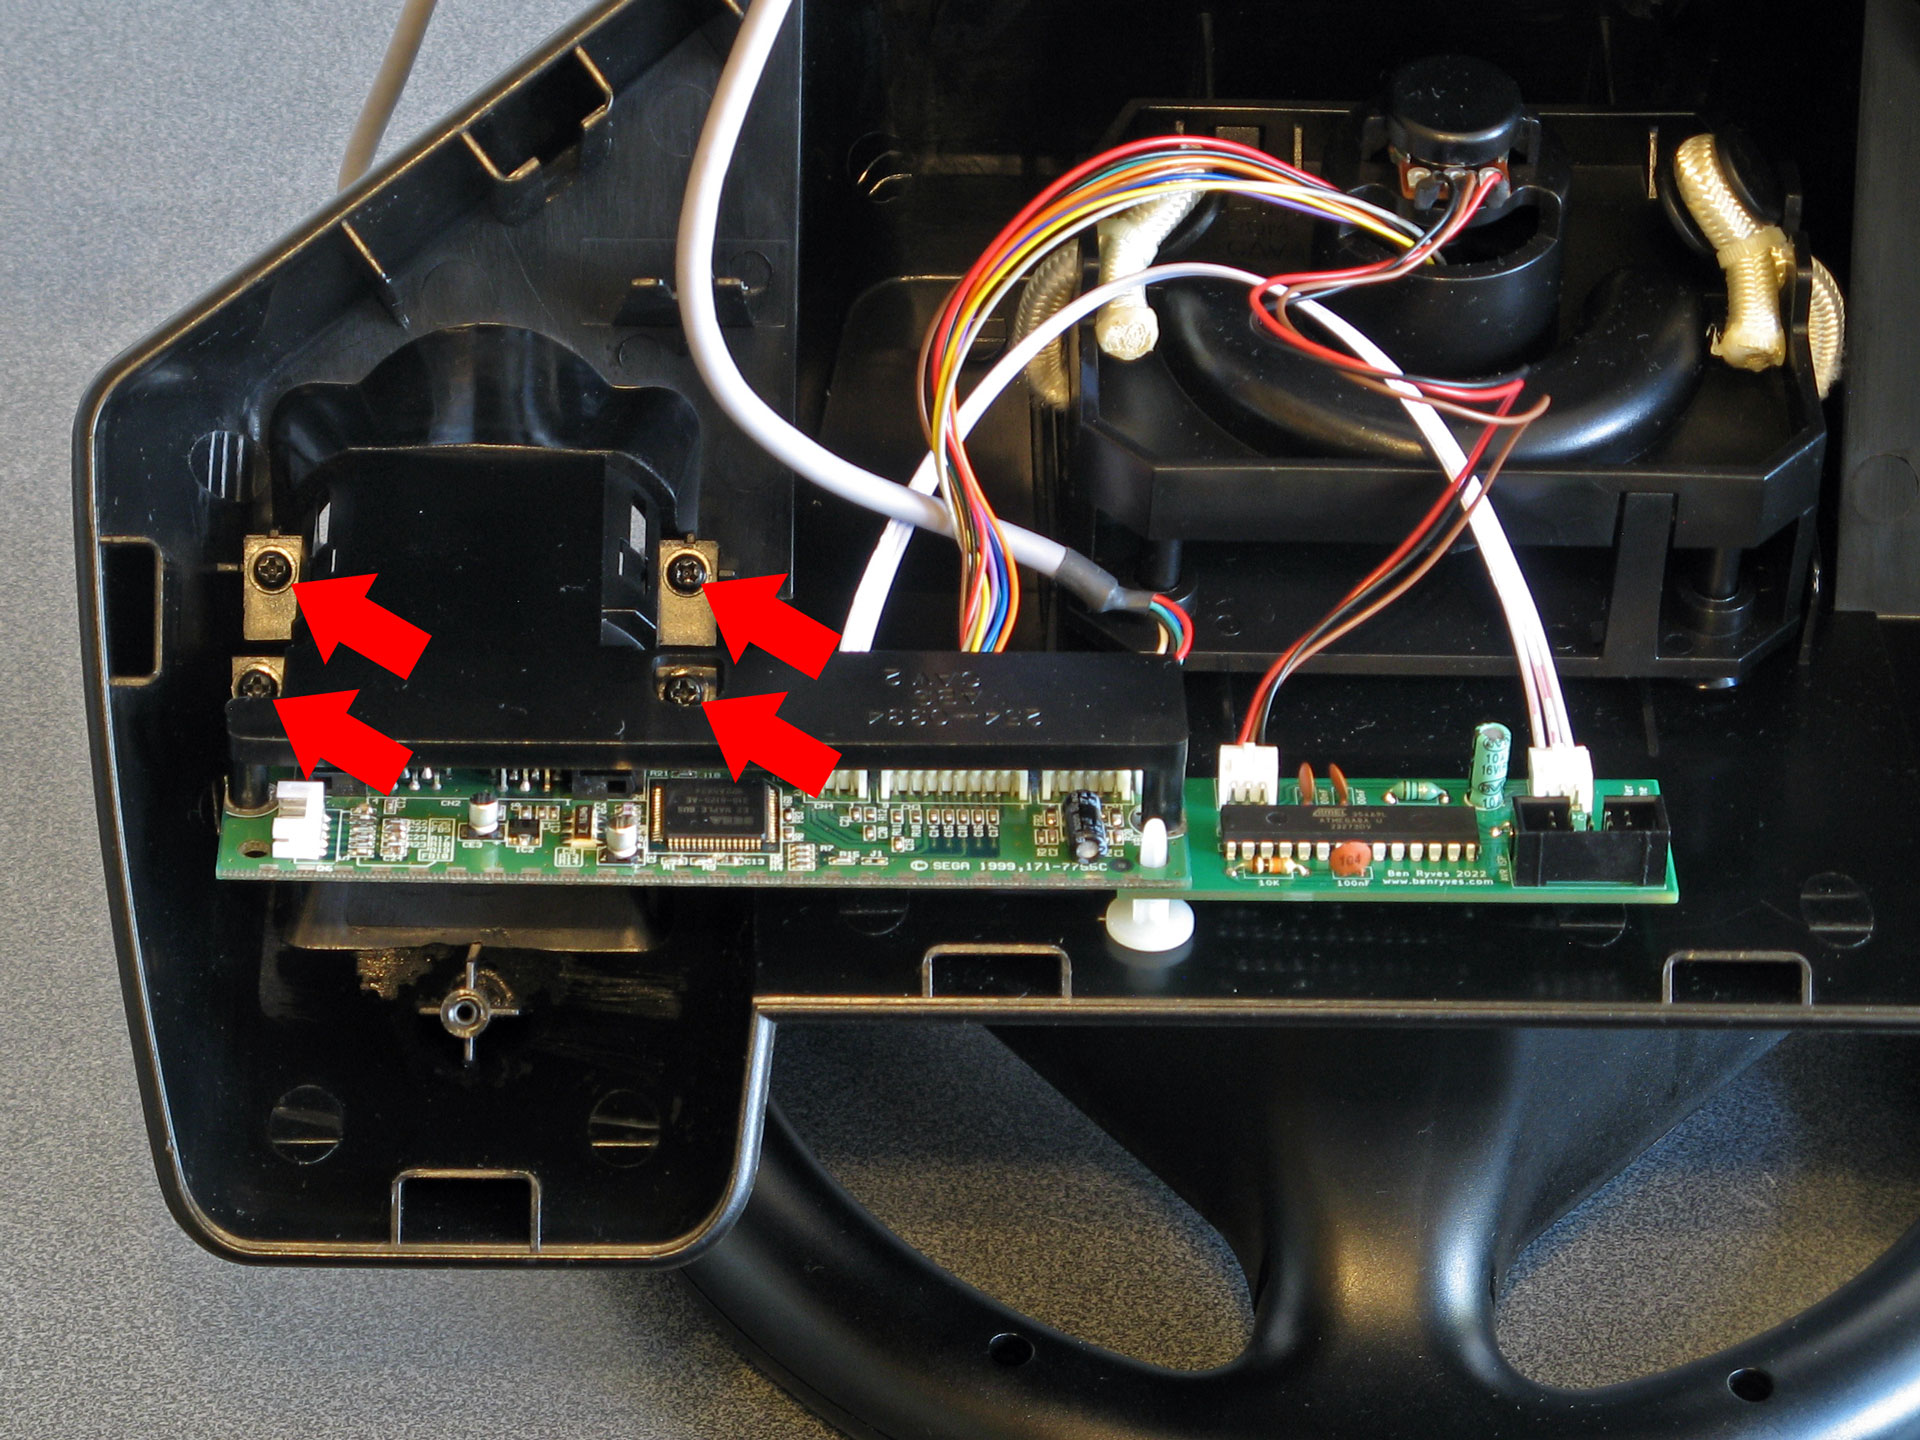
Line up the plastic bracket with the four screw holes around the VMU slot and screw it back in. Make sure that all wires are away from moving parts of the mechanism and that they are free to move.
14. Reattach the bottom plate
Double check that the wires inside the wheel are routed correctly then replace the bottom plate and screw it back on.
Usage
The modification is now set up and ready to use. It significantly reduces the size of the wheel's dead zone which should make it feel much more sensitive and easier to make small corrections. It also slightly expands the available range of motion.
Whenever the wheel is powered up the modification board automatically recalibrates itself to the wheel's centre position. If the wheel is held off-centre or moved around when the wheel is powering up then it will not return to the correct centre position. If this happens, you can reset the wheel by unplugging it and plugging it back in again.
Some games seem to have been designed with the wheel's large dead zone in mind and so become a little twitchy with the modification installed. You can therefore enable or disable the modification by intentionally holding the wheel all the way to the left or right when switching on the console:
- Turn the wheel all the way to the right when switching the console on and the modification will be disabled (turn to the right for a larger dead zone).
- Turn the wheel all the way to the left when switching the console on and the modification will be enabled (turn to the left for a smaller dead zone).
The modification will remember whether it was previously enabled or disabled, even if you unplug it or switch the console off and on again.
Further help
If you need any further help installing or using the modification, please send me an email at benryves@benryves.com.